Open Face Steak and Radish Sliders

IMG_0756

I know that I’ve mentioned this before, but I cannot bake to save my life. Ask me to prepare a seven-course meal, and I can do that without blinking an eye…but ask me to bring dessert, and that puts me into full panic mode. I mean, I can do the basics, like simple cupcakes or apple pie… but anything else? Forget it.

I had it in my head that I was going to bake strawberry shortcake cupcakes with orange whipped cream this weekend…

Yeah. Right.
What day is it today? Sunday?
I started this project on Friday!

Fail.
BIG Fail.

I thought for sure that this was a winning recipe that I was coming up with. I thought that I’d fill my yellow cupcakes with a strawberry cream cheese mixture, and then top them off with whipped cream loaded with orange peel. I couldn’t get the cream cheese mixture to the consistency/texture I was looking for, and the whipped cream just did not taste good with the orange peel for some reason. Honestly? I think that I tasted the cream cheese and the whipped cream so much, that my taste buds were on over load (once again), and I went to bed last night with that sicky sweet feeling, and a kitchen that looked like a war zone. I had gone through way too many batches of cupcakes.

Before I fell asleep, I was trying to figure out what I could do with the remaining cupcakes…something that would be easy for my very low level of baking expertise, yet pretty enough to post. At that point, my thoughts turned to a banana Boston cream cupcake.

So this morning, I looked at the cupcakes sitting on my island, which were all ready to fill, and I just couldn’t do it…

I just didn’t have it in me to fight the banana cream fight.

IMG_0767

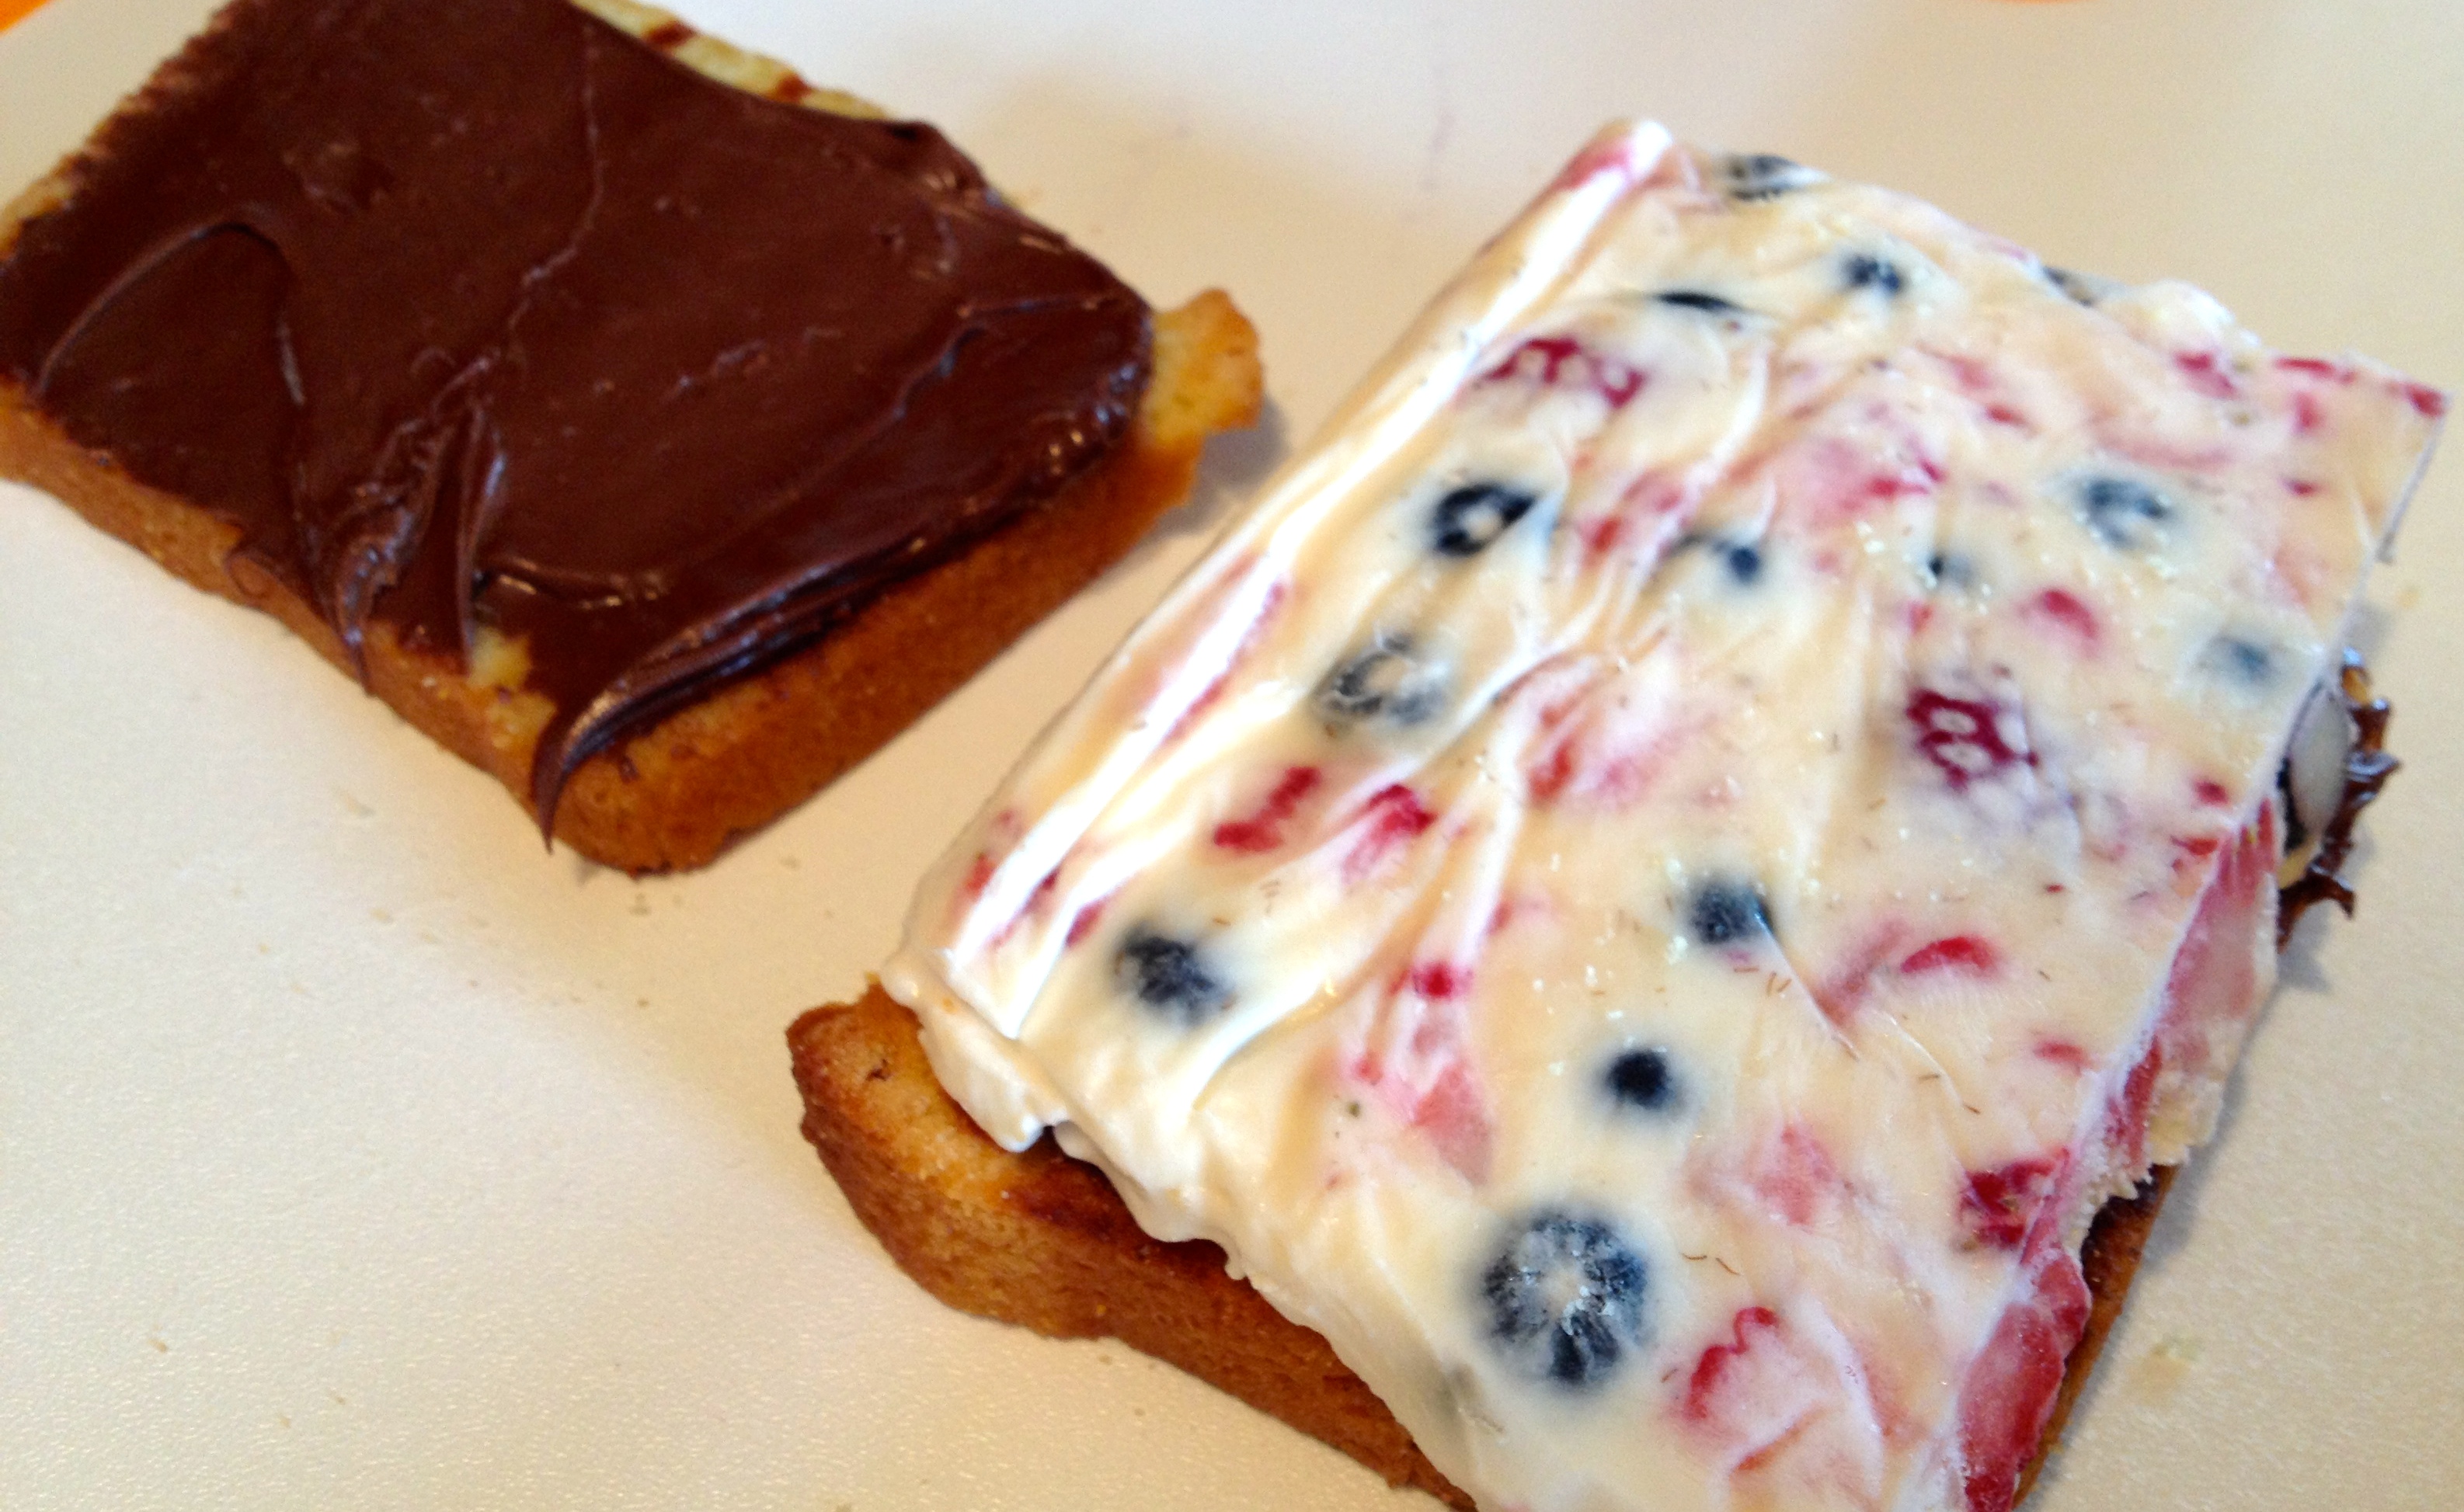
So…I made some chocolate frosting, frosted the cupcakes and put myself into pure heavenly yellow and chocolate filled bliss.. because, as you know (or should know by now..) yellow cupcakes with chocolate frosting and sprinkles are my most favorite. Like…in the whole wide world, favorite.

And, on my yellow cupcake with chocolate high, my brain turned to what I know best…

Savory.

I bought a beautiful bunch of radishes the other day, with the plans of sautéing them. And as I was pulling them out of the fridge, my eye caught sight of a half of a container of baby spinach that should be used up. Hmmm… did I want to throw that in with the radishes? Sounds good, but I decided instead that I’d try to cream the spinach in a pepper jack cream, and put that with the sautéed radishes on toasted baguettes.

IMG_0758

A little tenderloin, cut into bite size pieces, and sautéed in garlic would make a perfect addition to this…and that’s how I came up with open face steak sliders.

They’re delicious. They’re perfect for a light dinner, for lunch, for appetizers…

Life is good. Well, it wasn’t good for the last two days while I was trying to pretend I know how to bake, but life is good now because  I finally admitted to myself that I’m not a baker, and I got to eat my YCWCF, and came up with a rockin’ slider…
kind of good.

IMG_0749

Open Face Radish and Steak Sliders
Makes 12 sliders
(They’re about 2” x 1-1/2” in size, so figure about four sliders per person)

Not into beef? Change it to chicken! Or for that matter, make them completely meatless by using sautéed zucchini or summer squash, or even tofu! The beauty of these sliders is that they’re very versatile!

1 mini baguette, sliced
Olive oil for drizzling

1 8 oz filet mignon (or your choice of steak)
1 clove garlic, roughly chopped
1 tbsp butter
salt and pepper to taste

2 cups baby spinach, stems removed
1 cup heavy cream
2 tsp butter
2 tsp white pepper
1/2 tsp salt
4 oz pepper jack cheese, shredded

6 radishes, sliced thin
2 cloves garlic, minced
2 tbsp chives
2 tsp butter
salt and pepper to taste

Preheat oven to 350 degrees

Place the baguette slices on a baking sheet, drizzle with olive oil. Place in preheated oven, and bake for about 10 minutes, until golden brown. Remove from oven and set aside.

Thinly slice the steak, and cut the slices into bite size pieces. Melt 1 tablespoon butter in a small skillet, and add the 1 clove of roughly chopped garlic. Saute for about a minute, and then add the steak. Fry the steak until just cooked, leaving it a little pink if you prefer. Season with salt and pepper, remove from heat, and set aside.

Melt 2 teaspoons butter in a medium frying pan. Add the heavy cream, 2 teaspoons white pepper, 1/2 teaspoon salt, and whisk until blended. Cook until thickened, about five minutes. Remove from heat, and add pepper jack cheese. Stir until the cheese is completely melted. Add the spinach to the cheese mixture, and stir until the spinach is wilted. If you find that you need a little more heat to wilt the spinach, go ahead and turn the heat back on for a minute or two. Not too long, so that your cheese doesn’t turn gritty. Remove from heat, and set aside.

Melt 2 teaspoons butter in a medium frying pan. Add the garlic, and sauté for about a minute. Add the radishes to the pan, and sauté for about 10 minutes. At the last minute, stir in the chives. Season with salt and pepper, remove from heat, and set aside.

IMG_0757

Assembling the sliders:
Start by placing about a tablespoon of the spinach/cheese mixture on top of each baguette. Add a few pieces of the steak on top of the spinach. Layer three slices of radish on top of the beef.

Bake for about 5 minutes at 350 degrees, or until heated through. Garnish with chives.

Enjoy!!

IMG_0748

Meet my Artist…Marielle Reuser from Miss Beretta Illustration

I’m sure that you’ve noticed that I have a new header, and some artwork for my blog today. I want to share the highly talented artist who designed all of this for me…

copy-marielle_header2

Click on the image above to go to Marielle’s blog…

I had the honor of working with Marielle Reuser, from Miss Beretta Illustration for the last couple of weeks… and what a delightful and exciting experience it was..

I’m came across Marielle’s blog about two months ago or so…and was totally blown away by her talent. We would comment here and there… and it was a simple “If you didn’t already have a header, I’d love to design yours…” comment from Marielle, that made me say..”Let’s talk”…that got us to where we are, and my blog to where it is today.

And I have to say.. She totally captured my style…and I couldn’t be more thrilled!!

Marielle is such a pleasure…and so accommodating, putting up with all of my requests and changes. Always friendly, and always understanding exactly what I was asking for. She never ceased to surprise and amaze me when I opened an email that held drafts, and updates…

I hope that you stop by her website to check out her work. She’s amazingly talented…she’s funny… and so, SO very sweet.

Thank you Marielle…for everything. For your kindness, and for your patience…for the long hours that you put into the drafts, the drawing, painting, updating… and updating…and updating…

I truly, TRULY appreciate everything you did for me…and I couldn’t be happier!!

Asparagus and Mushroom Frittata

They say it takes a village to raise a child, and that may be true… but in my little world, I can honestly say that it takes a village to build a frittata…

IMG_0717

I’ve always avoided making frittatas. I’m not sure why, I just have. Maybe the word “avoided” is a little exaggerative…maybe it’s more like “shied away from”…. But that ended the other day when I made my very first one…It was made up of sautéed mushrooms, onions, asparagus, parmesan cubes, and Italian sausage. I sliced a few potatoes, and made a crust with them in the bottom of the pan by frying them until they were golden brown and crisp. I thought for sure those ingredients would have made a frittata filled with flavor, but instead, I found it to be very bland.

Because I cannot post a recipe unless I’m absolutely confident that others will love it, I brought it to work with me the next day and left a note on it asking my friends, who are also my co-workers, to try it and tell me what it needed…

Yes, I’m comfortable enough to ask them to be my guinea pigs…and yes…they’re comfortable enough to be completely honest with me!  Honestly?  I don’t think they mind..

IMG_0713

All in all, they liked it…The majority said to leave it as is, that it was delicious. But then some of the suggestions were that I sauté the asparagus and potatoes in bacon grease, sharper cheese and more of it…possibly using a couple of different cheeses, more black pepper, and maybe a little more onion and garlic.  Oh, and chives and scallions.  Chives and scallions?  Brilliant!!   So really, I wasn’t really way off track… they only had a couple of suggestions; and maybe it wasn’t as bland as I thought…

You know…sometimes that happens. You spend all that time cooking, and it’s hard to taste the food after a while.. maybe it’s because we smell it so much as we’re cooking, our taste buds are on overload. Kind of like when you go on a wine tour, after the third or fourth winery, all of the wines taste the same!

I was kind of glad that they didn’t suggest green or red peppers, because while I LOVE them, I really don’t care for peppers and eggs together. I mean, I’ll eat it, but I’ve always thought that the peppers overtake the eggs.

IMG_9658

I went home that same night and made another one using their suggestions…I decided to keep the parmesan, but added it to the eggs as I whisked them.  I added some sharp cheddar, too.  Another small onion, a clove of garlic, and a sliced scallion. I sautéed everything (except the scallion, which I added right before I poured the eggs in) in bacon grease, and added more black pepper. I garnished it with raw scallions and chives. It was delicious!  And honestly? I think that the garlic was the main factor that was missing from the first go round.. and the sharpness of the cheddar, and the bite of the scallions and chives gave it that oomph that I was looking for…and I received all thumbs up from my friends, because they got to try it again the next day!!

And now? I’m totally hooked on these things. Who knew that they were this easy? I don’t know why it took me so long to make one.. and I LOVE that the possibilities are endless! And now that we’re heading into asparagus season… we’ll be eating a lot of frittatas!

Life is good…. It’s all about learning how to make frittatas and asparagus coming into season kind of good…

IMG_0708

Asparagus and Mushroom Frittata

1 pound asparagus, woody ends discarded
10 eggs
½ cup heavy cream
Bacon grease (or olive oil)
½ pound bulk Italian sausage
1 large onion, chopped (about 3/4 cup to 1 cup)
1 clove garlic, minced
1-2 scallions, sliced thin
2 large potatoes, thinly sliced
2 cups sliced mushrooms (I used baby bella)
8 oz sharp cheddar, grated
4 oz parmesan, finely grated
Salt and pepper to taste
Scallions and chives for garnish

Just a quick note: I know that it’s the general rule that you use a cast iron skillet to make a frittata. I didn’t. I used my Calphalon pan, and it worked just fine. You want to use a pan that you can take right off of the stovetop to put right into the oven. I have to say that the frittata slid right out of the Calphalon.

Preheat oven to 350 degrees.

You’ll be sautéing everything separately, so make sure you season it all properly with salt and pepper!
Melt about two tablespoons of bacon grease in a large frying pan (or skillet). Saute the onions and garlic. Remove the onions and garlic from the pan, and set aside. Saute the asparagus until it’s partially cooked. Remove from the pan, and set aside. Saute the mushrooms until they’re golden brown, about five minutes. Remove from pan, and set aside. Add the sausage to the pan, and cook thoroughly.

If you think you need a little more grease for the potatoes, add about another tablespoon to the pan. Begin laying the potatoes in the pan, around the edge, overlapping the potatoes until the bottom of the pan is covered. Season with salt and pepper and cook on medium high, covered, until the bottom of the potatoes are golden brown, and they’re tender. Remove from heat.

Take about one half of the asparagus, and cut into one inch pieces. Save the other half for the top of the frittata.

IMG_9639

IMG_9640

Begin layering the ingredients on top of the potatoes (in the pan): sausage,onion mixture, mushrooms, asparagus, cheddar, raw sliced scallions.

Whisk the eggs and heavy cream together in a large bowl until light and fluffy.  Mix in the grated parmesan.  Pour over the layered ingredients in the pan. Season the top with salt and pepper.

Arrange the remaining asparagus stalks on top of the frittata (as pictured). Place in preheated oven, and bake for about 15 minutes, or until the eggs are set.

IMG_9643


IMG_9650


Cut into wedges, and enjoy!

IMG_9662

Twisted Tuesday… Grilled Strawberry Ice Cream Sandwiches

IMG_9548

I have a lot of happy memories from my childhood, some of them are real… and I’m sure that some of them are probably embellished by a little girl who thought that those things happened, but maybe not exactly the way she thought they did…and sometimes different things going on in my life spark bits and pieces of those memories for a fleeting second or two.

My memories of my Grandpa Bucolo are just snippets in my mind… Grandpa passed away when I was about 8 years old, so while I have memories of him, they’re vague…But strawberries tend to spark strong memories of Grandpa…and I envision me in a strawberry patch eating strawberries, and him in his metal patio chair saying in a stern, yet joking…Italian laden accent:  “Get outta my strawberries..”  Now, whether he was actually sitting in a chair, I don’t know… but his words are a strong memory…

IMG_9529

But then again…
I was a little girl, it was years and years ago…
And sometimes my memories aren’t that accurate…

Like this memory… I must have been about five years old… and I remember falling out of bed.  I can remember that my mom came in to my bedroom and helped me back into my bed… and then I can remember hearing her say to my father: “She must have hit a tree”…

I don’t know why, but that has always stayed with me….and I  brought it up to my mom quite a few years ago, because over the years, I couldn’t understand why she would have said “She must have hit a tree”… when obviously, there was no tree in my bedroom!  She sat there and thought about it for a minute… and said: “Could it be possible that maybe I said: ‘She must have had a dream..'”….   Oh, my gosh… yeah, now that makes sense!!  We laughed and laughed about that one!!  But once in a while, that memory pops up into my head… and I can still clearly hear my mom saying: “She must have hit a tree…”…even though I know it’s not the way it happened..

IMG_9561

Sometimes those memories, right or wrong, are embedded in our brains…and we are going to remember them the way we want to remember them.. So whether or not that actually happened with my grandpa.. it is what I remember, and what I hold on to because that’s all I have of him.

Strawberries and Grandpa Bucolo.  They just belong together, and the whole time I made these sandwiches, I thought of him.

IMG_9565

Now…I can’t take full credit for this idea today… Kelsey Nixon made these cute little strawberry sandwiches on one of her shows not too long ago, and I thought that was the cutest idea.

I thought that these would be fun to share on Twisted Tuesday, but with my own twist…

Kelsey made hers with a lemon cream, grilled strawberries and poundcake.  I changed it up just a little bit to suit my personality and taste, and of course, I added some Nutella, and thought it would be cool to make them into ice cream sandwiches.  A perfect twist to an ice cream sandwich!

These little beauties are so easy to make, and such a cool and refreshing dessert, or summertime treat!  The vanilla ice cream loaded with fresh strawberries and blueberries was so delicious with the Nutella and pound cake.  I would say that you could even make deconstructed ice cream sandwiches with a slice of pound cake frosted with Nutella, a scoop of ice cream on top, with macerated strawberries poured over the top!

Life is good. It’s memories filled with sweet strawberries on a summer’s day kind of good… 

IMG_9546

Grilled Strawberry Ice Cream Sandwiches
Makes 4 Ice Cream Sandwiches

Just a quick note:
I grilled the pound cake and strawberries (on my stovetop), but you don’t have to grill them, if you don’t have a griddle.  If you prefer, you can toast the pound cake, and roast the strawberries…or do absolutely nothing to them and eat them as is! They’re delicious, no matter how you choose to eat them!

Try this with peaches, nectarines, cherries, or any kind of fruit that might tickle your fancy!! Pineapple! Oh, this would be so good with pineapple!!  Have fun and mix it up!

One pound cake, ½” slices  (recipe below)
12 large fresh strawberries, sliced in half
2 cups vanilla ice cream
1 cup fresh strawberries, chopped
½ cup fresh blueberries
Nutella (chocolate hazelnut spread)

Line a 11×7” pan with plastic wrap.

Place the ice cream in a large mixing bowl, and leave at room temperature until softened.  Add the chopped strawberries and blueberries to the ice cream, and mix well.  Pour into the prepared 11×7” pan, cover with more plastic wrap, and place in freezer, until frozen. Cut into rectangles to fit the slice of pound cake.

IMG_9494

IMG_9496

IMG_9506

Place the pound cake on a heated griddle, and grill until it’s toasted with golden brown grill lines, about three to five minutes on each side.   Remove from the griddle, and set aside.

IMG_9493

IMG_9501

Place the strawberry halves on the griddle, and grill until they have seared grill lines on them, about three to five minutes on each side.  Remove from griddle and set aside.

IMG_9504

To assemble the ice cream sandwiches:
Spread the Nutella on the inside of two slices of pound cake. Place one rectangle of ice cream on top of the Nutella on one slice of pound cake. Place six strawberry halves on top of the ice cream, and top with the other slice of pound cake, Nutella side down. Wrap in plastic wrap, and store in freezer until ready to serve.

IMG_9508

IMG_9509


IMG_9510

The Pound Cake:
This makes two pound cakes.  Freeze one for another day, or double the recipe above to make 8 ice cream sandwiches!

3 cups all purpose flour
3 tsp salt
4 sticks butter, room temperature
2 cups sugar
10 large eggs, room temperature
2 tsp vanilla paste (or vanilla extract)

IMG_9489

IMG_9490

Preheat oven to 325 degrees.

Butter two 9″ x 5″ loaf pans.

Sift the flour and salt in a small mixing bowl. Set aside.

Cream the butter and sugar until light and fluffy. Add the eggs, one at a time until incorporated. Add the vanilla and beat for about a minute.

Add one cup of flour at a time until it’s completely incorporated.  Pour into prepared loaf pans.  Bake for about an hour, or until a cake pick inserted in the center of the cake comes out clean.  Remove from pans, and cool completely on cooling rack.  Slice into 1/2″ slices.

Enjoy!!

IMG_9546

Cannellini Bean and Sausage Stew

IMG_8355
There is something about a big pot of stew simmering on the stove. I guess the only way I can describe it, is that I have a very strong feeling of satisfaction…of accomplishment…of confidence…and that all leads to that wonderful feeling of contentment. And that’s why I love to cook. Sometimes it just isn’t about the food….but it’s about getting yourself lost in the preparation…

And that’s why I love my kitchen tools.
And that’s why I can never have too many of them…

I know that I’ve mentioned my tendency to be an impulse buyer… and I’ve gone and done it again. But in my defense, it doesn’t help that I get emails almost on a daily basis from Williams Sonoma, Crate and Barrel, and Sur la Table. Sometimes they have multiple sales going on..

I mean seriously, how many sales can these stores have in one week?
Apparently a lot.

IMG_8324

One of the emails that I received a while ago was for a 5-quart cast iron braiser from Sur la Table. It was a crazy good sale, along with free shipping, and for some reason, the green color caught my eye, and that, my friends, was the beginning of the end…

I’ve also mentioned that I get caught up in reviews, and everyone seemed to love this pan, so of course, by the time I was finished reading the reviews, I was pushing the “submit payment” button.  And then the major guilt trip set in…

IMG_8335

But the guilt was short-lived..because when I got home and found the box waiting for me on the porch..I was like..”Guilt? What guilt??”!  I have to say, this is a great pan! I’m in love with that color (don’t ask me why, because there is nothing green about my kitchen, except for the pot of basil sitting on my windowsill)… and I cannot believe how heavy it is! I have a feeling that this pan is going to be one of my favorites..

So, when I get a new pan, I think the hardest thing for me is to decide what will be the first thing I prepare. For some reason, I had white beans in my head for this one. Yep, this recipe started with white beans. Cannellini beans to be exact. Spinach was the obvious next ingredient… with tomatoes and Italian sausage a very close third and fourth. The addition of rigatoni made this a wonderful meal..it was very stew-like, very filling, and really delicious! A little shaved Asiago on top gave it the perfect sharpness to go with the sweetness of the sauce, and the spiciness of the sausage.

I used a can of garlic diced tomatoes; which tend to have a very strong garlic flavor to them. If that is too much for you, then regular diced tomatoes would be just fine…and if you don’t like tomatoes floating around in your stew, you could use one large can of sauce instead of a can of tomatoes and a can of sauce.

Oh, and no…I’m not getting paid to advertise for Sur la Table. I’m just sharing a recipe and a story…

And quick note about the wok. I did get it in the mail a couple of weeks ago..and I love it! I’ll be doing a post about seasoning it. I’m waiting for a nice day to to season it properly..because from what I hear I have to open windows because it smells really bad, and I’d like to be able to open all of the window in the house!

IMG_8369

Cannellini Bean and Sausage Stew

1 15.5 oz can cannellini beans
1 pound Italian sausage, removed from casings (or bulk)
1 large onion, diced
2 cloves garlic, minced
1 15.5 oz can diced tomatoes with garlic and basil
1 15 oz can tomato sauce
1 6 oz bag fresh baby spinach, stems removed
2 tbsp olive oil
1/2 pound rigatoni
Asiago Cheese, shredded

In a large pan, heat olive oil over medium heat. Add the onions and garlic and saute until translucent. Add the Italian sausage and thoroughly cook. Add the diced tomatoes, sauce, and cannellini beans. Simmer for 1/2 hour.

IMG_8325

IMG_8329

While the stew is simmering, bring a pot of water to boil, add the rigatoni and cook per directions on the box (about 9 minutes, until al dente). Drain (reserve about 1 cup of the water)

IMG_8330

After the stew has simmered for 1/2 hour, add the spinach to the pan, and stir until wilted. Add the rigatoni and stir until completely coated.  If the sauce is too thick, add the reserved pasta water.

Serve with Asiago cheese.

IMG_8334

Mushroom Pizzas and Raspberry Sangria

Spring is nature’s way of saying, “Let’s party!”  ~Robin Williams

IMG_9433

Today was the first full day of spring, and it’s Fiesta Friday at Angie’s blog, The Novice Gardener!  It must have been nature’s way of saying it’s time to party!

It was such a gorgeous day today…perfect for the first full day of spring! I checked the weather channel on my phone around 2pm, and it said that the temperature was 35, and that, paired with the sunshine… is a beautiful thing… truly good for the soul..

I know I’ve said this before, but it always amazes me when the temperature has been below zero, and all of a sudden it hits 35 degrees, everyone walks around with no coats, thinking it’s a heat wave…. but…. when the temperature has been 85 degrees, and all of a sudden it goes down to 35, it feels unbearably cold, and everyone is bundled up in heavy coats, scarves and mittens!

The beautiful weather today made me feel like summer. I didn’t feel the cold in the air, I only felt the sunshine on my face.. and it made me think of warm evenings and friends.. parties with fruit drinks and finger foods…

IMG_9429

I couldn’t think of a better way to celebrate this beautiful day, than with a pitcher of raspberry sangria and individual mushroom pizzas! In my mind, a perfect meal to share with friends on a warm evening…or for Fiesta Friday at Angie’s place!

The oyster, shiitake, and baby bella mushrooms, along with the sautéed onions and garlic were delicious with the Boursin cheese….and the freshness of the zesty sprouts tied it all together in a pretty delicious little package..

IMG_9430

IMG_9444

And the sangria? I mean, is there ever a bad time for sangria? It was so refreshing and delicious with all of the different fruit, and the liqueur gave it a wonderful raspberry aftertaste, the flavor of summer!

I’m on my way to Angie’s party, and I hope to see you there!  A special thank you to Angie for hosting such a wonderful party!

Life is good… it’s springtime fiesta party good… 

IMG_9439

Mushroom Pizzas
Serves Four

Just a quick note.. you’ll only be using 1/2 of the bread dough. I’ll usually use half for the pizzas, and with the other half, I’ll make into a small loaf of bread.

1/2 of a store bought pizza dough
2 – 5.2 oz pkgs of Boursin Cheese (your favorite flavor, I used shallot and chive)
1 onion, sliced
1 clove garlic, minced
1 tbsp olive oil
1/2 lb block mozzarella cheese, shredded
8 oz mushrooms (your favorite type, I used oyster, shiitake, and baby bella), sliced
Sprouts, such as clover, radish sprouts, zesty sprouts, pea shoots
Flavored Olive Oil, I used Tuscan Herb (for drizzling)

Preheat oven to 350 degrees. Lightly grease two baking sheets.

Divide the pizza dough into fourths, and flatten each one out into small ovals, placing two on each baking sheet. Crumble the Boursin cheese onto each pizza. Layer the mozzarella on each pizza.

IMG_9416

IMG_9419

IMG_9418

In a large frying pan, saute the onions and garlic in the olive oil until browned. Remove from the pan, reserving the oil. Saute the mushrooms in the reserved olive oil for about five minutes, or until golden brown.

IMG_9417

IMG_9420

IMG_9427

Layer the mushrooms on top of the mozzarella cheese. Layer the onions on top of the mushrooms. Bake for about 20 minutes or until golden brown.

Garnish with sprouts, and drizzle with flavored olive oil.

Sangria
1 bottle sweet white wine
1 cup raspberry liqueur
1-1/4 cups raspberries (1 cup for sangria, 1/4 cup for garnish)
1/2 cup blueberries + a few extra for garnish
1 small orange thinly sliced
1 small lemon, thinly sliced
3 tbsp granulated sugar
Fresh mint or basil for garnish

Mix the wine, raspberry liqueur, raspberries, blueberries, orange slices, lemon slices, and sugar together. Pour into a covered jar and refrigerate for about six hours or overnight.

IMG_9422

IMG_9424

IMG_9438

To serve, pour into a pitcher, and serve in stemmed glasses with ice. Make sure you add some of the fruit into the glasses, and garnish with fresh raspberries, blueberries, mint or basil.

Enjoy!

IMG_9432

Twisted Tuesday… Eggs Benedict Ravioli

It’s Twisted Tuesday once again, and every week I think to myself that this is the last week for this, but then an idea pops into my head, and I think “Okay, one more week..”

IMG_9283

This past Saturday, Michael had some friends over to play cards and watch movies, and then they would spend the night. I went out and bought bacon, eggs, bread, etc…and planned on making them a big breakfast on Saturday morning. Well, I got up and started right in.. got the bacon frying, started mixing the eggs for French toast… and while I was doing that, I was watching the cooking channel. Giada was on, and she was making ravioli. I was half listening to the TV, and half zoning out while preparing the breakfast…and I started thinking about Eggs Benedict. I thought how nice it would be if the boys all liked it, and I would be making that for them instead of boring old bacon and eggs.

I’m not exactly sure where it came from..
But it hit me…
Eggs Benedict Ravioli.

Yep. You read it correctly!
Eggs. Benedict. Ravioli.

IMG_9295

I thought about it all day Saturday, trying to figure out how I would actually prepare it. Would I stuff the ravioli with eggs and Canadian bacon, and then cover it with hollandaise? But the eggs would have to be scrambled in order to stuff the ravioli, because otherwise, how would I successfully put a poached egg inside a ravioli without the yolk fully cooking when I boiled the ravioli?

I had quite the quandary..
But it didn’t last long…

I decided to make the ravioli out of egg roll wrappers, with ricotta and pepper jack cheese. I thought that the pepper jack would give it a spicy kick. I thought that I’d cut the Canadian bacon into matchsticks, and fry them until they were crisp. I knew in my heart of hearts that the egg had to be poached, because I’m pretty sure it’s sacrilege to serve Eggs Benedict without a runny yolk….and the hollandaise? Yeah, it definitely had to be homemade.

IMG_9274

I went out Sunday morning early to get the ingredients and immediately set out to make the Eggs Benedict Ravioli. They were easy to make, and in no time at all, I had a test plate of them ready for Jessica and me to try. I took a few bites… Delicious. Jessica took a couple of bites, and then took the plate out of my hands and proceeded to eat the whole thing!! It was definitely Eggs Benedict, but with a twist…the hollandaise and runny yolk totally delicious over the ravioli, and with that beautiful spicy kick at the end? Perfect!!

I will definitely make this again!! While I’m still debating whether I want to end the Twisted Tuesday theme, I’m glad that I didn’t… at least for this week!

Oh, and by the way… the boys breakfast… As I was cooking the French toast, it dawned on me that I hadn’t heard any noise coming from the living room (where the boys would be sleeping). I looked in the living room… there wasn’t anyone in there. I looked in the driveway, and there wasn’t a car in sight (except for my own).. I was cooking breakfast for boys who weren’t even there!! Needless to say, we ate breakfast all day!!

Life is good. It’s a runny yolk over spicy ravioli mixed with crispy bacon, and homemade hollandaise crazy kind of good…

IMG_9296

Eggs Benedict Ravioli
Serves Four

The Ravioli
1 cup ricotta cheese
1 egg
1 tbsp fresh parsley
1/4 cup Romano cheese
4 oz pepper jack cheese, shredded

4 egg roll wrappers
1 egg

2 tbsp butter

1 – 6 oz package Canadian bacon, cut into matchsticks.

Put a large pot of water to boil on the stove as you prepare the following:

Mix the ricotta cheese, egg, parsley, Romano cheese, pepper jack cheese in a medium size bowl until blended.

IMG_9256

In a small bowl, whisk the remaining egg. Place one egg roll wrapper on the work surface, and place a generous spoonful (about 1 1/2 tablespoons) of the ricotta mixture in the center. Brush the egg around the edges of the egg roll wrapper.

IMG_9413

IMG_9259

Carefully pull one corner of the wrapper across to match up with the opposite corner, creating a triangle. Be careful that the filling doesn’t make its way to the edges. Seal the edges tightly with your fingers (again, ensuring that the filling doesn’t seep out of the sealed edges). Repeat with remaining three egg roll wrappers.

IMG_9260

IMG_9261

Once the water is at a slow boil, place one ravioli into pan, and boil for exactly three minutes. Remove with a wooden spoon, and place on a baking sheet that has been sprayed with vegetable spray. Repeat with remaining three ravioli.

IMG_9266

IMG_9268

Melt the butter in a large frying pan on medium heat, and fry the ravioli on both sides until they are golden brown. Remove from pan, (reserving the butter in the pan) and place on individual dishes.

IMG_9270

IMG_9271

Add the Canadian bacon to the reserved butter, and fry until crisp. Divide and sprinkle the bacon over the four ravioli.

IMG_9264

IMG_9265

Poached Eggs
8 large eggs

Ok, so poached eggs are really easy to make. I can say that now, because I’ve had years of practice. When I first started making them, it was a pathetic attempt with the whites stringing everywhere except around the yolk. I’ve learned through trial and error that the water needs to be a slow boil, and that you have to make a whirlpool with a spoon in the water right before you add the egg.

To use vinegar or not to use vinegar? Supposedly vinegar helps the protein in the egg to coagulate, and helps the whites stay together. Whether that’s true or not, I can’t say. I’ve tried both ways, and there is no difference in the egg. It’s up to you whether you want to add a tablespoon or so of white vinegar to the water.

Crack one egg into a small ramekin. Once the water is boiling, and you’ve created a whirlpool, slowly introduce the egg into the center of the whirlpool allowing the ramekin to dip into the water so that the egg stays in one piece. I usually use a large pot of water, and I’m able to poach two eggs at one time. Make sure that the eggs don’t touch.

IMG_9273

IMG_9274

Boil for three to four minutes. With a slotted spoon, carefully remove each egg, placing the spoon on top of a folded paper towel so that the egg isn’t wet when you place it on top of the ravioli. Once you’ve let the egg dry, place two poached eggs on top of each ravioli. Top with hollandaise sauce. Garnish with fresh parsley and cayenne pepper.

IMG_9276

Hollandaise Sauce
The first time I tried to make hollandaise sauce was truly going to be my last time. I swore right then and there that I would never attempt to make it again. I spent years using the mix that is sold in a packet. It’s tastes decent, but every time I used it, I was reminded of my failure.. So one day, I decided that it was time to try again. I’m not exactly sure what I did the first time that made it a failure..because I found this to be very VERY easy to make.

4 egg yolks
1 tbsp water
Juice of one lemon, divided
Salt and pepper to taste
Dash of cayenne pepper

1 cup clarified butter (see below)

Bring about two inches of water in the bottom pan of a double boiler to a simmer. In the top pan of the double boiler, whisk the egg yolks, water, and 1/2 of the lemon juice until foamy. Place the top pan over the bottom pan, and whisk the eggs for about a minute or two until they’ve begun to thicken. Immediately remove from heat.

IMG_9280

IMG_9282

Slowly begin to drizzle the clarified butter into the egg mixture whisking constantly so that the egg mixture doesn’t break up. As you continue to add the butter, you can increase the amount you pour in as you continue to whisk until all of the butter has been incorporated. Add the remaining lemon juice, salt, pepper, and cayenne pepper to taste.

IMG_9272

IMG_9279

How to make quick clarified butter: Melt two sticks of butter in a saucepan, and simmer on low until it separates. Skim the foam off of the top of the melted butter. Now here is where I’ll make everyone cringe. I don’t stress over getting all of the foamy stuff off of the top. What I’ll do at this point, is just place a fine strainer over a medium size bowl. Pour the butter through the strainer, allowing the golden butter to pass into the bowl, and the fats and foam of the butter will stay in the strainer. One might argue that this isn’t true clarified butter, but it works in the hollandaise sauce, and that’s all I care about.

Enjoy!!

IMG_9299

Stuffed Artichokes

IMG_9345

“These things are just plain annoying. After all the trouble you go to, you get about as much actual “food” out of eating an artichoke as you would from licking 30 or 40 postage stamps. Have the shrimp cocktail instead.” …. Miss Piggy

Poor misguided Miss Piggy, she honestly doesn’t know what she’s talking about! It’s a shame that she just doesn’t understand the artichoke, and she will be truly missing out on a “savoring moment” if she chooses the shrimp cocktail instead.

IMG_9325

Don’t get me wrong…there is no doubt that shrimp is delicious, but an artichoke? It can be served as an elegant appetizer, yet it’s fun to eat, and it’s truly delicious…a special treat to be enjoyed, as a snack, a lunch, or a simple dinner.

Yes, Miss Piggy, it can be served as a simple dinner…and you’ll walk away completely satisfied…

I’m the only one in the house that likes artichokes, so I don’t make them all that often. When I do, I make only one, and it’s usually when it’s just me at home. This recipe for the filling is the perfect amount for one artichoke, so if you are making more, it’s easy enough to multiply the amounts by the number of artichokes you’ll be serving.

IMG_9316

There is a little bit of work to do when preparing an artichoke, but it’s not as bad as you might think. It’s a matter of cutting a few leaves, and filling it with breadcrumbs. Keep in mind, they don’t have to be stuffed… artichokes can be steamed plain, and dipped in the aioli, or a simple butter and lemon sauce!

Lucky for me, I bought two of them… so I still have one more in the refrigerator to enjoy in the next couple of weeks!

Life is good… it’s good with that savoring moment from dipping little green leaves in garlic and lemon aioli…

IMG_9350

Stuffed Artichokes
Serves One

The Artichoke
1 artichoke
1/2 cup seasoned breadcrumbs
3 tbsp romano cheese
1 clove garlic, minced
2 tsp fresh parsley, chopped
Juice of 1/2 lemon
1/4 tsp salt
1/4 tsp pepper
Olive oil

Begin preparing the artichoke by snipping the tips of the leaves with scissors to remove the thorns. It never fails, I always end up with one in my finger… Using a serrated knife, cut about an inch from the top of the artichoke. Slice off the stem so that the artichoke has a flat bottom and can stand freely.

IMG_9302

IMG_9304

IMG_9306

In a small bowl, mix together the breadcrumbs, Romano cheese, garlic, parsley, salt, and pepper. Stuff the leaves of the artichoke with the breadcrumb mixture.

IMG_9308

IMG_9313

Drizzle with lemon juice. Pour about an inch of water in the bottom of a small saucepan, and place the artichoke in the pan. Drizzle with olive oil. Bring to a boil over high heat, and the lower heat to simmer. Simmer for an hour to an hour and a half, or until the leaves can be plucked easily from the artichoke. Watch the water, if it evaporates, just keep adding a little more to the bottom of the pan.

Remove from pan, and place in a serving dish. Serve with lemon garlic aioli and lemon slices.

Lemon Garlic Aioli
1/4 cup mayonnaise
Juice of 1/2 lemon
1 clove garlic, minced
Dash of cayenne pepper
salt and pepper to taste

Add the mayonnaise, lemon, garlic, cayenne, salt, and pepper to a small processor. Pulse a few times until well blended. Refrigerate until ready to serve.

Not sure how to eat an artichoke?  

Well, it’s very simple!!   You just pull one of the leaves off, dip it into your sauce of choice, and put it between your teeth, and then pull it while you’re removing the pulp of the leaf with your teeth.  Discard the leaf.

IMG_9359

When all of the leaves have been removed, you’ll have the heart of the artichoke to eat.  First, you’ll want to remove the choke (as pictured below).  Don’t try to eat the choke, as there is a reason why it is named just that….

IMG_8990 copy

Once the choke has been removed, enjoy that delicious tender heart with a fork and knife!

IMG_3297 copy

IMG_5041

Enjoy!!

IMG_9325

Potato Chips!

IMG_9236

It wasn’t until about two years ago that I actually started liking potato chips. It’s not that I hated them, I just found store bought chips to be boring, and totally did not understand the “you can’t eat just one” thing. As far as I was concerned, I didn’t even need to eat ONE.

IMG_9247

And then I tried a homemade potato chip. Holy smokes! Why didn’t I know about these flavorful little beauties? I mean, of course I knew about homemade potato chips, but why did it take me so long to try them? It’s probably because I didn’t realize the true potato flavor and freshness that you just cannot get with a store bought chip.

It took me a few tries before I learned how to get them right. You can research them, and you’ll find a ton of recipes and techniques of making the perfect potato chip. I tried so many different techniques, and finally decided to play around with them myself using bits and pieces of what I read on the internet. This one works for me, and I think you might like it too.   They’re so simple to make, but you do need to set a little time aside to make them!

IMG_9243

These chips are a beautiful golden brown, they’re crispy, and they’re FULL of flavor thanks to a vinegar boil, and deep frying them twice! The vinegar isn’t over-powering, it is more of an after taste after eating one, it’s just enough to say “Hmmm”.  Serve them with garlic dill dip, and you have a wonderful side for that special sandwich, or a great snack for a party, or a quiet evening at home.

Life is good. It’s a “Chips with a hint of Vinegar” kind of good.

IMG_9249

Prudy’s Potato Chips
Serves Four (or two generous snacks!)

The Potato Chips
4 large russet potatoes
2/3 cup vinegar
5 cups water
3 cups canola oil
sea salt to taste

Wash and dry the potatoes. Slice 1/8” thick with mandolin, or a knife. If using a knife, try to keep them as uniform in thickness as possible, so that they cook in the same amount of time.

Bring the vinegar and water to boil in a medium saucepan or dutch oven. Add one half of the potato slices, and boil for exactly four minutes. Remove with a wire spider skimmer and place on a baking sheet lined with paper towels. Let them dry completely, flipping them so that they dry on both sides. Let cool completely. Repeat with the other half of the potato slices.

IMG_9229

IMG_9230

IMG_9231

While the potatoes are cooling, heat the canola oil in a large saucepan (You want the oil to be at least 2” deep, so add more oil if you think you need it). I deep fry them when the oil reaches 350 degrees.

When the oil is ready, add a few potato slices at a time to the pan. Don’t overcrowd them. Deep fry for 3 minutes. Remove with a wire spider skimmer to a baking sheet with a cooling rack placed on top. Repeat with remaining potato slices, and let cool completely on the cooling rack, which by the time you’ve finished the last of the potatoes, the first batch will have already cooled.

At this point the chips will still be white and soft.

Now to bring a little color and crispiness to the chips….This is where you really need to stand over the pan and watch the potato chips cook:

Add 1/2 of the cooled chips back to the oil, stirring them around with the wire spider skimmer, and removing the ones that have turned golden, and placing them on the baking sheet with the cooling rack.  Watch them!!  Some turn golden must faster than others!!   Add more to the pan as you remove the golden chips.  Immediately season with salt. You can serve them warm or cooled with homemade chip dip!

IMG_9255

Garlic Dill Dip
1/2 cup sour cream
1 tbsp fresh parsley, chopped
2 tbsp fresh dill, chopped
2 tbsp fresh chives, chopped
1-2 cloves garlic, minced (depending on how garlicky you like it)
1/2 tsp salt
1/2 tsp black pepper

IMG_9233

In a small bowl, mix the sour cream, parsley, dill, chives, garlic, salt, and pepper until well blended. Refrigerate until ready to serve with chips.

Enjoy!

IMG_9236

Chipotle Lime Chicken over Salsa and Corn Risotto

IMG_9204

Have you ever done a dance in your kitchen after creating a meal that you’re just way too excited about? Yes? Of course you have… we all have.

Have you ever done a dance for your dog while you sang “You put the lime in the coconut, and drink it all up…” (Baha Men) to her/him, after creating that meal? Yeah. I did.

Poor Sophie.. sometimes she just doesn’t know what to make of me, and watched me with this pathetic look in her eyes… but honestly, that’s the first song that came to mind after I finished this meal…  And the dance?  Ok, yeah…it was pathetic..

IMG_9183

My friend Seana (Cottage Grove House) has been on a spicy Mexican food kick lately, and her wonderful recipes have pulled me right in on her kick! If you haven’t visited her blog, you should take some time to visit. You will love the sophistication of her photos, and her recipes are definitely to salivate over. I met Seana back in October right here on my blog…she was the very first person to comment on my my very first post,  rustic tomato tartlet, and we became fast friends with so much in common outside of our blogs… I adore her, and know you will too.

I can’t seem to get enough of the spicy deliciousness that Mexican food tends to bring to the table. It’s festive. It’s colorful. It’s happy.

IMG_9199

So it’s no surprise to me that I decided to try a salsa risotto today, by starting with a jar of salsa as the very first cup of liquid added to the arborio rice. I cooked it with a couple cups of chicken stock, and a generous cup of wine that I found in the fridge. At first, I thought that I wanted to add peas to the risotto, but the green peppers from the salsa, combined with the peas, in my mind, would have been too much green. The peas would have been delicious, but I decided to add corn instead. Beautiful. It gave the risotto a wonderfully sweet and fresh flavor! Finished with a couple tablespoons of butter, and about a half cup of romano cheese, made this a creamy goodness that I was pleased to serve with my chipotle lime chicken.

I thought that a roasted pepper, tomato, black bean salad would be the perfect accompaniment with this meal. …And…it was.

IMG_9202

Life is good….
Life is “dancing in front of your dog while she looks at you pathetically…but you don’t care….because she can’t talk and tell everyone how dumb you looked”….kind of good…

IMG_9192

Chipotle Lime Chicken over Salsa and Corn Risotto

Roasted Pepper, Tomato, and Black Bean Salad
1/2 yellow bell pepper
1/2 red bell pepper
1/2 orange bell pepper
1 tbsp olive oil
salt and pepper to taste

Cut the peppers into 1” squares. Mix with olive oil, season with salt and pepper. Place on a baking sheet, and roast at 400 degrees until tender and browned. Remove from oven and in a small bowl, mix with (until combined):

1 large beefsteak tomato
1/2 cup red onion, chopped
1 clove garlic, minced
2 tbsp olive oil
Juice of one lime
1/2 tsp chile powder
1 tsp honey
1/2 tsp hot sauce
salt and pepper to taste

Refrigerate until ready to serve.

Salsa and Corn Risotto

1 large yellow onion, chopped
2 cloves garlic, minced
3 tbsp olive oil
1 cup uncooked Arborio rice
2 to 3 cups chicken stock
1 16 oz jar salsa (I used medium heat, you choose your desired heat)
1 cup white wine
1 cup corn (fresh or frozen)
1/2 cup grated Romano cheese
2 tbsp butter

Bring the chicken stock to a boil, and reduce to simmer during the cooking time of the risotto.

In a large frying pan or sauce pan, saute the onion and garlic in the three tablespoons of olive oil over medium heat, until translucent. Add the rice to the onion and garlic mixture, and sauté for about two or three minutes (you don’t want the rice to brown).

Add the jar of salsa to the rice, and begin stirring frequently until the liquid is absorbed. Add one cup of wine, stirring until it has been absorbed into the rice.

Continue to add the chicken stock, one cup at a time, stirring constantly until the liquid is absorbed, and the rice is cooked al dente. Right before you add the last cup of chicken stock, add the corn. Continue to stir until the liquid has been absorbed.  Add the butter and Romano cheese, stir until creamy.

Chipotle Lime Chicken

4 boneless chicken breast halves
2 tbsp olive oil
2 tsp chipotle chile powder
1 tsp garlic powder
1/2 tsp salt
1/2 tsp pepper
1/2 tsp paprika

Mix the chile powder, garlic powder, salt, pepper, and paprika in a small bowl. Rub all over the chicken breasts. Heat the olive oil in a large frying pan and add the chicken breasts to the oil. Cook over medium heat for about 8-10 minutes on each side, until the chicken is no longer pink, or reaches 165 degrees internally. Remove the chicken from the pan, reserving the drippings right in the pan. Slice on the diagonal and serve over the salsa and corn risotto. Drizzle chipotle lime sauce over chicken. Serve with roasted pepper, tomato, and black bean salad. Garnish with lime slices and chopped cilantro.

Chipotle Lime Sauce
Drippings from cooked chicken
1/2 stick butter
Juice of one lime
2 cloves garlic, minced
2 tsp chipotle chile powder

Heat the drippings in the pan over medium heat. Add the butter, lime juice, garlic and chile powder. Cook until thickened. Remove from heat and drizzle over cooked chicken.

Enjoy!

IMG_9204