Chicken Nachos

IMG_2656So here’s one for you…this was actually quite a few years ago….Seriously, I bet it was at least 10 or more years…

I was working in my yard on a Saturday… and I knew that I had just a couple of hours left before I had to get ready to go to a party. I promised to bring an appetizer, so I figured that I’d bring chicken nachos, because they’re really easy to throw together, they taste good whether they’re hot or cold…and…everybody loves them. I really wanted to get two sides of my house weeded before I left for the party. You know…those blasted weeds that I complain about all the time. I just cannot seem to keep up with them! But I knew that if I could get the two sides finished, then I’d be halfway there for the next day.

I figured that I had an hour or so to finish the weeding, and then I’d go in and start cooking the nachos, and get cleaned up and changed.

This is why I love these nachos. They take minimal prep, minimal cook time, and minimal ingredients. I knew that I’d have plenty of time to throw them together at home, and then toss them in the oven at my cousin’s house to heat them, and melt the cheese.

IMG_2638

Well, I worked in the yard up until the last possible moment. I ran into the house, cut the chicken, tossed it into the pan with the taco sauce, and ran upstairs to shower quick and put on fresh clothes. I had a new pair of shorts, that I couldn’t wait to wear, because they actually fit and looked decent. So I was feeling pretty confident about going to this party. I had my weeding done, the nachos were just about ready to be thrown together, and I looked cute. Life was good.

IMG_2649I arrived at the party, and settled in to relax for the evening. I was sitting in the chair, enjoying a little drinky-poo of some sort…and sat back in the chair, crossed my legs and looked down…

There was a blade of grass on my knee.
I took a closer look.
Oh Lord.
My knees were dirty.

They were black with a big old blade of grass on the one. Ok, so when I showered, I did the quick version.. I did the important parts, and the knees didn’t even cross my mind.

I uncrossed my legs, set my drink down, flicked the blade of grass off, and slowly leaned forward placing my hands over my knees. Too late. My cousin caught sight of them…

“Pru, is that dirt? Are your knees dirty??!” she asked, a bit too loudly for my comfort.
“Yes…I was working in the yard…” I kind of whispered…hoping that she’d get the hint that I didn’t want this brought to everyone’s attention.

Well, she starts laughing, and not just a chuckle…but a deep belly laugh. Of course, everyone notices…. Yep. Prudy’s knees are dirty. It was a matter of seconds before everyone was laughing at my knees. It’s not bad enough that they’re chubby knees, but it turns out that I had dirty chubby knees! …And….everyone was laughing at them!

What else could I do, but join in the laughter? Luckily I surround myself with the people I love, and those who love me… so there was no judgement… just humor, love and laughter…and dirty knees…

It’s something that I will never forget, and always think about when I’m making chicken nachos!

IMG_2641

I love making these nachos….they never get old. They have been the most requested snack by my kids and their friends for years now (Except Mike. He hates them. I know…surprise, surprise… ). They’re just that easy to make, and they’re that delicious! They’re a great appetizer, and they’re a quick and easy meal!  Pile them on a serving tray and serve them with your favorite salsa and sour cream.

Life is good…it’s a “moral of this story? Never weed until the last possible moment… and the knees should never be overlooked in the shower…and they never have ever since… “ kind of good…

IMG_2659Chicken Nachos

4 boneless chicken breasts, cut into bite size pieces
1 – 16oz bottle Ortega taco sauce (or your favorite taco sauce)
1 lb shredded cheddar
1 large bag tortilla scoops or chips
Salsa
Sour cream

Preheat oven to 350 degrees.

In a large frying pan, add the chicken and taco sauce. Cook over medium heat until the sauce cooks down, and the chicken is fully cooked.

Spread the tortilla scoops or chips in a single layer on a cookie sheet. Discard Eat the broken pieces. Spoon a couple pieces of cooked chicken onto each tortilla scoop or chip. Top with shredded cheddar.

Bake for about 10 minutes, or until cheese is melted.

Pile on a serving tray, with bowls of salsa and sour cream on the side.

Enjoy!

IMG_2656

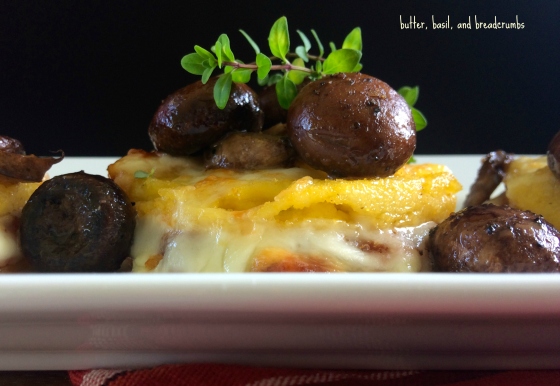
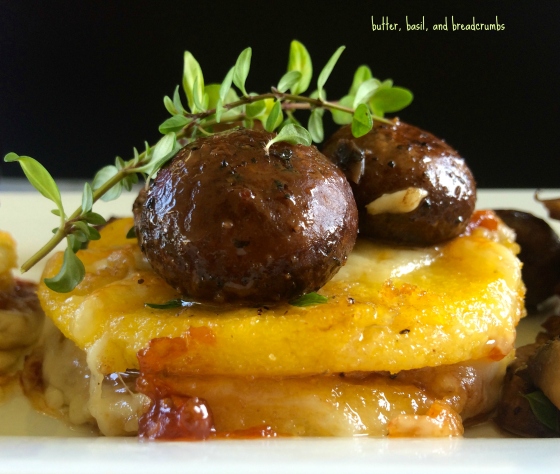
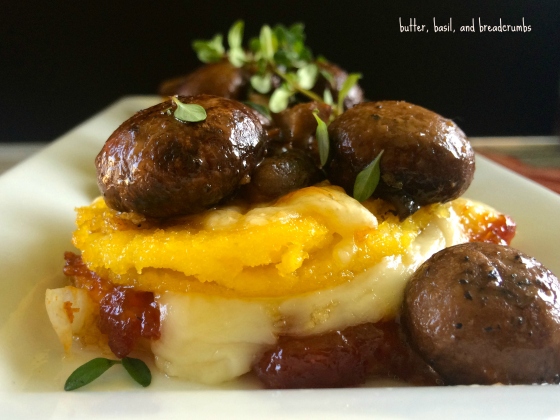
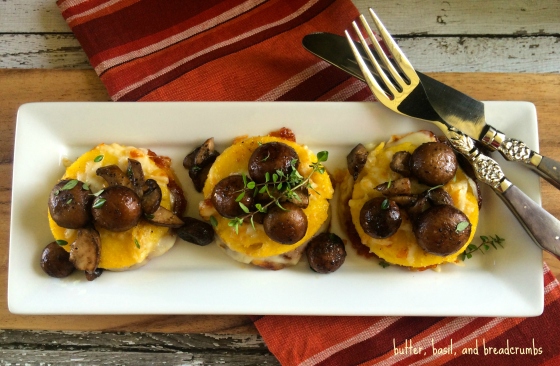
Fontina and Mushroom Polenta Panini


panini 6A couple of months ago, my friend Cheryl and I went for a cheese making class.  Cheryl is my quirky friend… you know, the girl who I talked about in my post about my tomato tartlets, when she took me to a quaint little cooking school in the midst of a peach orchard! And then one time went to see Bobby Flay, and we stood outside his exit like a couple of little foodie groupies, hoping to get an autograph from him! Another time she hosted an Iron Chef competition at her house… We have taken quite a few cooking classes together.  I just never know what she has up her sleeve, but it’s pure craziness and I’m always game!

grilled polenta 3This really isn’t about the cheese making class at all, but about the drive to the farm for the class. It was about an hour drive, and she gave me a silly little hat to wear in her convertible…. And she pulls out iced coffees for us to enjoy during the ride… and says: “Oh, and I grabbed a few cookbooks for you to read on the way…”

Seriously… Does that girl know me, or what?

So, while I was flipping through the cookbooks, I was making mental notes of the books that I wanted to order when I got home. There was one in particular that I really liked…. It is called “The Great Big Butter Cookbook” by Diana C. Von Glahn.. First of all, this book doesn’t really even pertain to butter at all…but is filled with some really appealing “comfort” recipes. Ok, recipes that look really good, but I know that I would definitely add my own “comfort” touch.

grilled fontina on polentaI did find that cookbook in used section on Amazon for $3. Yes. Three dollars. Three bucks. Three smackaroos. But I’m not kidding when I tell you that the book arrived within a couple of days… it was brand new! The book was in absolutely perfect condition, but alas, no notes or markings from the previous owner! Bummer.

And now, it sits on my coffee table, with bookmarked pages of all of the recipes that I will be trying in the near future. Like these Polenta Fontina “Paninis” with Mushroom Sauce.

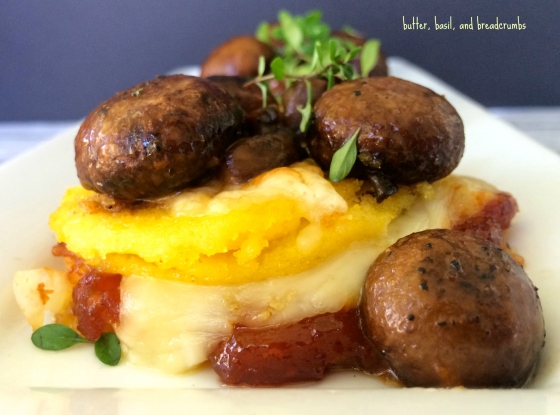
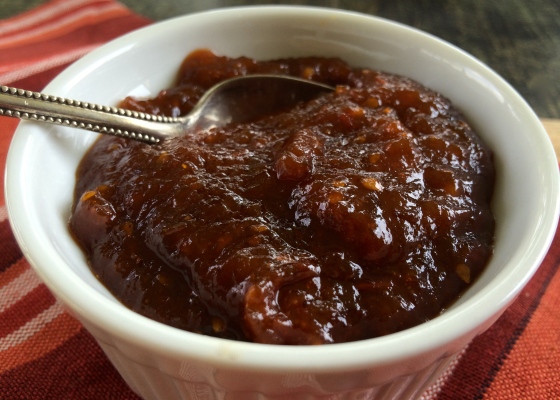
As soon as I saw this recipe, I knew that it was the first one that I would try. But you know, I can’t leave things well enough alone… The original recipe called for sun dried tomatoes…which….I should say would have been delicious….but I thought that it needed something more substantial…something with “oomph”… so I made a caramelized onion and tomato jam that is simply out of this world, and that took the place of the sundried tomatoes. I  sautéed mushrooms instead of a sauce, and I made my own polenta, rather than purchasing a tube.

grilled polenta 2Oh yeah, I made the right choice. The sweet, yet savory jam brought so much “happy” to the dish… it was like an instantaneous friendship with the mild, yet tangy fontina… the earthy mushrooms, and the crisp buttery polenta. They just belonged together.

The paninis are perfect for a brunch… serious…poach an egg and throw it on top. Delicious. They’re perfect for lunch…they’re perfect for appetizers…or would make a lovely light dinner!

And….you can be sure that I’ll be making notes in this book for the next owner….whomever that may be…

Oh yeah, and I’ll be sharing a couple of the things I learned from cheese making very soon!

Life is good. It’s a “One man’s old cookbook, is another man’s treasure” kind of good…

grilled polenta 4

 Fontina and Mushroom Polenta Panini 
Serves 4
Adapted from the Recipe: “Polenta Fontina “Paninis” with Mushroom Sauce from the cookbook: The Great Big Butter Cookbook by Diana von Glahn

16 Polenta Rounds (Recipe below)
Caramelized tomato and onion jam (Recipe below)
5 oz fontina cheese (1 oz grated, 4 oz sliced into 8 slices)
2 tbsp butter for polenta rounds plus 1 extra tbsp butter for sautéing mushrooms
8 oz whole baby bella mushrooms
1 tbsp fresh thyme, chopped
1/2 tsp salt
1/4 ground black pepper
A few sprigs fresh thyme for garnish

Melt 2 tbsp butter in a large frying pan. Add 8 polenta rounds to the frying pan. Fry until golden browned, and flip. Fry on the other side until browned. Remove from pan, and set aside on a cooling rack. Add the remaining 8 polenta rounds, and repeat the frying until both sides are browned.

Leaving the second batch of polenta rounds in the pan, reduce the heat on the stove, and add about a tablespoon or so of the caramelized tomato and onion jam to the tops of each of the 8 polenta rounds that are still in the frying pan. Place a slice of fontina cheese on top of each of the jam topped rounds. Place the reserved rounds on top, as a sandwich. Sprinkle each sandwich with the grated fontina. Top the pan with a lid, and let sit until the cheese has melted.

In the meantime, in a separate frying pan, melt the 1 tbsp butter. Add the bella mushrooms, salt, pepper, and chopped thyme. Saute for about five minutes, or until the mushrooms are golden brown.

Top each panini with the mushrooms, and garnish with the fresh thyme.

Serve hot.

Quick Polenta Rounds

Makes 16 rounds, 8 panini sandwiches
1 cup quick polenta
3 cups water
1/2 cup grated Romano cheese
Bring the water to a boil in a medium saucepan. Add the polenta, simmer for about three minutes, or until the polenta pulls away from the side of the pan. Remove from heat, and stir in the Romano cheese.

Pour into a buttered 9″x11″ pan, and let sit until cooled. Once the polenta has set, cut into 2-1/2″ – 3″ circles. Set aside.

Caramelized Onion and Tomato Jam
Makes One Cup

IMG_3008

1 large onion, sliced thin
2 tbsp butter
2 tbsp water
1 pound assorted cherry tomatoes
1/4 cup brown sugar
1/2 tsp salt
1/2 tsp crushed red pepper
1 tbsp cider vinegar
1 tbsp fresh lemon juice

Melt the butter in a heavy skillet. Add the onions, and sauté until a dark golden brown. Add the water, cherry tomatoes, brown sugar, salt, crushed red pepper, vinegar, and lemon juice. Cover and simmer until the tomatoes have burst, and using your wooden spoon, gently press down on the tomatoes to break them up. The skins will start to separate from the tomatoes. Remove them if you want, but it’s really not necessary! (the skins on cherry tomatoes are so thin, they will break up when ground in the food processor). So honestly? Don’t drive yourself crazy trying to remove them!

Simmer until all of the juices have caramelized, and the sauce has thickened.  Let cool. Add the cooled tomato and onion mixture to the food processor, and process until smooth. This can be refrigerated for up to two weeks.

Enjoy!

grilled polenta 2

Hot Dog Buns

IMG_2376So…I shared my hot dog sauce with you the other day…and now it’s time for the most important part. At least it’s the most important part for me… The part that can make or break the hot dog experience.

The bread…
The bun.

I love bread.
Especially when it’s hot out of the oven.

IMG_2375

I admit to eating one of them as soon as I pulled them out of the oven, and, of course, it was gobbed with butter! I’ll tell you, I could have made a meal on these rolls alone. But I stayed strong, I stopped at one.

Ok… One and a half.
Ok… Two.
I stopped at two.
And then I was too full to eat the hot dog!

Anyway…I spent a lot of time looking for the perfect hot dog bun recipe…trying different recipes from different blogs.. and finally happened upon Joy the Baker’s blog, who got the recipe from King Arthur Flour.

I’m so impressed with them, the rolls are so soft and fluffy, and yet they don’t fall apart…they’re perfect for hot dogs!

And…while they’re very easy to make, I’m not going to lie, there’s some prep work to them… rolls are basically a bread dough… and bread takes time to prepare…

IMG_2400

So, while I want to say that I’m never buying store bought hot dog rolls again, and only make them homemade from now on…

We all know that would be a little white lie…
Ok, a big white lie.
A big fat lie.

There is no doubt that I’ll buy store bought again. Sometimes I just don’t have the time to make them homemade… ok, a lot of the time I don’t have the time….

But I do plan to make these again… and again. Seriously, they’re just that good…and I know would be so delicious with burgers…and easy enough to shape into hamburger buns!

The important thing that Joy mentions in her post, is that you shouldn’t let the dough over proof, and don’t handle the dough too much. This is a squishy dough, it’s not the dough you’re used to when making bread.

IMG_2365
IMG_2366
IMG_2368
Handle it lightly, and you’ll be rewarded with those light and fluffy rolls!Once you have the rolls shaped, let them be! They don’t have to be perfect! They will form a perfect bun as they rise.
IMG_2369
IMG_2371
IMG_2372
IMG_2373
If anything, everyone needs to experience a homemade bun with their hot dog! Impress your friends at your next cookout when you come walking out with a basket of freshly baked (and still warm) hot dog buns. You’ll be the life of the party!

Life is good, it’s a “You’re probably happy that this is the very last hot dog post, but I really had to share this recipe with you because it’s awesome” kind of good..
IMG_2376

Homemade Hot Dog Buns

Prudy’s note: This recipe called for 6 to 7 1/2 cups all purpose flour. Trust me, don’t go as high as 7-1/2 cups flour. Stop at 6 cups, or even 5-1/2. You’ll be kneading it, so it will form a dough that you’ll be able to work with.  I also used sesame seeds instead of poppy seeds.  I love poppy seeds, but  fussy Mike doesn’t (I know..surprise, surprise).

This recipe is copied from Joy the Baker’s blog.

recipe from King Arthur Flour

makes 18 buns

2 tablespoons granulated sugar
2 packets or 2 scant tablespoons active dry yeast
1/2 cup warm water (105°F to 115°F)
2 cups warm milk (105°F to 115°F)
2 tablespoons olive oil
2 teaspoons salt
6 to 7 1/2 cups all-purpose flour*
egg wash: 1 egg beaten with 1 tablespoon cold water
poppy seeds, coarse black pepper, and sea salt for topping (optional)

*King Arthur Flour gives a fairly wide flour measurement variation for a couple of reasons. First, you’ll find in the summer that you’ll need a bit more flour to absorb a given amount of liquid than you will in the winter. This is because it’s humid and flour acts somewhat like a slightly dampened sponge as a result. I used 6 1/2 cups flour for my hot dog buns.

King Arthur Flour also notes that this particular dough should be quite slack, i.e., very relaxed in order to make soft and tender buns. So you want to add only enough more flour, past the 6-cup point, to make the dough just kneadable; sprinkling only enough more to keep it from sticking to you or the board.

To mix the dough: In a large bowl, dissolve the sugar and then the yeast in the warm water. Add the milk, oil, salt and 3 cups of flour to the yeast mixture. Beat vigorously for 2 minutes.

Gradually add flour, 1/2 cup at a time, until the dough begins to pull away from the sides of the bowl. Turn the dough out onto a floured work surface.

To Knead the dough: Knead until you have a smooth, elastic dough. Because this dough is so slack, you may find that a bowl scraper or bench knife can be helpful in scooping up the dough and folding it over on itself.

To rest and rise the dough: Put the dough into an oiled bowl. Turn once to coat the entire ball of dough with oil. Cover with a tightly-woven dampened towel and let rise until doubled, about one hour.

To shape the buns: Turn the dough out onto a lightly oiled work surface. Divide into 18 equal pieces. This is done most easily by dividing the dough first into thirds, then those thirds into halves, then the halves into thirds.

Roll the dough into cylinders, 4 1/2-inches in length. Flatten the cylinders slightly; dough rises more in the center so this will give a gently rounded top versus a high top.

Line two baking sheets with parchment paper and lightly grease the parchment paper.

For soft-sided buns, place them on prepared baking sheets a half inch apart so they’ll grow together when they rise. For crisper buns, place them three inches apart.

Second Rising: Cover with a towel and let rise until almost doubled, about 45 minutes. Just drape a towel over the buns for the second rose, a piece of plastic wrap may stick and deflate the buns when the plastic is removed.

To Bake: Fifteen minutes before you want to bake your buns, preheat your oven to 400°F. Just before baking, lightly brush the tops of the buns with the egg wash and sprinkle with whatever seeds strike your fancy.

Bake for 20 minutes or until the internal temperature of the bread reaches 190°F. (A dough thermometer takes the guesswork out of this.)

When the buns are done, remove them from the baking sheet to cool on a wire rack. This will prevent the crust from becoming soggy.

Enjoy!

IMG_2376

It’s Fiesta Friday #19, and I’m Co-Hosting and Bringing My Smoked Baby Back Ribs!

IMG_1834

I’ve been looking forward to this Fiesta Friday #19, because I have the honor of co-hosting this week with the lovely Sue O’Bryan from Birgerbird! I’m thrilled to be co-hosting with Sue… she’s such a sweet, sweet girl, and the recipes and stories that she shares are always delightful!

A special thank you to Angie for hosting Fiesta Friday; and I cannot believe that we are at week number 19 already!! How time flies when we’re having fun, and Angie certainly knows how to put on a fabulously fun party! I hope that you’ll stop by and see all of the delicious recipes that everyone has brought to the table this week!

….AND….If you are a blogger and haven’t had the chance to link up, now is the time! If you are new to this party, or even new to blogging…we welcome you to join us! It is a wonderful way to meet other blogger friends, and gain exposure and views! Please feel free to contact me, Sue, or Angie if you have any questions! We are here to help, and look forward to meeting you!!

Please be sure to link your posts to Angie’s blog, as well as my blog so that we know that you have arrived! It’s as simple as clicking on the “Click to Join” button right here…

fiesta-friday-badge-button-click-to-join1

So, I have been working on mastering the art of smoking. Like I mentioned the other day….not the nicotine or cannabis type… but the art of taking a beautiful cut of meat, and rubbing glorious spices all over it, and placing it in a box in which wood burns and smokes to create a most delectable and juicy inside, but yet that crispy black bark on the outside that we all adore.

I am by no means a certified professional smoker. When it comes to the art of charcuterie…well…let’s just say I’m no Picasso. Far from it. But I’m learning.

It has taken a good year to figure out how to properly smoke baby back ribs. Ok, I use the word “properly”, but maybe I should just say that I figured out what works the best for me when it comes to smoking ribs.

IMG_1836

I have spent so much time researching and reading up on rubs and smoking, you’d think that I’d know what I was doing by now, but there is no doubt that it takes patience and a little bit of experience to get it perfect.

Low and slow.
Nope.
That just cooks shoe leather.

185° for “x” amount of hours… That’s what everybody says. And that truly did not work for me. I don’t know if it’s the smoker that I use, but every piece of meat that I tried that method on, dried out. Maybe I kept it in too long. I tried the method of smoking it for 6 hours, and then wrapping it in plastic wrap, and then again in foil, and throwing it in the oven for another 2 hours. It burned.

IMG_1831

And then finally, I stumbled upon this 3-2-1 method. If you Google 3-2-1, a ton of links will pop up. It works, it really, really works!! Rub the piece of meat with spices, and smoke it at 225° for three hours. Wrap it in foil; throw it back in the smoker at 225° for two more hours. Remove the foil, slather it with barbecue sauce and place it back in the smoker at 225° for one last hour. I don’t know if it’s because I’ve become really comfortable with this method or what, but it seems to me that this is the easiest method that I’ve ever tried (aside from leaving it in the smoker for hours and hours, only for it to become shoe leather!).

IMG_1832

As for the rub, I’m sharing mine with you, but you’ll find that you probably change it up to suit your taste. I tend to like mine sweet, and a little on the spicy side. It’s a simple rub, but does the trick.

If you are thinking about buying a smoker, I highly recommend it. I went back and forth for the longest time, unsure if I’d really use it….would it be one of those things that I buy, but ends up sitting in the back of the garage filled with junk? I can promise you, I use mine all the time. It’s right at the front of the garage, ready to go whenever I’m ready! ..And clean up isn’t as bad as I thought it would be… it isn’t instant clean up, but I soak the racks overnight, and by the next morning, everything just washes right off! Trust me, I think everyone who owns a smoker, will attest that it’s one of the best things that they ever bought.

While I finally feel confident in smoking baby backs, and sharing them with you… there is still so much that I have to learn… brisket being my next challenge! So, stay tuned!!

I’m taking these ribs to Angie’s Fiesta Friday to meet up with Sue, and welcome everyone who has brought something to our table. I hope to see you there!

Life is good…it’s a “Friends getting together, sharing and laughing, and meeting new friends… just a happy and fun time” kind of good..

IMG_1825

Smoked Baby Back Ribs
Six Really Generous Portions

Just a quick Note: The recipe for the rub is just the right amount for three racks of baby backs. Adjust it accordingly to the amount of ribs you will be making.

Plan on preparing the ribs the night before you’re going to smoke them. You will need jumbo zipper disposable plastic bags to brine them in.

The Night Before:
3 racks baby back ribs
3 cans Coke, Pepsi, Dr. Pepper, or Root Beer
Your favorite flavor wood chips. I tend to use Apple, Jack Daniels, Cherry, or Maple

Remove the ribs from their packaging. On the back of each rack, you’ll find a silver membrane that you’ll want to remove. You don’t have to, but you’ll find it more of a yucky inconvenience if you don’t. Been there. Done that.

Take a sharp knife, and beginning at one end of the rack, slice just beneath the membrane so that you can get your fingers underneath it. Once you do that, you’ll be able to peel it away from the ribs with your fingers. Just continue to work it up until you’ve removed the whole thing. It’s pretty easy to do.

Once you have the membranes removed, cut the ribs in half, by finding the middle, and cutting in between the bone. Place the rib halves into the jumbo plastic bag, and place the bag in a very large bowl (just in case it decides to leak, you won’t have a huge mess all over your fridge!). Pour the three cans of pop or soda, (Yes, I say pop, I’m a Western NY girl) over the ribs. Seal the bag, and refrigerate overnight.

In the morning, prepare your smoker per manufacturer instructions and heat it to 225°. Remove the ribs from the brine. Discard the brine. Generously rub the spices all over the rib halves, and place on the racks of the smoker. Add the wood chips to the smoker per the manufacturer instructions. Close the smoker, and leave it for 3 hours. Continue to add wood chips as often as the instructions indicate.

After 3 hours, remove the ribs from the smoker and wrap each one in foil. Place the foil wrapped ribs back into the smoker, and leave for 2 hours.

After the 2 hours, remove the foil wrapped ribs from the smoker, and remove the foil. Generously slather your favorite barbecue sauce all over the ribs, and place the ribs back into the smoker for one last hour. Continue to add the wood chips as the instructions indicate.

After that last hour, the ribs will be absolutely juicy, fall off the bone perfect!!

Serve immediately with your favorite picnic sides, such as this German Potato Salad, these potato chips, and these Buffalo Chicken Deviled Eggs!

The Rub:
1 cup brown sugar
1 tbsp garlic powder
1 tbsp black pepper
1 tbsp paprika
2 tsp salt
3 tsp ground mustard
¼ tsp cayenne

Blend the brown sugar, and all of the spices together until combined. Generously rub all over ribs. This is delicious for any type of meat that you plan to smoke!

Enjoy!!

IMG_1836

Buffalo Chicken Deviled Eggs

My plan for today’s post was to talk about my smoking adventures…(No silly…. Not of the nicotine or cannabis kind!)… but I received an email telling me that today is National Egg Day, so I have switched gears mid-flight, and we will talk about smoking another day…

egg-1-4So instead, let’s talk about deviled eggs for a few minutes. I’m a deviled egg girl. I love them. You can skip the egg salad sandwich, just serve me a couple of classic deviled eggs, and I’m in heaven. Throw a green olive on top, and I’ll probably ask you to marry me!

I think it was about 15 years ago when I first tried “flavored” deviled eggs. One of my co-workers brought some eggs in for a work party, and she had prepared them with salsa. I think that’s when I made my first marriage proposal…and she let me down easy…letting me know that it just wouldn’t work out as we were both already married…and I was letting her salsa deviled eggs rule my heart…

She was right of course…and for many, many reasons, it wouldn’t have worked out. It seems that I tend to let food rule my heart…and I have offered many proposals of marriage**…only to be let down time and time again…but that’s ok, because the proposals are always made while I’m lost in the throes of food!

**Disclaimer: My proposals of marriage are always in fun, and I have absolutely no intention of marrying anyone!!

egg-1-2Not too long ago, I was at the Griffin GastroPub in Niagara Falls with my friends for dinner, and on their appetizer menu, they had Buffalo Chicken Deviled Eggs. Hmmm…. Even I, the girl who loves a gazillion flavors going on at once, was a little hesitant, wondering how that would even taste. But my hesitation was fleeting, and I ordered them.

Wow.
Holy Smokes.
I didn’t know who to ask to marry me.
The waitress?
The chef?
The owner of the restaurant?
Could I ask all three, and if I did….if three is a crowd, what would four of us be?
That was way too much to process while I was trying to enjoy the eggs…

egg-1-3The marriage proposal was quickly forgotten…because as I was eating the eggs, I was studying, examining, and considering every ingredient in them. I knew that I’d be trying to recreate them at home. And…I did. And…they are delicious.

This is such a great recipe. They’re perfect to take to parties as a finger food, grab a couple for lunch in place of a sandwich, or put them on the table with some chips (Homemade!) to go with your hot dog or burger! The beauty of this recipe is that you can make these so quick and so very easily…shred up a rotisserie chicken that you can purchase fully cooked at the store…boil up a few eggs, mix them with mayonnaise, hot sauce, and blue cheese… chop a little parsley, or cilantro (if you’re brave enough) for a little garnish… and boom, you have a great little deviled egg to share, or keep for yourself (I prefer the latter!).

And then sit back, and wait for the marriage proposals to start coming in…

Life is good… it’s a “Deviled eggs make me feel really devilish” kind of good…

IMG_0165

Buffalo Chicken Deviled Eggs
Makes One Dozen, or 24 Halves

1 dozen hard boiled eggs
1/2 to 3/4 cup mayonnaise
1 tbsp yellow mustard
3/4 cup shredded or chopped cooked chicken (rotisserie chickens work perfectly!)
1/4 cup hot sauce
4 tbsp finely chopped celery
3 tbsp crumbled blue cheese
Salt and pepper to taste

Chopped parsley or cilantro for garnish
Finely chopped celery for garnish
Reserve about 4 tbsp of chicken for garnish
Crumbled blue cheese for garnish
Hot sauce for garnish

Mix the chicken and hot sauce together in a small bowl.  Set aside.

Carefully slice the eggs in half lengthwise, and remove the yolk to a medium size bowl. Set the egg halves aside.  To the bowl of yolks, add the mayonnaise and mustard. Mix with a hand mixer until light and fluffy. Add the chicken mixture, celery, and blue cheese, and stir by hand until fully mixed in. Add salt and pepper to taste.

To assemble the eggs, using a cooking scoop, add one scoop of yolk mixture to each egg white half.

Sprinkle droplets of hot sauce over each egg. Sprinkle celery, more chicken, blue cheese and parsley (or cilantro) for garnish. Refrigerate for at least one hour.

Serve chilled. Enjoy!

egg-1-4

Writing Process Blog Tour Part II: Sharing Shivaay Delights’ Cheese, Cauliflower, and Broccoli Patties

IMG_0113I had the wonderful opportunity to join Dimple Makani from Shivaay Delights on the Writing Process Blog Tour a couple of weeks ago, and wanted to take it just a step further. I want to share one recipe from each of the girls that I introduced to you in my Writing Process. Today, I’d like to share Dimple’s Cheese, Cauliflower, and Broccoli Patties.

I am still a rookie blogger, but a blogger nonetheless, and I know the hard work that goes into just one post….It isn’t just preparing a recipe and posting pictures.

Nope.
That would be too easy.

Sometimes you’re preparing a recipe. Then preparing it again. Then changing it up, and preparing it the new way… and that repeats until you feel as though you have it right. Then it’s a matter of setting it up to photograph, usually with props of some kind….and then taking pictures….and taking more pictures. And then a few more until you’ve exhausted every angle you could possibly imagine.

And then once you have your photographs all set, then you have the task of writing a post to go with it. What can one say about a piece of broccoli? You want to draw people in from the first couple of words. You want to be witty, you want to be interesting, and you want them to crave that piece of broccoli. But you also want them to know how easy it is to prepare…. And most of all, you want your readers to come back.

And that’s what bloggers like Dimple do, time after time after time…and that’s okay, because we love it. And that love truly shines in every single one of Dimple’s posts. She has that ability to draw you in, not only with her delicious recipes, but her stories as well.

IMG_0122

The minute I set eyes on these Cheese, Cauliflower, and Broccoli Patties, I knew that it would be a matter of time before I tried them…and I’m glad I didn’t wait long, because they are fabulous! I do have to say that I was heavy handed on the broccoli, so mine are definitely more green than Dimple’s…but green or not, they’re still absolutely delicious!!

They don’t take long to prepare, and the cheese melts in with the cauliflower and broccoli…They’re crispy on the outside, and moist on the inside with that gooey cheese…pure deliciousness! They are perfect as the main course, but could also be served as a side dish! Add a fried egg on top and have them for breakfast! This is such a great recipe, so versatile…

I hope you stop by Dimple’s blog for a visit. I know that you’ll keep going back if you do!

Life is good… It’s a “crispy on the outside, moist and cheesy on the inside” kind of good!

IMG_0106

Cheese, Cauliflower, and Broccoli Patties
Recipe copied from Dimple’s Blog: Shivaay Delights

INGREDIENTS
Cauliflower florets half
Broccoli florets half
1 onion
2 to 3 cups self raising flour
1tbsp oil
1 tsp salt
1/3 tsp garlic granules
1/3 tsp chilli powder
2 tsp coriander and cumin powder
Handful of mature cheese
Fine semolina for coating
Sunflower oil for shallow frying.

METHOD
Boil the cauliflower, broccoli and onion. Once soft after about 5-8 minutes, drain and then blitz all three in a food processor.

Season with the salt and spices. Add the one tablespoon of oil and blitz to combine, stir in the cheese.

Gradually add the flour until you get a soft thick runny batter.

Heat up 1cm depth of sunflower oil in a non stick frying pan on a medium heat.

Take one tablespoon of cauliflower batter. Roll in some semolina and flatten to form a patty. Gently place in the frying pan and shallow fry for a few minutes each side until both sides are golden brown.

Serve with barbecue sauce or a chutney of your choice.

I served mine with a tzatziki sauce, more shredded cheese, and a sprinkle of fresh parsley.

Enjoy!

German Potato Salad

IMG_1775

The Potato:
Potatoes have been around for at least 7000 years. I find it kind of funny how much we love them, especially since they weren’t held in high regard up until about 200 years ago. Because the potato is considered a member of the Nightshade family, the leaves of the plant are highly poisonous, so they weren’t really considered a food for the dinner table. They were usually reserved for feeding prison inmates and pigs….and…. if people were eating them at home for meals, it meant that they were of the “lower class”, consumed for sustenance only….which is kind of smart, because potatoes are loaded with potassium, vitamins B&C, iron, zinc, and copper.

IMG_1776I can only imagine what people from 6,800 years ago would think about the variety of potato dishes that we eat today…

They’d be like “But Damn..”
That’s right, you people from 6,800 years ago..
You totally missed the boat on that one..

But seriously? Let’s think about that for a minute… It only took us 6,800 years to figure out what the inmates, pigs, and the “lower class” people already knew….

Potatoes are freaking delicious.

IMG_1807I’m always trying to come up with something original for potatoes, and honestly, there isn’t anything original anymore…but that’s ok, because some of the classic potato recipes are timeless. They’ll never go out of style. The recipes might get revamped here and there…but the classics will always be there to fall back on.

Like potato salad. I mean, how many versions of potato salad are out there…and how many versions do you really rely on?

My guess is that you rely on the classics.
That’s ok.
We all do.

IMG_1778Yeah, it’s fun to try the different variations, but in the end, we stick with the classics. Why? Well, because they’re foolproof, they’re dependable; and reliable at times when we need them the most.

While I love a good Americanized potato salad, I also love German potato salad, and not talking about the kind you can buy in the can! You can have a delicious German potato salad thrown together in the amount of time it takes you to find your can opener, open the can of fake stuff, and heat it up.

It’s a matter of frying a few slices of bacon, frying some potatoes and onions right in that same pan, and then mixing it with a lovely sweet vinegary dressing. Simple, delicious, and the perfect accompaniment with a hot dog on a summer’s day…

Life is good…it’s a “I would have gladly gone to prison, or schlepped with the pigs, just to eat potatoes 500 years ago…” kind of good…

IMG_1783

German Potato Salad
Six Side Dish Servings

8 slices bacon, fried crisp, save the bacon grease
6 medium potatoes, sliced thick
1 lg onion, sliced thick
1/4 cup vinegar
1/4 cup water
2 tbsp sugar (if you like it sweeter, add another tablespoon)
1/2 tsp ground mustard
1/4 tsp black pepper
1 tbsp butter
1 tbsp flour

Fresh parsley for garnish

Fry the bacon until it’s crisp, remove from pan, saving the grease in the pan. Drain the bacon on paper towel lined plate. When cool, break into smaller pieces, and set aside. You’ll want to reserve a couple tablespoons of bacon for garnish later.

Add the thick cut potatoes to the frying pan with the hot bacon grease, and fry until tender and browned. Don’t over load the pan, do it in a couple of batches if necessary. Remove the potatoes from the pan to a plate, taking care not to break the potatoes up. Reserve the bacon grease to fry the onion.

Add the onion to the pan, and sauté for about 15 minutes, until softened and golden brown. The onions need to be removed from the pan, I usually throw them on the same dish with the potatoes.

You’ll notice that there is hardly any grease left in the pan, and that’s ok. To that pan, add the vinegar, water, sugar, ground mustard, and black pepper. Bring to a simmer.

Mix the butter and flour together to make a paste. Add to the vinegar mixture in the pan, and whisk until thickened, about three minutes.

Add the potatoes, onion, and bacon (remember to reserve a little bit of bacon for garnish) to the pan, and carefully stir until they are fully coated with the vinegar mixture.

Add to a serving dish, garnish with bacon and fresh parsley. Serve hot, or cold (your preference).

Enjoy!

TuesdaysTable150x150-horiz peppers

IMG_1802

Affairs of the Eggplant: Eggplant Parm for One

IMG_0167

My kids did not inherit my love of tomatoes. It saddens me, because I think about all of the meals that I could prepare for us…if… only they would love tomatoes. So, there are times when I’m home alone, I make myself some sort of pasta with fresh tomatoes. It’s a special treat for me (both the quiet and the food). Sometimes I’ll make it with mushrooms, sometimes with zucchini, and sometimes, with eggplant. All of the things that I love, but Mike and Jess hate.

And while she’s not fond of tomatoes, Katie did inherit my love of mushrooms, zucchini, and eggplant. I mean, she LOVES them all! So, this week, my beloved Wegmans had a beautiful display of gorgeous eggplants (aubergines). I couldn’t pass them up, that beautiful purple color just pulled me in. I knew immediately that I’d be making an eggplant parm for one, and thought I would be the best mom if I called Katie to come and pick it up after I was finished photographing it. I knew that she wouldn’t mind the tomatoes too, too much…especially when I told her that it was eggplant.

That didn’t happen.
I’m not the best mom as of this moment.
Because I ate it.
All of it.

I could have made more.
But I didn’t.

I’m sorry Kate.
I owe you one.

I’m expecting an angry text…
Right about…
…Now!

And now that I’ve aired the wrongs against my eldest daughter….I want to talk about how easy it is to prepare one serving, so Kate can make her own (although I will make her some soon)… especially now that we all know that I just cannot be trusted when it comes to affairs of the eggplant.

An affair with eggplant parm and fresh cherry tomato sauce..

IMG_0181

I like to make a fresh tomato sauce with cherry tomatoes. It’s such a quick and easy sauce…one of my favorite go-to sauces when I’m making a meal for just me…one pint of cherry tomatoes is the perfect serving size. And…depending on my particular tomatoey mood for that day, I’ll either leave it chunky, or toss it all in my mini processor to make it smooth. I left it chunky for this meal. I’ll throw it on pasta, rice, even over a fried egg… it truly makes a delicious…and completely satisfies that craving that I have for all of those delicious things that my family won’t eat!

There is something about throwing a pint of tomatoes into a pan of sautéed onions and garlic…I’m totally in my happy zone when I’m listening to them sizzle and burst as they give up the last of their firmness, and begin to cook down to a sauce, and that’s when I grab the potato masher and start mashing them down to sauce. A good 20 minutes of simmering, and you have a wonderful sauce!

IMG_0178

And then there is that age old question…. Tomato skins, or no tomato skins?

When I’m making a sauce from cherry tomatoes, I just leave the skins on. I think that with cherry tomatoes, the skin is hardly noticeable, it so tender, that I just don’t think it’s worth the effort to peel each small tomato. Now if you were planning on using larger tomatoes, then yes…I would definitely get rid of the skin, as it tends to curl up and become a little of an unpleasant texture that is still edible, but not palatable.

The best part of this recipe is that one eggplant will usually make four meals for me. So I’ll prepare one meal, and then freeze the rest of the eggplant for another two or three meals!

Life is good…. It’s a “cherry tomato sauce…and all of my favorite things…on a quiet evening” kind of good…

IMG_0171

Eggplant Parm for One
(or two, or three, or four)

Just a quick note: The measurements for the sauce are for one serving, while the eggplant is a generous four servings. If you want to make this four servings, just quadruple the sauce! Or if just for one, cook the whole eggplant, and then freeze it (two slices at a time with waxed paper in between them) for the next time you’re anticipating a quiet evening for one!

The pasta that I used for this was DeCecco Linguine Fini. It’s one of my favorite pastas, but you use your preferred pasta! For one serving, use about a quarter coin size (maybe a little smaller) serving of dry.

The Eggplant:
1 medium eggplant
1 cup flour
1 tbsp garlic powder
1 tbsp black pepper
1 tbsp white pepper
2 tsp salt
¼ tsp cayenne
3 eggs, whisked
2 cups seasoned breadcrumbs
1 cup grated Romano cheese
¼ cup butter
2 tbsp olive oil
8 oz fresh mozzarella, sliced into 8ths.

Cut the eggplant into eight slices.

Mix the flour, garlic powder, black pepper, white pepper, salt, and cayenne in a bowl that is large enough to dip the eggplant slices in. Whisk the eggs in another bowl that is large enough to dip the eggplant slices in. Mix the breadcrumbs and Romano cheese in a third bowl.

Dip each eggplant slice first into the egg on both sides. Then dip into the flour, making sure that the flour is coated well on both sides. Dip it back into the egg on both sides…. And then into the breadcrumbs, making sure that it’s coated nicely on both sides.

Melt the butter and olive oil in a large frying pan over medium heat. Add each slice of eggplant, and fry until golden brown. Place on a baking sheet that has been sprayed with cooking spray. Add one slice of mozzarella on top of each eggplant slice, and bake at 350 degrees for ½ hour to 45 minutes, or until the cheese has browned, and the eggplant has softened.

The Cherry Tomato Sauce:
1 pint cherry tomatoes
3-4 cloves garlic, roughly chopped (Hey, it’s a dinner for one, there is no kissing planned!)
1 small onion, roughly chopped
¼ to ½ tsp crushed red pepper
Fresh basil. I usually just grab a handful and roughly chop. If I had to guesstimate… I would say maybe ¼ cup chopped.
2 tbsp olive oil

One serving of pasta, cooked according to directions on the box
Fresh chopped Basil for garnish
Fresh grated parmesan for garnish

Heat the olive oil in a medium frying pan, and add the onions, garlic, and crushed red pepper. Sauté on medium heat until the onions are translucent. Add the cherry tomatoes, whole. Let simmer on low heat.

After about 10 minutes, you’ll hear the tomatoes sizzle, and begin to burst. When they start to look really wrinkled, take your potato masher, and mash them down. Cover, and let simmer for about 20 minutes, or until they have cooked down to a chunky sauce. Add the basil and cook for a few more minutes. At this point, you can either leave the sauce chunky, or carefully put it in a food processor to make it smooth.

Cook the pasta according to directions on the box. Make a nest of the cooked pasta in a pasta bowl or dish, and stack 2 slices of eggplant in the middle of the pasta. Top with the cherry tomato sauce, sprinkle with chopped fresh basil, and freshly grated parmesan cheese.

So easy….So delicious! Enjoy!!

TuesdaysTable150x150-horiz peppers

IMG_0181


Fish Tacos with Cilantro Lime Rice and Dirty Agua Fresca… Happy Cinco de Mayo!

IMG_1541

I’ve been thinking about joining in on the Cinco de Mayo fun, and post something really fiesta-ish…but what to make? EveryBODY has done EveryTHING imaginable to prepare for tomorrow’s celebration, so anything I made would have been done already…nothing new…but I knew that if I was going to post anything, it was going to be fish tacos. So then I thought, “Eh, I just won’t post anything..” But then I thought…”Why not post something, even if it’s been done a bazillion times already?…Just do what you do, and it will be okay… “

And so I did…
I did what I do…
And it was more than okay…

I’m sure that fish tacos have been around forever, especially in the coastal areas of Mexico…but I think that the fish tacos that we are familiar with today, are more Americanized… or should I say Baja California-ized? There are so many variations of fish tacos…and it seems that I love them all. I can’t go to a restaurant without zeroing in on them, and everything else seems to disappear on the menu. And each time, I proclaim that that particular taco, at that particular time is my most favorite.

IMG_1562

So I had to decide what kind I wanted to talk about tonight, and I thought maybe something on the lighter side, a no nonsense type of taco. A simple grilled cod taco, with a green tomato salsa, cilantro lime rice, and a dirty agua fresca to drink. I know… dirty? Yes. Dirty. Perfect.

Can agua frescas be dirty?
Well…now they can!
Should agua frescas be dirty?
Oh yes… yes they should!!

IMG_1554

Seriously though, I’m totally into dirty drinks now. I tend to go through phases..and it just so happens that I now want everything muddled, shaken, and not strained. Thank you Ryan.

IMG_1569

Back to the taco… I was thinking about a green tomato salsa, and found the prettiest green tomato at my beloved Wegmans. It had just a hint of pink on it, and for the purpose of cosmetic delight only, I bought it. I love how it looks in this salsa!!

I am a firm believer that avocados belong in a taco..no ifs and or buts… cilantro and jalapeños just go with the territory… celery added a wonderful crunch.. needless to say, this salsa was perfectly light to go with the cod. It wasn’t over powering, which was perfect, so that the fish could still be the star of this show.

And it was.
A delicious fish taco.

Life is good… it’s a “starting out unsure about posting yet another fish taco, but truly glad I did, while I drink a dirty kind of drink…” kind of good..

IMG_1570

Fish Tacos
Makes 4 6” tacos

1 lb Cod filet
Salt and Pepper
Old Bay Blackened Seasoning
Olive oil

4 – Six inch flour tortillas
Vegetable oil

1/2 Avocado, cut into small chunks

Prepare your grill (if you don’t plan to cook on the grill, that’s ok. This can be cooked on the stovetop too!)

Preheat oven to 350 degrees.

To make the tortilla cups, brush both sides of each tortilla. Mold each cup by fitting it into a small tartlet pan. Bake for 10 minutes or until golden brown. Remove from oven, and remove from tartlet pan. Place on grill for a few minutes to char the edges. Remove from grill and set aside.

Rub the cod filet with olive oil. Season with salt, pepper, and blackened seasoning. Place fish on grill (using a grilling pan or cedar plank if you prefer), and cook until flaky..about four minutes on each side. Remove from grill.

Divide the fish between the four tortilla cups. Serve with green tomato salsa, avocado, and cilantro lime rice.

Green Tomato Salsa
1 green tomato, seeds removed and chopped
1 stalk celery, chopped
1 clove garlic, minced
3 green onions, sliced (including the green)
1 tbsp minced fresh jalapeño
1 tbsp chopped cilantro
Juice of one lime
2 tbsp olive oil
1/2 tsp sugar
Salt and Pepper to taste

In a small bowl, combine the tomato, celery, garlic, green onions, jalapeño, cilantro, lime, olive oil, sugar, salt and pepper. Let sit in refrigerator until ready to use.

Cilantro Lime Rice
1 cup uncooked rice
1 cup water
1 cup chicken stock
1 tbsp butter
Juice of 1/2 lime
2 tbsp cilantro, chopped
Salt and Pepper

Combine the rice, water, chicken stock, and butter in a medium sauce pan. Bring to a boil. Give it a good stir, reduce the heat, and cover. Let simmer, covered, for about 25 minutes. Let sit for five minutes. Add the lime and cilantro. Season with salt and pepper.

Dirty Agua Fresca
(Makes one drink)

Just a quick note…I know that this isn’t technically an agua fresca, but it’s fun. Delicious. Try it. You’ll love it!

8 oz spring water
Juice of 1/2 lime
1 to 2 tbsp mint
1 tsp turbinado sugar
Ice
Strawberry for garnish

Muddle mint in a cocktail shaker. Add lime juice, ice, water, and turbinado sugar. Place cap on cocktail shaker, and shake for a couple of minutes. Pour into a glass, and garnish with strawberry.

Enjoy!

IMG_1569

Lemon Chicken Linguine

I love lemons.
And I want a lemon tree.

IMG_1318

I’m trying to find out exactly how small a dwarf lemon tree is. So far, everyone (friends, websites, etc) tells me that a dwarf lemon tree will reach about six feet tall, and if I wanted one in my house, I’d need to dedicate a room solely for the tree. I’m starting to wonder if I really even need a living room…

I use lemons all the time… pretty much on a daily basis…well…almost on a daily basis. Frequently. So, a lemon tree would be so wonderful to have growing in my yard..or in my lemon room (a.k.a. living room)..

IMG_1309

What I wanted to hear was that the tree would reach about four feet tall. And that I could keep it in a little pot, bring it outside in the summer, and then bring it back inside during the winter months. Unfortunately, it’s not meant to be.

Unless I move someplace warm…there are no lemon trees in my future.
I don’t like those words.
I don’t like those words at all.

While that’s a real bummer, it’s not the end of the world, because there are lemons always readily available to me whenever I need them. A lemon tree just would have been fun, you know?

I’m not going to give up, and will continue my search for that perfect little lemon tree.

But in the meantime, I’ll continue to use the lemons that I can buy at the store, and that’s ok, because they do exactly what a fresh lemon would do for me… like this Lemon Chicken Linguine.

Despite my fame for posting heavy creamy dishes ( I really don’t eat that way all the time), this dish is definitely on the lighter side…not laden with sauce, but the lemon truly makes up for that! A squeeze of lemon over the chicken at the end gives this such a refreshing taste! And the asparagus? Well, it’s asparagus…it just belongs in this recipe.

IMG_1315

This is actually one of the meals that I make often, but I felt like it wasn’t worthy of the blog…maybe “not worthy” is being a little too harsh…maybe I thought it was too easy, a no brainer… because it is a common meal that I make. But just like the Embarrassingly Simple BLT Wedge Salad I posted the other day, I started to think that it’s ok to post ordinary meals that I make for my family. After all, my promise to you was simple, rustic and delish, right from the very beginning. This dish truly fits that bill.

It’s quick. It’s easy. It’s delicious. And everyone loves it. Well, maybe not your pickiest eater, but that’s why you have chicken nuggets stashed away in the freezer, right?

Life is good.. it’s a “Not giving up on the lemon tree, and thinking that I really don’t need a couch…” kind of good…

IMG_1293

Lemon Chicken Linguine
Serves Four

For the Chicken:
8 chicken breast tenders
1 cup flour
1 tbsp black pepper
1 tbsp white pepper
1 tbsp garlic powder
1 tbsp salt
1 tsp cayenne
Olive oil
Juice of ½ lemon

The Pasta:
½ pound linguine

For the Sauce:
½ cup butter
3 cloves garlic, minced
2 shallots, minced
1 lb fresh asparagus tips (save the stalks! Use them for another meal…chop them up in eggs! Make soup! Just don’t toss them!)
2 cups chicken stock
Juice of 1 lemon
1 cup Romano cheese
3 tbsp chopped fresh parsley
Salt and pepper to taste

Garnish:
Fresh lemon zest for garnish
Fresh parsley for garnish
Fresh ground black pepper
Lemon wedges for garnish

Mix the flour, black pepper, white pepper, garlic powder, salt, and cayenne in a medium size shallow bowl. Dredge the chicken breast in the flour mixture until well coated.

(While the chicken is cooking, bring a pot of water to boil. Cook the linguine per the instructions on the box. )

Pour enough olive oil in a large frying pan to coat the bottom. Sauté the chicken about four minutes on each side, or until fully cooked and golden brown. Right before removing the chicken from the pan, drizzle with the lemon juice (1/2 to 1 full lemon, depending on your lemon preference) Remove the chicken from the pan, and set aside. Save the pan with the oil, you’ll use that for the sauce.

Immediately after taking the chicken from the pan, add the butter, garlic, and shallots. Sauté for about two to three minutes, or until golden. Add the asparagus, and sauté until tender (not mushy, but tender), about three to five minutes. Remove the asparagus from the pan, and set aside. Add the chicken stock and the lemon, and simmer for about 5-10 minutes. Salt and pepper to taste.

As soon as the pasta is cooked, transfer it from the water to the pan of sauce with tongs or a wire strainer. Mix the pasta around in the sauce until it is fully coated, and then add the asparagus back to the pan. Add the Romano cheese and parsley, stirring until the pasta is fully coated.

Serve with the chicken and lemon wedge. Garnish with a little more parsley, fresh lemon zest, black pepper.

Enjoy!

IMG_9946