Peanut Butter Pie Jars

IMG_8118

One of Michael’s pet peeves with me is that I’ll perfect a recipe, and then move on to the next challenge. He claims that once a recipe is perfected, it’s never to be seen again.

I say that’s nonsense.
He’s completely mistaken.
Ok, yeah. He might be right..

This past summer, I wanted to recreate Mike’s favorite peanut butter pie that I buy for him from the patisserie at my beloved Wegmans. I thought that the whipped peanut butter filling would be my challenge, but it turned out that the crust was the challenge! I tried several different crusts (oreo, graham cracker, etc) before I actually got it right. Because this pie is for him, it was only right that Mike should be the taste tester, and as the pie recipe progressed, he was actually the one who chose the final crust. “You nailed it, mom”…was finally music to my ears!!

IMG_8130

I admit, I haven’t made it in a while, and he’s been asking for it on a weekly basis, probably for the last three months. I figured I better get it made before I prove him right!

IMG_8129

I think the best part of this dessert is that you can make it into the actual pie, or make it into a tartlet, a cake, mini dessert cups, or bake it right in individual canning jars for easy transport! Mike doesn’t care what shape or form it is when I make it, as long as I actually make it!!   He was just as happy with them in jars this time around, as he was with the tart shown above.  He didn’t even mention the missing Reeses cups!

Life is good. Life is “whipped peanut butter and a happy son” good.

IMG_8126

Peanut Butter Pie Jars

You can easily make this into a 9” x 13” pan by doubling the recipe for the crust, the whipped peanut butter, and the whipped cream.

Brownie Crust
3/4 cup all purpose flour
½ cup unsweetened cocoa
½ tsp baking powder
¼ tsp salt
½ cup butter, melted
1 cup sugar
2 eggs
1 tsp vanilla

Heat oven to 350 degrees. Prepare pan(s) or jars by spraying with nonstick cooking spray.

In a large bowl, combine the flour, cocoa, baking powder, salt, butter, sugar, eggs, and vanilla. Mix until well blended. Pour into prepared pan(s) or jars. Bake for about 30 minutes or until toothpick, when inserted, comes out clean. Let cool completely.

IMG_8107

IMG_8111

IMG_8114

Whipped Peanut Butter
1 – 8 oz package cream cheese
1 cup peanut butter
1 ½ cups heavy cream
½ cup powdered sugar
1 tsp vanilla

In mixing bowl, whip the heavy cream and powdered sugar until stiff peaks form. Transfer to another bowl, and set aside. In mixing bowl, cream together the cream cheese , peanut butter, and vanilla. Fold in the whipped cream until it’s well blended.

Spread over brownie crust.

IMG_8116

Whipped Cream:
1 ½ cups heavy cream
1 tsp sugar (or more, depending on how sweet you like your cream)
1 tsp vanilla

In a large mixing bowl, whip the heavy cream and sugar until stiff peaks form. Stir in the vanilla. Refrigerate until ready to use. Spread over whipped peanut butter.

Chocolate Sauce:
Note: Don’t make this until you have assembled the pie, and are ready to drizzle with chocolate sauce.

½ cup semi-sweet chocolate chips
1-2 tbsp heavy cream

In a small microwave proof bowl, add the chips and one tablespoon of heavy cream. Cook on high in your microwave for 30 seconds. Remove from microwave, and stir until all of the chips are melted. If it’s too thick to drizzle, add another tablespoon of heavy cream, and keep adding drops of heavy cream until it’s “drizzle” consistency.
Drizzle over whipped cream.

Assemble the Pie:
Brownie Crust
Whipped Peanut Butter
Whipped Cream
Chocolate Sauce
Mini Reeses Cups (Optional)

It doesn’t matter whether you’re making a pie, mini tartlets, a big tartlet, a cake, or individual jars, the crust is the first layer. You can keep it right in the pan that it was baked, unless you’re using a removable bottom tart pan.

Spread the whipped peanut butter over the crust. Top with whipped cream. Drizzle with the chocolate sauce. Garnish with a mini Reeses cup.

Enjoy!

IMG_8121

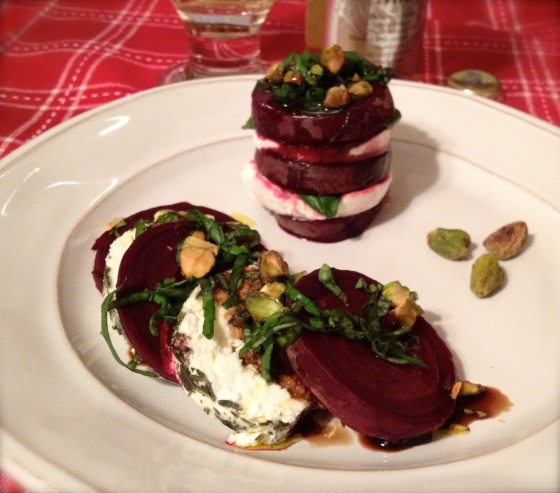
Twisted Tuesday: Goat Cheese and Beet “Caprese” Salad

IMG_8153

I just love Caprese salad.  And even though I know it’s frowned upon, I love to drizzle it in sweet, aged balsamic vinegar.  A true Caprese salad is made from vine ripened tomatoes that are red and juicy, fresh and moist mozzarella (preferably buffalo mozzarella, but since it’s so expensive, the more popular is cow’s milk mozzarella), and fresh green basil…all drizzled in a high quality olive oil, and seasoned with salt and fresh ground pepper.  The Island of Capri’s population would be horrified at the thought of ruining what are three beautiful and absolutely perfect ingredients with a drizzle of balsamic, and because they believe that the vinegar will break down the delicate cheese. 

Well, I’m not horrified, and I think that the delicate cheese is much stronger than they think. I like it.

The Caprese salad was actually created in the 1950’s at the Trattoria da Vincenzo (A restaurant in Capri) for it’s regulars who would request a fresh tomato and possibly fresh treccia cheese (similar to mozzarella, but drier) salad.

As I was researching the origin of the Caprese salad, I read that Capri’s name could have originated from capra, meaning goat.  The very first thought that came to mind was, if the Caprese salad was created by someone on the Island of Capri, whose name could have originated from the word “goat”, then why is it that the Caprese salad is made with Buffalo Mozzarella, rather than goat cheese?

IMG_8138

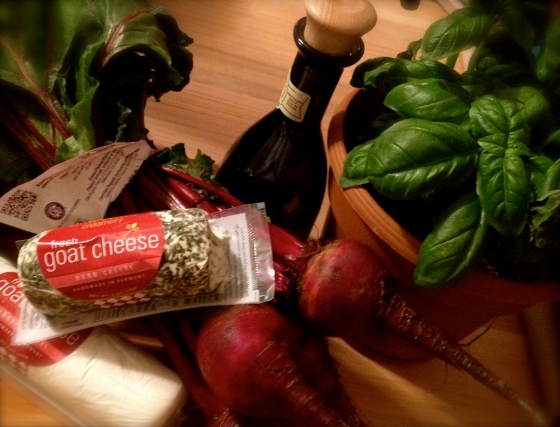
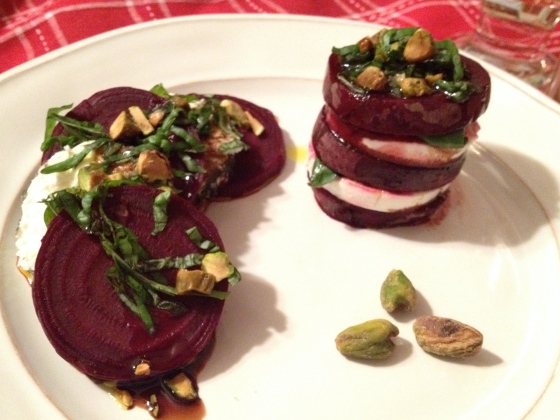
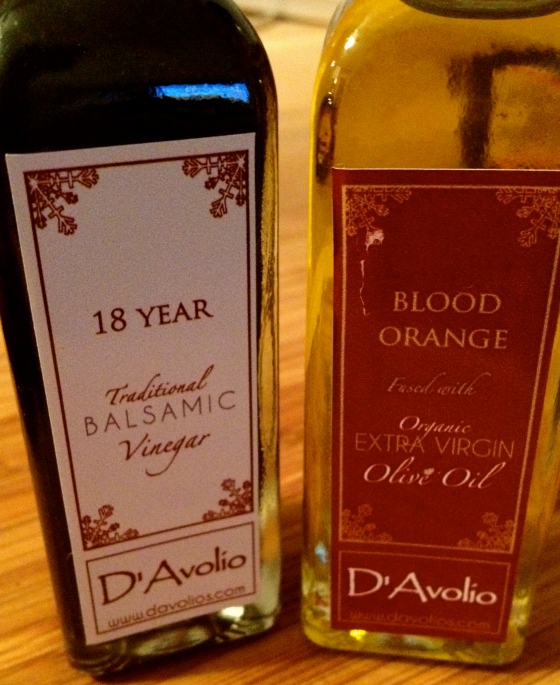
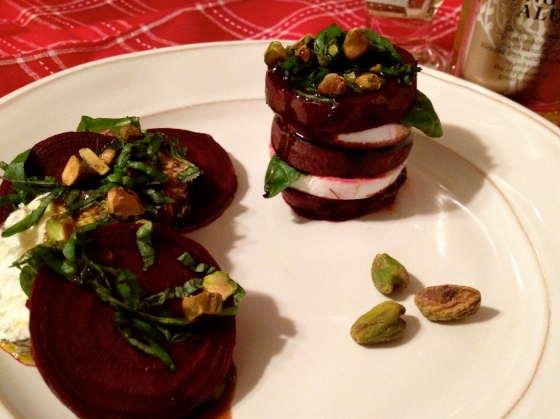
And that made me think that I should “twist” the Caprese salad, using goat cheese. I wanted to keep the colors the same, and knowing that beets and goat cheese are madly in love with each other in other salads, I decided to use fresh beets.  I wanted to keep the basil, just because I love it..but thought to add pistachio to add a nutty crunch.  Oranges complement beets beautifully, so blood orange olive oil would be a lovely addition.  It was.  And… to finish it off the way I think it was made to be finished off… 18 year old balsamic vinegar.

IMG_8148

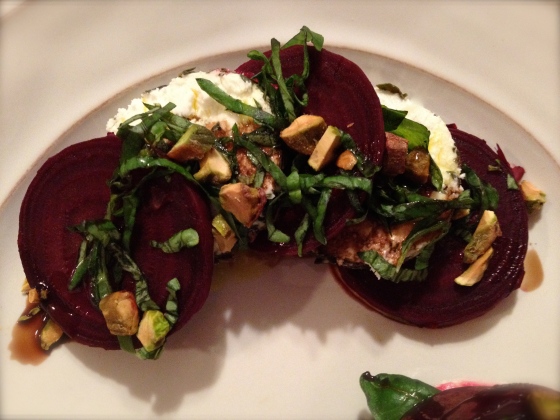
Well, talk about a million flavors popping with every bite.  The sweet beets; the blood orange, the tangy sweet Balsamic, the sharp tang of the goat cheese, the nutty pistachios, and the fragrant basil… I found myself grabbing a slice of Italian bread, and sopping up the beet juice that mingled with the olive oil and vinegar that was left on the plate.  I would definitely make it again… and again….

While I truly love the original, this is an excellent “twist” for the winter months!

IMG_8154

Goat Cheese and Beet “Caprese” Salad 

Serves Two

Just a quick note:  I think that store bought pickled beets would work just as nicely, and would put this salad into the quick and easy category.  I mean, it already is quick and easy, but it does take about 40 minutes or so to cook the beets.

IMG_8143

If you cannot find blood orange olive oil, you can add a teaspoon of fresh orange juice to a tablespoon of extra virgin olive oil.  Or, you can buy them online here.  (No, they’re not paying me to say that!  I just like them.)

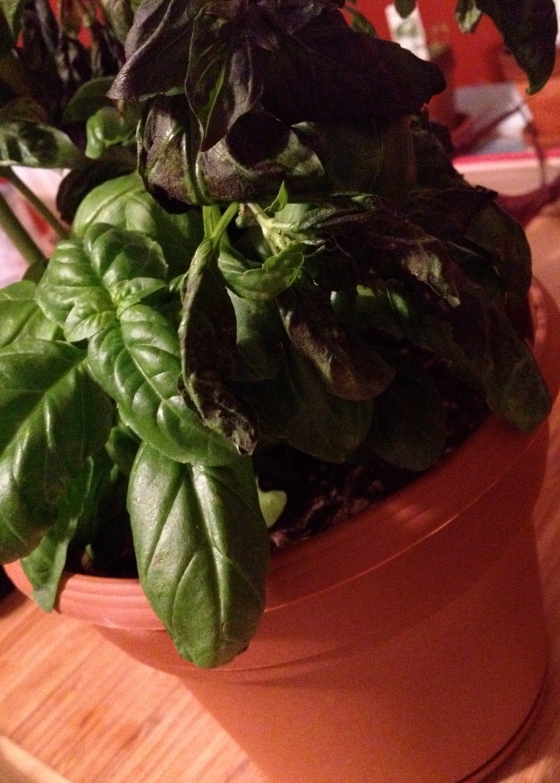
I wanted to share my basil story with you.  The temps were below zero today, and with the wind chills, I think we hit somewhere around -21 degrees.  I ran to the store at lunch to grab some basil and fresh beets.  I knew that the beets would be just fine in the car while I was at work, but I worried for the basil.  I had the cashier double bag the basil for me, and thought that it would be safest inside with me.  So I tucked it under my arm, and then ran inside.  And then did the same when I left work at 4:30pm.   Even though I tried to protect it, the basil just could not handle the cold.  This is what a couple of minutes did to my basil…wilted and black leaves.

IMG_8139

Ingredients:
4 beets, cooked and sliced into 1/4” slices
4 oz goat cheese, slice 1/4” slices
Chiffonade of fresh basil leaves
About 2 tbsp pistachios, chopped
Blood Orange olive oil
Balsamic vinegar
Fresh ground black pepper

The beets are easy to prepare.  Carefully wash them under water.  Remove the greens, and trim the root.  Place in a pan of cold water on medium heat, and bring to a boil.  Boil for about 40 minutes, or until tender. You can saute the greens in a little olive oil and garlic, but you won’t use them for this recipe.

Arrange the beets and goat cheese on the plate, alternating, and in any design you’d like.  Top with chiffonade of basil, and chopped pistachios. Drizzle with blood orange olive oil and balsamic vinegar (You can go as light or heavy as you prefer. I tend to go a little heavy with the vinegar). Sprinkle with fresh ground black pepper.

Enjoy!
IMG_8145

Ham and Potato Hash

IMG_8101

This past Saturday night, I baked what I believe might be the saltiest ham in the history of the world. No. Not the world. The universe.

Alright, yeah..I’m exaggerating… but it was still pretty salty.

You never know what you’re going to get when you buy a ham. Honestly? The good ones are few and far between. We don’t eat it that often, so it’s disappointing when it turns out to be inedible.

Well, I’m exaggerating again.
It was edible.
Just not by itself.
Unless you like to gnaw on a salt lick..
No exaggeration there.

It just turns out that this particular ham needs to be an ingredient, and not the main course as I had planned. Needless to say, there was quite a bit of it leftover, so it will go into soup, scalloped potatoes, or something…

IMG_8097

I was able to use a little bit of it up yesterday morning, when I made ham and potato hash.

I was pleased with the way the hash turned out, a little splash of heavy cream gave it a little scalloped potato flair, but without the creaminess. I tend to be very critical of my cooking at times; tasting and adding ingredients until I can get the flavor I’m looking for. After the heavy cream cooked down, I took a taste, and involuntarily said “Mmmm” out loud. I knew it had to be good.

It was good.  In the end, there was no leftover hash…comfort food at its best…I just love it when there’s no leftovers!  That’s when I know I hit it out of the ballpark…

The ham provided just the right amount of salt… so I know it’s going to make a good soup. I’m thinking a bean soup of some sort.. Stay tuned…

IMG_8098

Ham and Potato Hash

Serves 4

Ingredients:
2 cups cooked ham, cubed
3 large potatoes, cubed
1 onion, diced
1 clove garlic, minced
2 tbsp butter
2 tbsp fresh parsley, rough chopped
1/2 cup heavy cream
2 tsp white pepper
1/4 tsp black pepper
The ham should provide the salt, but if you think you need it, then please add salt to taste
1/2 cup shredded fontina cheese

IMG_8090

IMG_8091

IMG_8092

IMG_8094

IMG_8096

IMG_8097

In a large frying pan, sauté the potatoes, onion, garlic until softened and browned. Add the ham and parsley, and heat through. Add the heavy cream, white pepper, black pepper, and simmer until the heavy cream cooks down (about 10-15 minutes). Remove from heat, add the fontina cheese and stir until melted and blended into the hash.

Serve with your favorite style eggs, and buttered toast.
Enjoy!

IMG_8101

Appetizers: Beans and Rice & Shrimp with Corn Salsa

IMG_8086When it comes to the Super Bowl, I need to be honest…I’m only in on the action for the commercials and the food. Most likely I’ll be on the computer half reading blogs or whatever, and half watching the game. And for me…most importantly, I won’t be watching the end of the game. It’s way too sad for me. While most people are focusing on the winning team, and the interviews of players as they discuss their upcoming vacations to Disney, I’m focusing on the losing team. Their faces and their tears show the disappointment and devastation of the loss, and it makes me feel sad for them…and then I think of their moms, and how sad they must feel for their sons….and then I feel sad for the moms…..

It’s a vicious circle.

So, while I’m caught up in the hype of the Super Bowl, it’s because I’m planning the menu for that night, and getting really excited to see what the advertising teams have come up for Doritos, Budweiser, Coke, etc… ~And~ the halftime show….looking forward to the conversations at work the next day, as to the singer/band’s success or failure in performance, wardrobe malfunction, or whatever might happen in that very brief time on stage.

I’ve never been sports minded.
I am, however, food minded.

Which brings me to a couple of appetizers that are really great to serve at a Super Bowl party, or any party for that matter. I love to serve both of these appetizers together, as they really complement each other.

IMG_8084

The first one is beans and rice. A mini meal served in mini bowls, with mini spoons. Though I have to say, there is nothing mini about the flavor, with the corn, beans and rice… sweet and savory all in one.

IMG_8085

The next appetizer is shrimp with corn salsa. Like the rice and beans, it has huge flavor, and the corn and the shrimp bring a wonderful sweetness to the tartness of the lime and heat of the pepper.

…. And if you’re in on the Super Bowl action because you actually have a team you’re rooting for, then I hope your team wins…

IMG_8026

Beans and Rice

This is one of those recipes that turned out to be unexpectedly versatile. I love that. I love it when you take that first taste, and realize that the dish can be just about anything you want it to be…

It’s truly a meal in itself… It can be served hot, as beans and rice in a bowl, melted cheese on top, and with a dollop of sour cream. Wrap it in a soft tortilla, or in a hard taco shell. Serve it cold as a corn and bean salad. Make it with rice, or make it without rice. Use it as a baked potato topper. You can serve it hot, or even cold with tortilla chips as an appetizer!

½ cup olive oil
¼ cup cider vinegar
½ tsp cumin
1 tsp chili powder
¼ tsp black pepper
2 carrots, peeled and shredded
½ sweet red pepper, diced
½ medium onion, chopped
2 large cloves garlic, sliced thin
2 cups cooked rice
1 tbsp parsley
1 tbsp chives
1 – 15 oz can black beans, drained
1 – 15 oz can kidney beans, drained
1-1/2 cups frozen corn

In a large frying pan, saute the carrots, red pepper, onion, and garlic in the olive oil, vinegar, cumin, chili powder, and black pepper until the carrots are softened. (About 15-20 minutes).

Add the cooked rice, parsley, chives, black beans, kidney beans, and corn. Heat through for about 10-15 minutes.

Serve hot or cold. Garnish with cheddar cheese and sour cream.

IMG_8074

Shrimp with Corn Salsa

Just like the beans and rice, this recipe is just as versatile. I love making shrimp tacos with this. It’s just as delicious with chicken, or even fish!

1 pound medium shrimp, cleaned and deveined
Juice of 1 lime
1 tbsp chili powder
3 cloves garlic, minced
2 tsp honey
1 tsp hot sauce
2 cups frozen corn
1/2 red pepper, diced
1/2  English cucumber, diced
1/2 red onion, diced
1/2 jalapeno pepper, minced (I used a medium heat pepper instead)
1 cup fresh pineapple, diced
1 cup mango, diced

Tortilla chips

In a large bowl, combine the lime juice, chili powder, garlic, honey, hot sauce, corn, cucumber, red onion, jalapeno pepper (or your choice pepper), pineapple, and mango.

Refrigerate and let flavors marry for at least an hour.

Avocado Cream
1 cup sour cream
1 avocado, removed from shell
Juice of ½ lime
½ tsp salt
¼ tsp pepper

In mini food processor, pulse the sour cream, avocado, lime juice, salt, and pepper until well blended. Move to a small bowl, refrigerate until ready to use.

IMG_8086

To assemble the tortilla chips:
Place a generous spoonful of the corn salsa on each tortilla chip. Arrange one shrimp on top of the salsa, and top with a dollop of avocado cream. Sprinkle with chopped cilantro.

Enjoy!

Twisted Tuesday: Grilled Cheese and Tomato Soup Recreated

IMG_8006

I have a great twist on a favorite comfort food for tonight’s Twisted Tuesday.  Thanks to Matt (Katie and Ryan’s friend), who suggested that I make a grilled cheese on cornbread.

Genius…my friend…pure genius.

I know that a lot of people love to dunk their sandwich into their soup… I also know that some of you are in complete disagreement about the sandwich dunk…I understand, I’m with you.  I’m a non-dunker.  I know, right?  Prudy, who always claims how much she loves a million flavors popping with every bite, doesn’t dunk her sandwich.

Until tonight.
I am now a certified dunker.

While I was strolling through the cheese shop at my beloved Wegmans trying to decide on a cheese that would go well with cornbread, one of the girls who works there, Caitlyn, came up to me and asked if she could help me.   I told her what I was doing, and without hesitation, and complete confidence… she said “Fontina”.

Fontina? I admit it, I was taken aback.  It’s cornbread.  I had Monterey Jack on my mind.   But Fontina?  I took her advice, and bought it.  I’m glad I did.  Caitlyn knew exactly what she was talking about.

What would go well with Fontina and cornbread?   I thought that roasted tomatoes and peppers would bring great flavor.  While Fontina is a semi-soft cheese, it has a pretty strong flavor… a sharpness to it that could hold up very well with the tomatoes and peppers.  Caitlyn likened it to Swiss.  Spot on.

IMG_7999

But what soup? The first question that came to mind was, what is the most favorite companion to grilled cheese?  That’s easy. Tomato soup.

Since I already planned on tomatoes for the sandwich, and because it was Twisted Tuesday, I didn’t want to do tomato soup. It had to be the same meal, but different. Instead, I went with a roasted red pepper soup.

The soup was the perfect complement to the sandwich.  The flavors were all meant for each other…and the next part is all a blur…it happened so fast, I didn’t know what was happening….and I’m not even sure how long it was going on before I realized that I was dunking the sandwich.  I was dunking my grilled cheese in my soup. And loving every minute of it!

IMG_8002

The sweetness of the red pepper soup, along with the background pepper jack taste went so well with the sweet cornbread, and the tang of the Fontina cheese and tomatoes. One might argue that it was too much cheese for the meal, and I’d just argue back that you can never have too much cheese! The roasted pepper on the sandwich brought a slightly mild heat, almost as an afterthought. It changed my whole way of grilled cheese thinking, and honestly?  I don’t think I’ll ever go back to my old ways again.

Life is good.  It’s melty-tangy cheese mingling with a sweet red pepper kind of good.

IMG_8001

Grilled Fontina on Cornbread with Roasted Red Pepper Soup
Serves Four

Just a quick note:  I chose cornbread muffins tonight, thinking that not only would they make a cute little round sandwich, but they’d be the perfect portion size.  You can use a loaf of cornbread, or any kind of bread for that matter!

You will be slicing the tops off of each muffin.  You can save them for another day… eat them right then and there…or freeze them for when you want to make cornbread stuffing!

To blacken the peppers:
Slice the tops off of the peppers, and clean out the seeds. Place the peppers on a foil lined baking sheet.  Preheat your oven to broil…and broil the peppers until they are blackened.   Remove from the oven and place in a paper bag to steam.  This will help the skins to come off easier.   After about 15 minutes, remove the peppers from the bag, and peel the skin off of them.  Discard the skin.

IMG_7984

To roast the tomatoes:
Slice 3 large tomatoes into ¼ – ½ inch slices.  Let drain on a plate lined with paper towels. Place on a baking sheet and drizzle with olive oil and Balsamic vinegar.  Season with salt and pepper.  Roast at 350 degrees until the tomatoes are softened and browned, about 15 – 20 minutes.

IMG_7986

The Roasted Red Pepper Soup:
1 large onion, chopped
4 cloves garlic, whole
3 tbsp olive oil
6 Red Peppers, roasted and blackened, skins removed
2 large potatoes, peeled and cut into chunks
2 carrots, peeled and cut into chunks
5 sundried tomatoes (jarred, in oil)
½ cup pickled banana pepper rings (drained)
3 cups chicken stock
3 sprigs thyme
1 tsp salt
½ tsp black pepper
2 tsp hot pepper sauce
8 oz pepper jack cheese, cut into small cubes
½ cup sour cream
Sour cream and hot pepper sauce for garnish

IMG_7985

IMG_7990

Heat the olive oil in a large stock pot. Add the onions and garlic and sauté until translucent.   Add the chicken broth, red peppers, potatoes, carrots, sundried tomatoes, banana pepper rings, thyme, salt, black pepper, and hot pepper sauce.   Cover and simmer until the potatoes and carrots have softened.   Remove the thyme sprigs, and discard.  Remove the soup from heat, and in batches, pulse in food processor until smooth. Return to stock pot, and heat to a slow boil. Turn off heat, and stir in pepper jack cheese until melted. Stir in the sour cream until well blended and creamy.

Serve immediately…garnish with droplets of hot pepper sauce, and a heart of sour cream.

The Grilled Fontina on Cornbread:
4 cornbread muffins
12 oz wedge of Fontina cheese, cut into thick slices
8 slices roasted tomatoes
4 Anaheim peppers, blackened, and skins removed
2 tbsp butter

Slice the top of each muffin off.  Slice the base of the muffin in half, as shown in picture.  Layer the cheese, tomatoes and peppers on the bottom half of the muffin.  Place the other half of the muffin on top.

IMG_7991

IMG_7993

Melt the butter in a large frying pan, over medium-low heat.  Place each sandwich in the frying pan, and fry the one side until golden brown.  Flip, and fry the other side until golden brown, about five minutes on each side.  If the cheese hasn’t melted by the time that each side is golden, place a lid on the frying pan for a couple of minutes until the cheese has melted.   Remove from pan.

Serve with Roasted Red Pepper Soup..Enjoy!

IMG_8006

Potato Pancakes

IMG_7969

I think we’re supposed to be gearing up for another cold snap this week.  I don’t know; the thermometer showed 28F today, which isn’t really all that cold compared to what it’s been, but for some reason, I just couldn’t get warm.  I sat snuggled under a blanket on the couch for about a half hour this morning, until I decided it would be better to fire up the oven in the kitchen and get cooking.  Within five minutes, I forgot all about being cold!

I had three sad little apples sitting on the shelf in the fridge that needed some attention, and I thought applesauce sounded quite delicious.   What goes beautifully with applesauce?  Potato pancakes.

IMG_7937

As I was grating the potatoes, I was trying to decide whether I wanted to make them as the meal, or if I wanted to make them as a side.  That’s the beauty of potato pancakes, they can be the star of the show, or the really good back up singers.

I decided that the pancakes would be the meal today, and I’d make some bacon jam too.   I found a really good recipe for bacon jam on Angela Roberts’ blog called Spinach Tiger.  I’ve never had bacon jam before, and I’ve always wanted to try it.  To be honest, I wasn’t sure what to expect, and I wasn’t sure if I’d like meat made into a jam.  I’m happy to report that it’s delicious!  It’s sweet bacon. Sweet and oniony bacon. I can totally see what the hype was all about last year.  I will definitely make this again.  Angela’s recipe called for apples, but since I already had the apples simmering on the stove, I omitted them.

Honestly?  I think the bacon jam stole the limelight.

Potato Pancakes

IMG_7973

The Potato Pancakes
4 potatoes, peeled and grated
1 medium onion, chopped
2 cloves garlic, minced
Juice of ½ lemon
2 eggs
¼ cup instant polenta
½ cup grated Romano cheese
1 tbsp parsley
½ tsp salt
½ tsp black pepper

1 cup vegetable oil

Grate the peeled potatoes, and mix with the lemon juice.  Drain the potatoes in a colander that has been placed over a bowl.  It takes a good hour for them to drain completely.  Or you can help them along by squeezing the liquid out of them.

IMG_7880

IMG_7890

In a large bowl, mix the drained potatoes, onion, garlic, eggs, polenta, Romano cheese, parsley, salt and pepper.

IMG_7922

In a large frying pan, heat the vegetable oil over medium heat.  Measure ½ cup of the potato mixture into the frying pan, and flatten to about ½” thick.   You should be able to cook two or three pancakes at a time.   Fry for about 5-6 minutes on each side, or until golden brown.  Keep them warm in a 200 degree oven while you cook the rest of the pancakes.

IMG_7924

IMG_7929

The Applesauce
3 apples, any kind, peeled and cut into cubes
1/3 cup water
1/3 cup brown sugar
¼ tsp cinnamon

In a large saucepan, add the apples and water.  Cover and simmer over medium heat until the apples are softened.   Remove from heat.  Add the brown sugar and cinnamon.

IMG_7960

IMG_7961

IMG_7962

At this point, you can either mash the cooked apples by hand with a potato masher, or  pulse them a few times in a food processor.  It really depends on your “chunk” preference.  My family tends to like their applesauce smooth, so I use my food processor.   Store in a covered bowl in the refrigerator for up to a week.

IMG_7956

The Bacon Jam
1 pound bacon, fried crisp
1 medium sweet onion, chopped
3 cloves garlic, minced
½ cup strong coffee
¼ cup cider vinegar
¼ cup brown sugar
Pinch of cayenne
¼ cup maple syrup

In a large frying pan, fry the bacon until it’s crisp.  Drain on paper towel until cooled, and then break into pieces.

Remove all but 1 tablespoon of the bacon grease from the frying pan, and add the onions, garlic, coffee, vinegar, brown sugar, and cayenne.   Cook until the onions are translucent.

IMG_7941

Add the bacon back to the pan along with the maple syrup.  Reduce heat, and let simmer until the bacon mixture cooks down to a jam-like consistency, about an hour.  Angela said that you can add water to the jam if it becomes too dry while it is cooking.

IMG_7949

Remove from heat, and pour the bacon mixture into a food processor.  Pulse a couple of times to break the bacon up, but you still want to be able to see the pieces of bacon. Store in the refrigerator for up to a week.

IMG_7952

Garlic Sour Cream
1 cup sour cream
1 clove garlic
½ tbsp parsley

In a small bowl, mix the sour cream, garlic, and parsley until well combined. Refrigerate.

Serve the pancakes with the bacon jam, applesauce and a dollop of sour cream. Garnish with fresh parsley or chopped chives.

Enjoy!

Peas and Macaroni

They say that you should never  judge a book by it’s cover. Whoever “they” is, they couldn’t be more right. You just might end up missing out on a really delicious meal….

Peas and Macaroni.

IMG_7904

While this is one of the meals that I enjoyed growing up, I think that it must have originated during the Great Depression when it was a necessity to prepare meals that cost next to nothing, but would feed a large family.  Meals with pasta, rice, and beans were perfect for this because they were minimal cost, they went a long way, and they were filling.

It’s funny how those meals have come to be more of a comfort food to many of us today.  Like I mentioned, I grew up on peas and macaroni, along with chickpeas (ciceri) with rice, or pasta fagioli.

IMG_7903

I think out of all of them, peas and macaroni is definitely a favorite of mine.  Yes, because it brings that level of comfort that most childhood meals bring…but there is more to it.

It has a little bit of complexity to it.
Yes. It really does.
I mean, it’s peas and macaroni.
How could it even be close to complex?

Even though it has just a couple ingredients, there are a few levels of flavor. The onions and garlic definitely give it a savory tendency…but…coupled with the peas, the onions and garlic tend to give it a sweet note as well.  A sprinkle of Romano or Parmesan cheese adds that salty tang that truly gives it that satisfying sensory finish.  A few flakes of crushed red pepper will add a bit of heat here and there. For a little variety, add some diced tomatoes to the mix, and now you have a whole new level of flavor added ~and~ a completely different meal!

IMG_7917

Peas and Macaroni

Just a quick note… This recipe is the pretty much the only time I use canned peas. I like to use Le Sueur sweet peas, but if you can’t find them near you, you can use any canned peas that you prefer.

2 – 15 oz cans Le Sueur sweet peas, or your favorite brand (do not drain)
¾ cup small shell pasta, uncooked
1 medium onion, chopped
2 cloves garlic
3 tbsp olive oil
Shaved / grated Romano or Parmesan Cheese
Crushed red pepper (optional)
Salt and pepper to taste

½ can (14.5 oz can) diced tomatoes (optional)

Over medium heat, and in a large saucepan, sauté the onions and garlic in the olive oil until translucent.  Add the two cans of peas, along with the liquid.  Cover with lid, and simmer for about 20 minutes.  Add the shell pasta, cover, and simmer until the pasta is fully cooked, about another 10 minutes. Season with salt and pepper to taste.

IMG_7898

IMG_7902

IMG_7903

At this point, the peas and macaroni is done.  Serve it in a bowl garnished with Romano or Parmesan cheese, crushed red pepper (optional).

Or.. you can add a ½ can diced tomatoes:

IMG_7911

IMG_7914

Enjoy!

Spanish Bar Cake

IMG_7787

I’ve never been a fan of spice cake. Now, I say that I’m not a fan, but that does NOT mean that if you put a piece in front of me, I wouldn’t eat it. Quite the contrary, I would eat it, and I would most likely enjoy it. I know. It’s crazy. But it’s cake, and I love cake! Just not spice cake.

Having said all that nonsense, there are times that I’ll get a craving for Spanish Bar Cake. Yeah, I know what you’re thinking…. Spanish Bar Cake is basically a spice cake with raisins. But it’s so dense and moist at the same time, and with all of those plump little raisins in every bite, how can I resist?

I’m fickle.
I’m spice cake fickle.

Add cream cheese frosting to the insanity, and I’m over the edge. Throw some walnuts on top, there’s no going back, and you’ll find me heading for that second piece.

IMG_7791

Now ask me about spice cake.
And I’ll tell you I’m in love.

Fickle.

IMG_7790

Spanish Bar Cake

Just a quick note: I had to call my mom for this recipe, as she is the keeper of all things good. While she was reading her ingredient list to me, she said that it calls for two cups of granulated sugar. But then she said that there was a hand written note that said you could use one cup of granulated sugar, and one cup of brown sugar.

After thinking about it for about one-fifth of a second, she said: “I think that’s what you should do. The molasses in the brown sugar will bring such a great flavor to this cake”.

Mom was right. I love her.

Things to do first:
Preheat your oven to 350 degrees
Grease and flour a 9” x 13” pan

The Ingredients:
3 cups water
2 cups dark raisins
1 cup vegetable shortening
2 tsp cinnamon
1 tsp cloves
1 tsp instant coffee
1 tsp salt
2 cups sugar (~or~ one cup granulated sugar plus one cup brown sugar)
1 ½ tsp baking soda
1 tsp baking powder
4 cups flour

In a large saucepan, bring the water to boil over high heat. Add the raisins, vegetable shortening, cinnamon, cloves, and coffee to the boiling water. Remove from heat, and let cool.

IMG_7684

In a large bowl, mix together the flour, baking powder, baking soda, sugar(s), and salt until well blended. Add the cooled raisin mixture and beat until well blended, about three minutes.

IMG_7697

Pour into prepared 9” x 13” pan. Bake for 1 hour, or until toothpick comes out clean. Remove from oven and cool completely.

IMG_7705

IMG_7725

NOTE: Baking time will most likely vary. While this recipe called for 1-hour baking time, it only took 45 minutes in my oven. Keep an eye on the cake while it’s baking.

IMG_7780

Frost with Cream Cheese Frosting:
1 – 8 oz package of cream cheese, softened
½ cup softened butter
4 cups powdered sugar
2 tsp vanilla

In a large bowl, beat the cream cheese, butter, powdered sugar, and vanilla until light and fluffy.

Spread over cake, and sprinkle with chopped walnuts if desired.

Enjoy!

IMG_7781

Twisted Tuesday: Comfort Food with a Twist

IMG_7864

Just this morning, my friend Jamison planted an idea in my head.  He thought it might be fun to do a monthly theme… Comfort Food with a Twist.  I just really loved that idea, and of course, I thought about it all day, and decided to jump in head first! The only change is, instead of doing this monthly, I’d like to try it weekly and see how it goes.  I’ve decided on a monthly theme too, but we’ll talk about that another day…

So, every Tuesday, I’m going to do Twisted Tuesdays….Comfort Food with a Twist.

And….Today is Tuesday.
Twisted Tuesday.

I thought you should know that today is also National Pastrami Sandwich Day.  There are two sandwiches that come to mind when I think of pastrami.  A Reuben, with melted Swiss cheese, sauerkraut and Thousand Island dressing… or just a big old deli sandwich on rye, with pastrami, Swiss and coleslaw.

Just thinking of those sandwiches brings me happy memories, standing in line at a deli in New York City, waiting for our turn to sit through a David Letterman show.  We ate these huge pastrami and Swiss sandwiches, with coleslaw and spicy brown mustard. It was so cold outside, and so warm in the deli… wonderful friends, great conversation, and a lot of laughs.

I knew that I had to make a pastrami sandwich.  But what kind of twist?  How about a deep fried pastrami egg roll, with Jalapeño Thousand Island dressing to dip it in?  The last time I did a deep fry day was back in October, so there’s my justification… Perfect. But is it too much to do yet another egg roll?  No. I don’t think it could ever be too much.

This is really an easy meal to throw together.  If you don’t like pastrami, substitute corned beef, roast beef, ham or even turkey!  Any one of those deli meats would be just as delicious in this “piping hot, melted cheese, dripping Thousand Island, jalapeno biting your tongue, crunchy coleslaw, spicy pastrami” egg roll!

Life is Good.  Life is Twisted Good.

IMG_7859

Deep Fried Pastrami and Swiss Egg Roll
Makes 5 Egg Rolls

Just a quick note…I made the coleslaw first, so that it had time for the flavors to marry while I assembled the egg rolls, and waited for the oil to heat to 350 degrees in the pan.

I did the first round of frying the potato chips before I threw the egg rolls in, and then let them drain on paper towels while I fried the egg rolls.  As soon as I took the egg rolls out of the oil, I threw the potato chips back in for another three minutes to brown and crisp.  I was able to serve everything piping hot!

The Coleslaw

IMG_7855
Normally I’d use a small head of cabbage and two carrots finely shredded in a food processor.  Tonight I used a bag of coleslaw mix from the produce section of my beloved Wegmans.

IMG_7833

1 – 12 oz bag shredded coleslaw mix
1 medium onion, minced
½ small jalapeno pepper, minced (or the whole, depending on your heat preference)
1 cup mayonnaise
4 tbsp milk
2 tbsp vinegar (white or cider, I use cider more often than white)
1 tsp sugar
salt and pepper to taste

In a large bowl, mix coleslaw mix, onion, and jalapeño.  Set aside.

Blend together the mayonnaise, milk, vinegar, and sugar.  Pour over the coleslaw mixture, and mix well.  Season with salt and pepper to taste.

IMG_7854

The Potato Chips
6 medium potatoes, cut into thin round slices
salt to season

IMG_7843

IMG_7844

Thoroughly wash and dry the potatoes.  Slice thinly into rounds. I leave the skin on, but you can peel them if you prefer.

You will use the same oil (heated to 350 degrees) for both the potato chips and egg rolls,fry the potatoes in batches until lightly golden.  Drain on a paper towel lined plate while you fry the egg rolls.

When the egg rolls are finished, throw the potato chips back in the oil, and fry for another three or four minutes, or until they are crispy and golden brown.

IMG_7845

The Jalapeño Thousand Island Dipping Sauce
1 cup sour cream
3 tbsp ketchup
2 tbsp sweet pickle relish
2 tbsp minced onion
1 clove garlic, minced
1 tbsp minced jalapeno
1 tbsp spicy brown mustard
1 tsp hot sauce

Mix the sour cream, ketchup, relish, onion, garlic, jalapeno, mustard, and hot sauce in a small bowl until well blended.  Season with salt and pepper to taste.

The Egg Roll
1 package of Egg Roll Wrappers
½ pound of pastrami, or your favorite deli meat
½ pound Swiss cheese
Coleslaw (recipe above)

Lay the wrappers (2 deep) on your work area, and place the Swiss cheese down the middle diagonally.  Add a slice of pastrami over the Swiss cheese.  Add a spoonful of coleslaw on top of the pastrami.

IMG_7835

Beginning with the two diagonal corners, begin folding the egg roll (as pictured). Fold the bottom flap up, and then roll the egg roll until it’s closed up like a burrito.  Don’t worry if the juices from the coleslaw leak out of the roll, it will be fine. It doesn’t hurt a thing. Continue until you have 5 rolls put together.

IMG_7836

IMG_7837

IMG_7838

IMG_7839

Using the oil that you used to fry the first round of potato chips, cook two or three egg rolls at a time…don’t overcrowd.  Fry them until they’re golden brown and the egg roll skin is bubbly. Drain on a paper towel lined cookie sheet.

IMG_7842

IMG_7841

Serve with Potato Chips, Coleslaw and Jalapeño Thousand Island Dipping Sauce.

Enjoy!

IMG_7864

Corzetti with Basil Pesto

IMG_7753

I have a few tools in my kitchen that I love. When I say “love”, I’m not talking about my favorite knife, my favorite wooden spoon, my favorite frying pan, or even my favorite rubber spatula for that matter. Yes, I have a favorite rubber spatula.  Doesn’t everybody?  I’m actually talking about the tools that I rarely use.  They are the tools that I could live without, I just don’t want to. It’s even hard for me to imagine my kitchen without them.

IMG_7724

Take my corzetti stamp for instance. I fell in love with corzetti the moment I laid eyes on them while browsing photos of pasta (Doesn’t everyone do that?!!).  After a little researching to find out exactly what these adorable little coins of pasta were, I knew that it would just be a matter of time before I owned a corzetti stamp.  A few days later, I was opening the box that the UPS driver had just delivered, and it was exactly as I expected it would be:  Love at first sight. I knew that little stamp would be in my kitchen for the long run. I know that it isn’t something that I’ll use all the time, but it’s just one of those tools that I love to own.

IMG_7721

Corzetti are these adorable little coins of pasta. According to My Melange, their origins come from the Ligurian region of Northwest Italy. During the Renaissance, noble families would stamp their insignia or crest on the pasta. It was a fashion statement for sure, a display of wealth, because of the effort that went into stamping each individual coin. The indentation of the stamp does help the sauce to adhere to the pasta as well.

IMG_7723

The stamp itself is carved wood.  The stamp part is the actual design.  The base has a spiral design on the top, so that when you stamp your design into the pasta, the spiral will be the other side of the coin.  The bottom of the base is hollowed out, so that you can cut your pasta to size.

There is no doubt that this pasta does take a little time and effort to make.  You do have to make the pasta dough, roll it out, and cut and stamp each individual corzetti, but it is definitely a rewarding effort, because you’re left with an impressive “work of art” to share with your family and friends.  I’m kind of glad I don’t have the servants to prepare the corzetti, those Renaissance nobles didn’t know what fun they were missing out on!

IMG_7733

IMG_7732

After stamping the corzetti, I had to decide on the sauce. It definitely had to be a light sauce, such as a fresh tomato sauce, aglio e olio, pesto, or maybe a lemon butter sauce with fresh parmesan.  Last night, I decided on a basil pesto. It was perfect for the delicate little coins of pasta, and I used just a little sprinkle of crushed red pepper.   Honestly?  I think any one of the sauces I mentioned would have been perfect for the corzetti.

Even though I say that I say that there is time and effort to be put into corzetti, it’s not that bad. If you make this recipe that serves four people, it takes about two hours to make the corzetti from start to finish (not including boiling time, or preparing the sauce).   If you have the time, tripe or quadruple the recipe (I would do the batches separately), and freeze them.  After cutting the pasta into your desired shape, do a quick freeze so that they’re dried enough to stack, and you can freeze the pasta in baggies.  I would, however, freeze pasta as delicate as corzetti in a freezer container layered with waxed paper so that they don’t break.

Corzetti are truly a pleasure to make.  Honestly.  Treat yourself and your kitchen with the little gift of a corzetti stamp. I have a feeling you’ll love it as much as I do!  I bought mine here.

IMG_7758

Corzetti with Basil Pesto

As I mentioned above, you can freeze the corzetti for up to three months.  After you stamp the corzetti, flash freeze them by placing them on a baking sheet, and putting them in the freezer until they’re dried and hardened.  Store them by layering them between sheets of waxed paper in a freezer container.

I just used all purpose flour for this recipe.   While a lot of recipes call for semolina flour when making pasta, I tend to find that all purpose works just as well.  Semolina is definitely a sturdier flour,  and tends to hold its shape better than a pasta made with flour, but the corzetti proved to me that the all purpose flour can hold its own when it comes to making pasta. It kept its shape, as well as the imprint on the pasta.

Tools you will need:
Corzetti Stamp
Rolling pin (if you don’t own a pasta machine)
Pasta Machine (not necessary, a rolling pin will work too!)

The Pasta Dough
2 cups all purpose flour
2 eggs, beaten
1 tsp salt
5 tbsp water
3 tbsp olive oil

In a large bowl, mix the flour, eggs, salt, water, and olive oil until blended. Form into a ball, and let rest for about 15 minutes. If you’re having a little trouble getting it to mix, feel free to add another tablespoon of olive oil.  It won’t hurt a thing.  It should be a little crumbly like the photo below:

IMG_7719

After the 15 minutes is up, begin to knead the pasta until it is smooth and pliable. Cover with a kitchen towel, and let it rest for about 1/2 hour to 45 minutes.  You can knead this by hand or with your dough hook attachment on your stand mixer. I used my KitchenAid, and it took about 10 minutes to get this smooth dough.

IMG_7720

After the dough has rested, cut into four balls. Flatten one ball and using either a rolling pin or pasta machine, roll to 1/8″ thick.

IMG_7726

IMG_7727

IMG_7728

Lay the dough on your work surface, and begin cutting the corzetti with your stamp.  Place the pasta coin on top of the stamp base, and press the design into the coin with the stamp.

IMG_7729

IMG_7730

Place the corzetti on a baking sheet that with waxed paper that is sprinkled with flour, between layers.

IMG_7734

After you are finished cutting and stamping, you can either boil them immediately, let them sit out to dry, and boil them later, or flash freeze and freeze in a container for up to three months.

To cook the corzetti, bring a large pot of water to boil, and season with salt (about a tablespoon to 6 quarts).  When the water has reached a rolling boil, add the corzetti, about 15 at a time to the water.  Boil for 7 minutes, and using a slotted spoon, remove from the water and place in a dish.  Repeat until the desired amount of corzetti are cooked.

Serve with your favorite sauce!

The Basil Pesto

IMG_7744

Pesto is one of the easiest sauces to make. I tend to like to use Grana Padano rather than Parmigiano Reggiano only because it’s a little less salty with a more subtle flavor. It won’t overpower the basil, which to me, is the star of the pesto.

IMG_7742

3 cups fresh basil
3/4 cup grated fresh Grana Padano
1/2 cup pine nuts
1-2 cloves garlic (your desired garlic strength, I use two)
1 cup olive oil
1 tbsp fresh lemon juice
1/2 tsp kosher salt
1/4 tsp pepper

Throw the basil, pine nuts, garlic, lemon juice, 1/2 cup olive oil, salt and pepper into your food processor. Process until it’s well blended and smooth. When ready to serve, stir in the remaining 1/2 cup olive oil and Grana Padano. If the pesto is still a little too thick for your taste, you can add more olive oil until it reaches your desired consistency. Add more salt and pepper to taste.

Serve with your favorite pasta! Garnish with crushed red pepper and shaved Grana Padano if desired.

IMG_7755

IMG_7754