Caramelized Peach Tart

caramelizedpeachtart3
This has happened to me a couple of times now…when I’ve made a recipe that I really want to share with you.. but then I just cannot come up with a story to go with, or something fun to talk about. This delightful peach tart just happens to be one of those times. I think the last recipe that I could’t come up with anything was my peas and carrots recipe, in which Michael informed me that we don’t do anything fun… and that we suck.

So, I foolishly reached out to him last night once again.. asking him if we’ve done anything in our lives that might pertain to peaches. You know, anything fun, or funny. He informed me that we still suck, and nothing is funny. At the time, he was watching a football game, and I’m assuming it wasn’t going the way that he had hoped.

Immediately shrugging off Mike and his crankiness…I texted Katie, asking her if there was anything fun that has happened in our life that might go with that peach tart.  She texted me right back, and suggested I talk about our yellow lab that we had years ago, named Sadie.

caramelizedpeachtart6

Yeah… Sadie. My little peachy.

I’m a nicknamer…and any living being on this earth is fair game to me. You never know when it might strike…and most likely, it’s going to stick because the names tend to catch on, and before you know it, a person or sweet little four legged creature has a new nickname.

Sadie was our very first dog. She was a yellow lab, but more on the whiter side…and she was about the size of a polar bear. Honestly..she was a big girl, but she had the sweetest nature..a gentle giant, if you will.

And…Sadie was loved by everyone who knew her..
She was a peach..

The Peach
Peachy
Peachy Pie
Peaches

And she knew it. She knew her name was Sadie…but she also answered to all of those names above.

caramelizedpeachtart4

You know…dogs have such great, yet different personalities. I can’t say that the Peach was funny…because she never acted goofy, but she had a great sense of humor. She was always willing to go with the flow.

We had a black lab / chow named Mollie (Choonie, Choon, Choon-a-loon) at the same time as the Peach, a few years younger…and her personality was just the opposite. I always said that Choonie really wanted to be a lab, but the chow wouldn’t let her! When people would come to the house… Peachy would be there to welcome them with open arms…and was genuinely happy to see them! Choonie, on the other hand… I’d have to tell the people “Don’t look at her, don’t talk to her, and don’t put your hand out to her… just let her sniff you until she’s comfortable with you”… And the person would stand there stiff as a board, scared to death!!

Peachy would let a burglar in, and show him around the house… and offer him a cup of coffee while he robbed us. Choonie, on the other hand…would bite his arm off, and hold him down by the neck until reinforcements came…

They were a pair… the odd couple.

peachy

And as cranky as she was…Choonie was funny, quite comical…and I swear, Peachy was always laughing at her… There were so many times that you might find Peach following Mollie around the yard in her slow Eeyore kind of way…almost shaking her head in laughter knowing that Choonie was going to be up to something funny… which always meant that Choonie was up to no good…and the Peach would think that was hilarious! And then they’d both get into trouble….

They loved each other….those two girls.

Sadly, we lost the Peach at age 13…and while most people will say that she lived a long and happy life for a dog… and she did… there is still a little hole in our lives without her. About a year later, we lost Mollie at age 7.. we are convinced that she could never get over the depression from losing her Peachy.  We were devastated.

caramelizedpeachtart5

And now we have Sophie… Funny Face, Funny, Feenie, and Sofaletta…and she has brought us more joy in these last two years that we desperately needed.

But this one… this is about the Peach. This sweet caramelized peach tart is the perfect dessert to dedicate to my Peachy.  It’s sweetness is the epitome of her…  And I’m quite certain…a tart that she would offer to the burglar as he robbed us blind…

I decided to use a puff pastry for the crust, because I wanted it to be strong enough to hold the cream cheese filling, the juicy peaches, and the caramel that would be poured over it in the end.  I wanted to be able to remove it from the pan, and serve slices that would hold up on their own.   The puff pastry was the perfect choice.

caramelizedpeachtart2

This is a tart that I will make again…and again. The ingredients are simple…and it doesn’t take long to throw together… and it’s one that really calls for a strong cup of coffee or tea… Perfect for a cool day…an end of summer dessert,  in celebration of those glorious peaches that come and go so quickly…that tell us that summer is almost over… and that we will be heading into the crisp air of fall very, very soon.

So how about you? Do you have a little four legged love in your life? I’d love to hear about him/her…

Life is good.  It’s a “Peachy kind of sweetness for a sweet kind of Peachness” kind of good…

Caramelized Peach Tart
Serves 8

1 puff pastry, thawed

3 large peaches, sliced wedges
3 tbsp butter
1/3 cup brown sugar
1/8 tsp salt
1 tbsp dark rum

1 8oz cream cheese
1/3 cup powdered sugar
1 tsp vanilla

Chopped pecans for garnish

Preheat oven to 350 degrees

Press the thawed puff pastry into your favorite tart pan, and bake according to the package directions, and it is golden brown, and fully baked. Set aside to cool.

Melt the butter in a large frying pan over low heat, and add the peach slices. Sauté for about five minutes on each side, remove from heat and add the brown sugar, salt, and rum to the pan. Stir gently to combine. Simmer for about 15 minutes until the brown sugar has caramelized onto the peaches. Just make sure that you simmer them on low heat… and don’t over cook the peaches so that they become too mushy! Otherwise you’ll be spreading them on toast, which isn’t a bad thing at all, just not what you want to accomplish for this particular tart!

While the peaches are simmering, using a hand mixer, blend the cream cheese, powdered sugar, and vanilla until creamy.

Spread the cream cheese mixture over the cooled puff pastry. Add the peaches on top of the cream cheese, and pour the remaining caramel sauce from the pan over the peaches.

Sprinkle with pecans.

Serve warm or cold (It is delicious cold, but I tend to like it warm)

Enjoy!
caramelizedpeachtart7

Icebox Cake Makeover

IMG_2852I am a closet icebox cake eater.
I love them.

Do you remember them from years and years ago? You know, the ones that were made from chocolate wafer cookies stacked on their side, and then those stacks would be placed side by side to create a log…all with whipped cream in between them to act as a binder? Then the whole log of wafer cookies would be frosted in whipped cream, and then when sliced, you had stripes of chocolate and whipped cream. The chocolate cookie wafers would soften, so it was just like eating a rich fudge cake. Delicious.

Back in the day, it was a gorgeous dessert….and I still love it today. But because it’s not “pretty” or up to today’s culinary “snobbishness”, I’ve been a closet icebox cake eater, first of all, because I love it, and second, I personally don’t care what it looks like….

But today, with the standards of desserts set so high… it would be considered a train wreck at any fancy dinner party.

IMG_2864

Ok, maybe I exaggerate, maybe not a train wreck….but I’m keeping it real here…that old time dessert isn’t something that I’d bring to a fancy dinner party. I’m sorry, I just wouldn’t. Instead, I’d spend all of my time stressing over what to bring, stressing that it had to be the fanciest, and the prettiest dessert, because I’d want to please the hostess of the party. I’d want her to be proud to put it out on her table for all of her guests. Most likely, I would order something from a bakery.  Nope…not “most likely”… I would definitely would order from a bakery.

IMG_2889

IMG_2881

But no more. I’ve decided to give that old fashioned icebox cake a makeover. One that I’d be proud to bring to a dinner party, and confident that the hostess would be pleased to serve to her guests.

And this one is so simple to throw together…it’s one of those desserts that you can throw together about two hours before the party…minimal time…minimal effort. Perfect for a hot summer’s day when you don’t feel like firing up the oven, or spending a fortune at a bakery!

IMG_2849

And…it’s delicious. The raspberries, whipped cream, and chocolate were just made for each other. Not fond of raspberries? Use any fruit that tickles your fancy! It is truly that versatile. Just make sure that the fruit that you choose can be sliced through easily!

I’ve shared this with my lovely friends at The Novice Gardener’s, Angie’s Fiesta Friday…. and with my lovely friends at Love in the Kitchen’s Tuesday’s Table. …. And I’m proud to say that it was my very first feature on Food gawker!

IMG_2897

Life is good, it’s a “Throwing together a dessert in less that an hour, but it looks like you slaved all day” kind of good!

IMG_2851

Icebox Cake
Serves  10 to 12 People

Just a quick note:  Keep in mind that this does need to be refrigerated for at least two to three hours (or more) before you serve it, so that the wafers have time to soften into a cake like texture.  I let this particular cake refrigerate for three hours before I couldn’t stand it any longer, and had to slice into it!

And honestly, use whatever type of fruit you’d like.  Just make sure that it’s a fruit soft enough to slice through, otherwise, you won’t get perfect slices.

Choosing the right plate is important. I’ll pick a couple of plates, and then place the cookies around the outer edge in a circle to see if they’ll all fit around the plate perfectly. If they do, then that’s the plate you want to use!

If you’re not familiar with the chocolate wafers, here is a photo of the box:

chocolate wafers2 boxes Nabisco Famous Chocolate Wafers
1 quart heavy cream
2 tsp vanilla extract
1/4 to 1/3 cup of sugar (or more, depending on your desired sweetness)
3 pints fresh raspberries (or your favorite fruit)

Begin by whipping the heavy cream in a stand mixer (or in a large bowl with a hand mixer). Let it whip until it hits that point just before it starts to turn to butter. You don’t want it too soft, because you want it to be able to hold up the cookies and raspberries. Add the sugar and vanilla, and whip for another minute or so, until they’re fully combined. Don’t worry if the sugar isn’t dissolved at this point. It will continue to dissolve as the cream sits.

On your favorite plate or cake plate, spread a small amount of whipped cream over the plate. This will act as the glue to keep the base cookies in place. This is kind of important because the cake will fly off the plate the minute you try to carry it, and if you’re trying to make a grand entrance with it… let’s just say.. it will be grand alright, all over your floor!

Place the  cookies around the plate in a circle. You don’t want them to overlap. Fill in the middle section with about three or four cookies. It doesn’t matter if the cookies in the middle overlap. Place a second row of cookies on top of the first row.
IMG_2839
Using a pastry bag, and Ateco tip #824, begin making rosettes all around the top of the cookies. Gently place one pint of raspberries on top of the whipped cream. Make whipped cream rosettes on top of the raspberries. You want to be very gentle with this, so that each layer doesn’t get mashed down. You should be able to see each layer as separate layers.
IMG_2840
IMG_2842
Repeat with another layer of cookies, whipped cream, raspberries, and whipped cream. And then finally repeat a third time, ending with the raspberries on top of the cake.
IMG_2852
Refrigerate for at least two to three hours, or overnight.
This is best when served cold. Keep any leftovers refrigerated. It will keep for a day or two in the fridge.

Enjoy!

IMG_2881

Orange Sherbet

workding bb favorite sherbet with spoonPicture this…

It was a Saturday morning. The skies were blue. The sun was shining, and there was zero humidity in the air. There were no sounds except for a light breeze through the trees, and little bird singing the prettiest song, because even she felt the beauty in the day.

It was a flawless summer day.
A glorious day.

I had nowhere to go…
I had nothing to do…
Well…I had lots to do, but decided that it was too beautiful to spend my time worrying about things that needed to be done. There was plenty of time for that on a day not so beautiful.

Laundry could wait.
The house could wait.

I was happy.
I was content.

Gilbert Markham, a character in Anne Bronte’s (1820-1849, British Novelist and Poet) novel, The Tenant of Wildfell Hall spoke these words (although he wasn’t feeling very happy, nor was he content at the moment..):

“A light wind swept over the corn; and all nature laughed in the sunshine. The lark was rejoicing among the silvery floating clouds.”

And it does… I truly believe that sunshine brings laughter, and that nature laughs in its own way…like that little bird in my yard…singing her heart out.

I took a walk around the yard, trying to find that little bird. She was content to stay where she was, out of sight, safe…and from the sound of her song, I believe that she was happy too. My guess is that she thought the same thing… her nest could wait, she had to be out enjoying, and rejoicing in that most perfect day.
wording bbb close up of sherbet
At that point in time, I didn’t think that there was anything that could make that day more perfect. Until a thought popped into my head…

Fresh orange sherbet.
The quintessence of sunshine.
The perfect way to celebrate the day.

And it was.
wording bbb cute sherbet
This sherbet is so refreshing, and so pretty, you wouldn’t think that the prep time is only minutes…and so very easy to make. The fresh orange flavor will make you wonder why you’ve been buying your sherbet from the freezer section all your life, when you could have been enjoying the real deal all along..

It didn’t take me long to realize that there are a lot of orange sherbet recipes out there…and I had to laugh that day, because as I was reading all of the recipes, I realized that they’re basically the same, except this person added a ¼ cup more heavy cream, while that person added ½ cup less sugar…and then they called the recipe their own. And as much as I’d like to, I can’t tell you who came up with the original of this most perfect recipe. But I can tell you that the recipe I used came from  The Brown Eyed Baker, who found her recipe from The New Best Recipe Cookbook  which I just ordered a copy for myself!

IMG_2821

Let me get off track here for one second… I ordered The New Best Recipe cookbook from Amazon.. It is about $20 brand new…. But underneath the price, there is a used book option starting at $4.99. I clicked on that… and there were quite a few of these books offered at a much lower price. Yes, they’re used…and unless you’re really bent on having brand new…then by all means…order new!  But the one that I ordered said that it has notes and sections highlighted in it. For me? That’s perfect! Why not take the knowledge of someone who has already tried a recipe in that book? I look forward to seeing what the person had to say… her/his thoughts and suggestions. You never know… they could be priceless! My cookbooks never stay pretty anyway… you will recognize a favorite cookbook in my kitchen, from the written on, worn, stained, and sometimes torn, pages!

Ok, back to the sherbet…

wording bbb spoon ful of sherbet

In the true fashion of everyone else, I changed the recipe up a bit. While Michelle (The Brown Eyed Baker) called for a tablespoon of orange zest, I added three tablespoons, minced fine. She strained her sherbet mixture, and I decided that the bits of orange zest would be an added “oomph” to the sherbet. They did. I only used ½ cup of sugar, whereas she used 1 cup. She used two cups of fresh squeezed orange juice, I used about three cups. Hers called for Triple Sec, and all I had was Chambord on hand, so I used that instead. And of course, Prudence had to make it even fatter… I added ¾ cup of heavy cream instead of her 2/3 cup!

It’s delicious. It’s more than delicious. It’s pretty, a pale orange color, it’s creamy, it’s refreshingly delicious! Deliciously delicious! And…it’s one that I plan to make over and over again. I can’t wait to try different flavors now! Maybe even a rainbow sherbet!! Stay tuned…

Life is good, it’s an “even now when I look back on that day, a calmness comes over me.. a happy remembrance of the perfect day…” kind of good.

wording bbb shertbet with three spoons

Orange Sherbet
Makes About 4 Cups

This recipe was adapted from The Brown Eyed Baker
3 cups fresh squeezed orange juice (about 4-5 pounds oranges)
1/2 cup granulated sugar
3 tbsp. finely minced orange zest
2 tbsp. lemon juice
1 tbsp. vanilla extract
2 tbsp. Chambord
Pinch sea salt
3/4 cup heavy cream

Place the orange juice, sugar, orange zest, lemon juice, vanilla, Chamord, and salt in a blender. Blend until sugar is dissolved. Add the heavy cream, and blend until smooth.

Place the sherbet mixture into a glass bowl, cover with plastic wrap, and place in the freezer for at least two hours, but don’t let it freeze.

Don’t worry if the orange juice and heavy cream have started to separate. It’s fine! Just give it a good whisk, and pour the chilled mixture into the bowl of your ice cream maker, and churn according to the manufacturer’s directions. I use the KitchenAid ice cream bowl for my mixer, and it took about 1/2 hour to churn into a soft serve sherbet.

Place the soft serve sherbet into a freezer container, or ice cream container…and freeze for about 3 hours, or until it can be scooped out with an ice cream scoop.

Enjoy!
workding bb favorite sherbet with spoon

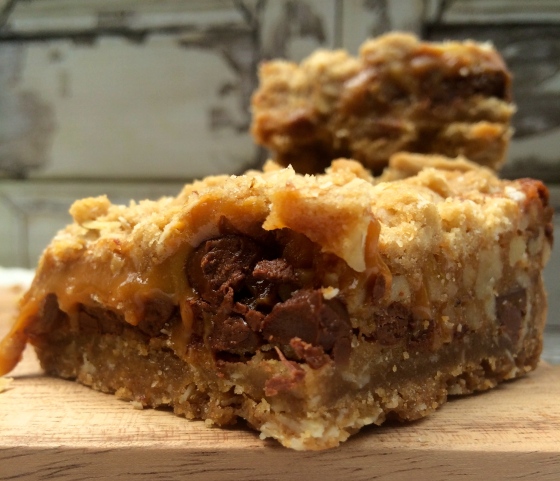
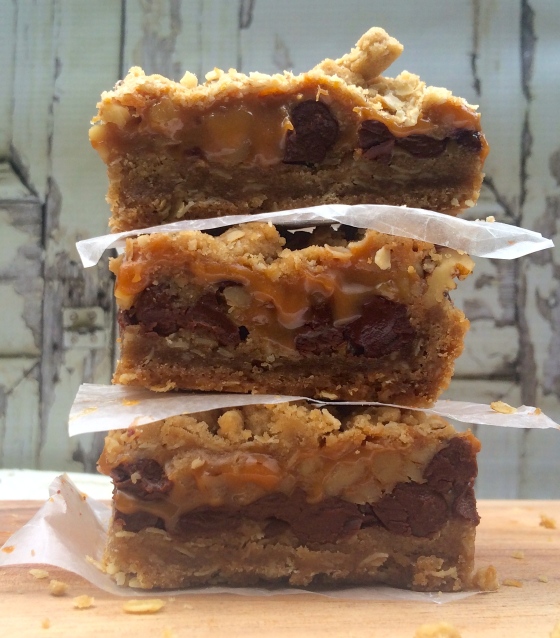
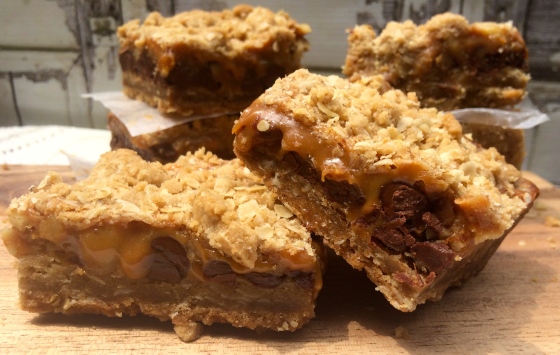
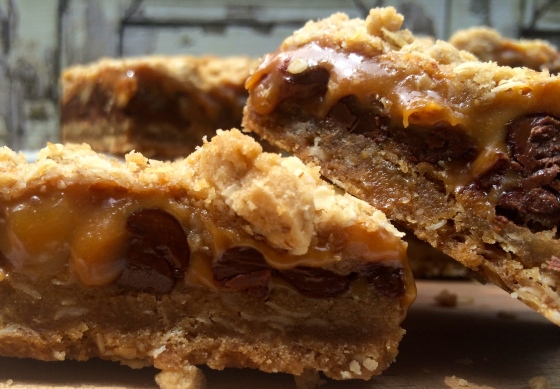
Oatmeal Caramelitas

IMG_2235

This recipe is 47 years old. It was the 1967 18th Pillsbury Bake-off winning recipe, created by Erlyce Larson from Kennedy, Minnesota.

In fact, it’s quite a popular recipe, but I share it with you under protest. Well, maybe not protest, because I’ve been making them for years and years…and they are actually a favorite of mine.

So, let me be clear.
I’ve never understood the name.
…and….I’m not sure I like it.

Oatmeal Caramelita.

It’s kind of like my name.
Prudy.

I’ve grown accustomed throughout the years, that when I’m introduced to someone new…. We shake hands, and right at that same moment, I receive a confused look from the other person, and they say … “I’m sorry, what is your name?” … “Prudy or Pru” I’ll answer… “Prudence”. It never fails, they say my name a couple of times as if they’re trying on a pair of shoes that they’re not sure that will fit them right. Sometimes it rolls off their tongue easily… and then there are people who truly struggle.

Trudy, Judy, Purdy, and Pam. I’ve been called all of these, many, many times.

I understand that.
It’s a different name that their brain can’t wrap itself around, so the signals to the tongue get all mixed up.

So, like those people who struggle with my name, I have struggled with the Oatmeal Caramelita name. In my simple mind, it just doesn’t fit. All I want to ask is “Erlyce, my friend… what made you come up with that name?”

I mean, I know why my parents came up with my name. I was named after my beautiful grandmother, Prudence.
IMG_2231
The fact that I don’t care for the name is truly nothing against Erlyce. She’s probably a very nice lady…and we’d probably be great friends (Well, maybe not after I’ve just rejected her cookie name publicly…I’m so sorry Erlyce) if we ever met. And like I said, the name has no impact on my admiration for the cookie bar itself. I love it.

I don’t know why I don’t like the name, I just cannot explain it. Maybe it’s because the chocolate chips and walnuts are nowhere referenced in the name. Maybe because my brain puts the “ita” with a fruity frozen drink, or a pretty girl’s name…but not an oatmeal caramel chocolate chip nut bar.

I’m sure Erlyce worked hard to come up with a name for her cookie bars.
Or maybe she didn’t. Maybe she knew instantly…
Maybe her daughter’s name is Caramelita. Or maybe her grandmother’s.

Or maybe the word caramelita sounded exotic to her.
I respect that.
I respect all of that.

Trust me. Coming from a girl with a funny name myself, I know that I don’t have much room to talk.
IMG_2219
I don’t know….I guess that Erlyce picked that name because she loved it….and since they’ve been caramelitas for 47 years, I can’t see any other name for them. I suppose it does fit. It’s just hard to roll off my tongue.

I guess that it doesn’t really matter what they’re called…they are a delicious cookie bar…and…I’ll still continue to make them, because I love them. And truly… the oatmeal and caramel are the stars of the show.

So, I’ll just grin and bear the name… Oatmeal Caramelita… and say it a few times, hoping that my brain and tongue will finally agree….while I enjoy every last bite of them.
IMG_2216
And today I’m sharing this recipe at Angie’s Fiesta Friday #26, where I happen to be co-hosting with Jess from Cooking is My Sport! I am so thrilled to be co-hosting with Jess. This beautiful girl is truly inspirational with all of her amazing recipes..and the stories that she shares with her recipes are always fun, but passionate at the same time. Her words show the love that she has for cooking.

A special thank you to Angie for hosting Fiesta Friday! Now here is a girl who is truly an artist when it comes to the culinary scene. Angie’s blog, The Novice Gardener, is just beautiful. Not only are her recipes delicious, but they’re show stoppers… Awe inspiring.

I hope that you’ll stop by and see all of the delicious recipes that everyone has brought to the table this week!
….AND….If you are a blogger and haven’t had the chance to link up, now is the time! If you are new to this party, or even new to blogging…we welcome you to join us! It is a wonderful way to meet other blogger friends, and gain exposure and views! Please feel free to contact me, Jess, or Angie if you have any questions! We are here to help, and look forward to meeting you!!

Please be sure to link your posts to Angie’s blog, as well as my blog so that we know that you have arrived! It’s as simple as clicking on the “Click to Join” button right here…
fiesta-friday-badge-button-click-to-join1

Life is good…it’s a “You can’t judge a book by it’s cover name. What’s inside…truly…is what matters…” kind of good.

IMG_2231

Oatmeal Caramelitas
Makes a 9×13” pan

2 cups all purpose flour
2 cups quick-cooking rolled oats
1 1/2 cups firmly packed brown sugar
1 teaspoon baking soda
1/2 teaspoon salt
1 – 1/4 cups butter, melted
14 ounces caramel candies, unwrapped
½ cup evaporated milk
1 cup semisweet chocolate chips
1 cup chopped walnuts

Preheat oven to 350 degrees F. Grease a 9×13-inch baking dish; set aside.

In a medium bowl, mix together the flour, brown sugar, oats, baking soda, and salt. Pour in the melted butter, and stir until you have a crumbly mixture.

Press half of the crust mixture into the baking dish into an even layer. Bake for 10 minutes, then remove from oven. Sprinkle the chocolate chips and walnuts over the baked crust.

While the dough is baking, combine the evaporated milk and caramels in a small saucepan over medium-low heat. Stir the mixture constantly until all the caramels are melted into a thick sauce. Let sit at room temperature until the crust comes out of the oven. It doesn’t have to cool completely!
Pour the caramel sauce over the chocolate chips and nuts. I usually pour it in rows, so that it covers the whole top. Don’t drive yourself crazy trying to spread it with a spatula…the caramel will melt and it will end up spreading!

Sprinkle the remaining dough over the caramel, so that it covers the whole top.

Bake until the top is golden brown, about another 15 minutes or so. Remove from oven, and let cool completely.

Cut into squares. These can be kept at room temperature if you like them softer…or in the refrigerator if you like them a little on the harder side. Personally, I like them at room temperature!

Enjoy!
IMG_2216

Writing Process Blog Tour, Part II: Suzanne’s Whipped Chocolate Caramel Ganache

IMG_2549
I’m finally home from vacation! It was a nice relaxing time, but I was pretty homesick the last couple of days, so it’s nice to be back, and into my regular routine. I’ll get caught up with all of your lovely comments in the upcoming week!

This is the very last post for my Writing Process Blog Tour, Part II…. I had the wonderful opportunity to participate in the tour a little over a month ago, and had the honor of introducing you to some outstanding bloggers, including Suzanne, from A Pug in the Kitchen.

IMG_2537

I went ahead and opened my big mouth during the first day of the tour…and said “Oh yeah, I’ll give Suzanne’s Whipped Chocolate Caramel Ganache a try!” It’s not enough that her recipe is a winner in a Food52 contest…Nope… I said that I was going to make it, and then post it for all the world to see.

Yep. Me.
The non-baker.
The un-bakeable-ist.

IMG_2616

So…when I put all of the ingredients in front of me, I’m not kidding when I say that I think I broke out in a little sweat. Panic set in. I stood there looking at everything… reading the recipe over and over again, and then looking at everything again.

I really wanted to make Suzanne proud.
Because, well…it’s Suzanne, you know?
She is one of the most highly respected bloggers in our blogging community.
We love her.

IMG_2545

Honestly, there was nothing to worry about…she made the instructions so clear, that this absolutely beautiful and delightful ganache is a breeze to make!

And seriously…this stuff is good. I mean really, really good… and when you make this ganache, be prepared for burned fingers and tongues. Because that’s exactly what’s going to happen the second you add the butter to the amber colored liquid sugar. You’re going to start dipping your finger in, knowing full well that burns and discomfort will happen… but you’re not going to care. That delicious caramel with the chocolate is completely and utterly burn worthy.

I mean…look at it…how could you not take that chance??

IMG_2512

IMG_2513

And while it was whipping in my mixer, I was so impressed at how quickly it all came together, to produce such a perfectly fluffy and delicious ganache. This is definitely a recipe that quickly became one of my favorites, one that will be my go-to whenever I need a chocolate frosting.

IMG_2614

I’m so pleased to share this with you today, and I hope that you’ll stop by Suzanne’s blog to visit her, and to see what she has cooking up her sleeve. I can guarantee that it will be amazing!

Life is good…it’s a “Finding a new favorite chocolate frosting, and totally knowing that you can rock that frosting out of the house!” kind of good…

IMG_2592

Whipped Chocolate Caramel Ganache
Copied from Suzanne’s blog: A Pug in the Kitchen

Makes enough frosting to fill and frost a 9-inch cake

Chocolate Caramel Sauce:
1 cup sugar
6 tablespoons salted butter cut into tablepoon-size pieces
1/2 cup heavy cream
2 ounces dark chocolate (I used bittersweet)
1 teaspoon vanilla extract
Put the heavy cream in a glass measuring cup and microwave on high for 45 seconds, add chocolate and microwave another 30 seconds Stir until its smooth, add the vanilla extract and stir to combine, set aside so that it will cool before adding to the caramel.

In large saucepan add the sugar, turn heat to med/high and let sit until it starts to liquefy. Start stirring with a heat proof spatula. The sugar will crystalize but that’s alright — keep stirring until its all liquid. Stop stirring and let it cook until it turns amber in color, then add the butter and stir to combine.
Remove from heat and add the chocolate cream. Stir until its incorporated. Store in a container at room temperature until ready to use. Note: If you make this ahead of time, simply place the bottle or jar in hot water to warm the caramel so it’s pourable.

Ganache :
4 ounces dark chocolate broken into small pieces
4 ounces milk chocolate broken into small pieces
1 cup plus 2 tablespoons heavy cream
1 tablespoon liquor (I like cointreau or kahlua) or vanilla extract
1/2 cup chocolate caramel sauce

Heat cream to scalding (not boiling). Pour over the pieces of chocolate that are in a mixing bowl. Let sit 5 minutes then stir until there are no pieces of chocolate and it’s smooth and shiny, then add the chocolate caramel sauce and stir to combine.
Place bowl in an ice bath and stir or whisk until it’s cool but not cold — it will stiffen fairly quickly if it gets too cold. Remove from the ice bath and beat with a mixer or whisk until the ganache is fluffy and spreadable. Frost the cake immediately. Best served at room temperature.
IMG_2545


Enjoy!

Strawberry Cheesecake Shortcake

IMG_1586
My best friend Cindy’s son will be taking his driver’s test in the next couple of weeks. There are three things that I think about when I hear about someone taking their driver’s test….lawnmowers, my father laughing, and strawberry shortcake.

Cindy has heard this story a gazillion times, so Cynthia, I know you’re reading this, so you can skip these next few paragraphs while I tell everyone else my story….

I’m not a fan of driving, and there is no doubt that I’m a defensive rather than an aggressive driver. There is a very big reason for that…

I was a late bloomer when it came to getting my driver’s license. I took my test when I was 18 years old. When my friends were all going for their driver’s tests, there were rumors going around school of a very, VERY grumpy and balding examiner, who was failing kids left and right… they called him “Grumpy Bald Guy”. I was nervous enough, I didn’t need to think about grumpy bald guy (GBG for short).

My father drove me to my test that day, and as we sat there waiting, I prayed and prayed that I wouldn’t get GBG.

Yeah, my prayers didn’t go through that day.
GBG came walking up to my car.
My lime green Gremlin with a white stripe.

Mmhmm… That’s right.
Lime Green.
Gremlin.

GBG didn’t smile. Didn’t really do anything really, except get in the car, and wrote on the papers that were on his clipboard. I did everything I was supposed to do, checked everything I was supposed to check… my window was down so that I could do my hand signals…and his window was down too. We were set to go.

…And then he told me to make my first right hand turn at the stop sign. Ok, I made it through the right hand turn perfectly. Deep breath. So far so good.

It’s important for you to know that there was a man mowing his lawn to the right of us… GBG started to tell me to do my three point turn, when all of a sudden there was a loud bang on my car… GBG makes a loud grunting sound, and falls forward.

Somebody shot my car, and then shot GBG! There’s blood! The man was bleeding!! What does an 18 year old girl do, when she thinks that her car and GBG have been shot?? Well, she slams on the brakes in the middle of the street, and starts to cry…that’s what she does!

I can’t even tell you if I put the car in park, sobbing, I asked GBG if he was alright… maybe a little loudly, and very, very shakily.

GBG sits up, and grabs a handkerchief out of his pocket, and puts it to the side of his head. He had me pull to the side of the street until he could get his wits about him. And there we sat, him holding a handkerchief to his head, and me crying, watching the man mow his lawn.

He looked around the car, and picked up a pretty good size stone from the floor. The only thing that he could figure is that the man that was mowing the lawn to the right of us, hit a stone. The stone must have flown from the lawnmower blade, and somehow hit my car, but then somehow made it perfectly inside the window… and hit GBG in the head!

Seriously.
What are the odds?

I asked him if he wanted to go back to where we started the test, and he said “No, let’s continue the test”. He quickly rolled up his window, and the test continued.…

From that point on… my three point turn turned into a five point turn. My parallel parking was about three feet from the curb. I don’t remember using any hand signals at all…

We made it back to where we started, and the test was over. We got out of the car, and he walked over to my father, and stood there talking to him for a few minutes, and I sat in the passenger side of my car, waiting for my father to come take me home.

Pa laughed all the way home.
I cried all the way home.

I swear he had tears rolling down his eyes as he was telling my mom about it, he was laughing so hard. I know that he wasn’t laughing at me, but just laughing at the whole situation. In hindsight, it’s hilarious! But at that point in time, my life was crashing all around me..

IMG_1627

I stood there crying, watching her cut up strawberries while he told her about it. Mom was making strawberry shortcake for dinner. She would do that once in a while. It was a special treat when we had strawberry shortcake for dinner…and I think that she was making it to celebrate my drivers test!

Now, back then, they didn’t tell you that you passed your test on that same day. We either had to wait for the license to come in the mail, or we could call within a couple of days and they would tell us whether we passed or failed. There was no doubt that I failed that day.

I didn’t want to know. But after a few days, my father said that I should call. “No way” I said. So he called for me. After he hung up, he turned to look at me… “You passed.” he told me. And he gave me a great big hug.

And then we laughed…

GBG passed me.
He passed me.

To this day, I’m shocked that the man passed me. I did everything wrong during my test. I slammed on the brakes in the middle of the street when the rock hit my car. I sat there sobbing like a lunatic. Everything I did after that was completely wrong.

But the grumpy bald guy passed me.
To this day, I still have the rock that hit him in the head.

I’ve kept it in my jewelry box for all these years.  It serves as a reminder that some of the things we think are so “life crashing” at the time, are just memories and sometimes funny stories that we can tell later on…

So while I was cutting the strawberries for this, I was thinking of my mom, standing there cutting up strawberries while my father was laughing and telling her the story…. and I was thinking of Zach, Cindy’s son, knowing that on the day of his test, I’ll cross my fingers, and silently hope that there isn’t a man mowing his lawn to the right of him…just like I did for my kids…and probably will do for everyone that I hear has a drivers test coming up…I know that he will do just fine during his test, and I have no doubt that he will pass with flying colors.. I love that boy.

I made this strawberry shortcake a little differently this time around… I really wanted strawberry shortcake with the warm biscuits, and fresh strawberries….but I was really in the mood for cheesecake with fresh strawberries too…so why not have both? There really was no reason not to! And to be honest, even if there was a reason not to, I probably wouldn’t have listened..

IMG_1631

Strawberry Cheesecake Shortcake. I simply made the whipped cream into a cheesecake whipped cream. It’s delicious. The best of both worlds! It’s a wonderful dessert… or a wonderful treat for dinner!

I truly hope you do have strawberry shortcake for dinner sometime…

I’m bringing my strawberry cheesecake shortcake to Angie’s Fiesta Friday at The Novice Gardener to share with everyone. Angie is a beautiful host, and always puts on a wonderful party! This week, she has asked Margy from La Petite Casserole, and Sylvia from Superfoodista to co-host… two absolutely beautiful souls. I know that this party will be so elegant, so sophisticated with these two wonderful girls in control. I just cannot wait to get there… Thanks to Angie, Margy, and Sylvia.. it’s going to be a wonderful time..

Life is good, it’s a “He passed me. The man passed me.” kind of good…

IMG_1586

Strawberry Cheesecake Shortcake
Serves Four

Just a quick note: The biscuits that I made were “Ruth’s Diner Mile High Biscuits” that I found on Pinterest, and that’s the recipe that I’m sharing with you today. It made exactly 7 biscuits for me. I toasted the remaining three biscuits for a couple of days, and ate them with fresh strawberry jam.

2 quarts fresh strawberries, sliced
1/2 cup sugar (I don’t like them too sweet, so use as much sugar to suit your sweet tooth)
Cheesecake whipped cream (Recipe to follow)
Ruth’s Diner Mile High Biscuits (Recipe to follow)
Whole strawberries for garnish

In a large bowl, mix the strawberries and sugar. Place in the refrigerator until ready to use.

Ruth’s Diner Mile High Biscuits:
Adapted from Deals to Meals
3 cups flour
1-1/2 tsp salt
1 tbsp sugar
1-1/2 tsp baking powder
1 stick butter
3/4 cup buttermilk
1 egg
1/4 cup water (Prudy’s note: I had to use 1/2 cup water. 1/4 cup just wasn’t enough)

Preheat oven to 425 degrees. Combine flour, salt, sugar, baking powder and butter until crumbly. Mix in buttermilk, egg and just enough water to make a workable dough. Mix the dough until it is just barely combined (don’t over mix). Roll the dough onto a floured cutting board about 1 inch thick. Cut with a 2 inch biscuit cutter, or a 2 inch round cup. Place on a greased baking sheet (touching each other) and bake 12-15 minutes or until golden brown. Makes about 12-15 biscuits, depending how thick you make them.

Tips to making awesome biscuits:
*ONLY hand mix your dough. Don’t mix in a Bosch or with a hand mixer. The dough will be too tough and the dough will become dry if you use a mixer. You don’t want to over mix this recipe. The best way to mix this dough is with a pastry cutter or using two knives and cutting the dough back and forth. This method takes a little longer but will ensure the perfect biscuit. You want pieces of butter left in your biscuit, that is what keeps the dough light and flaky.
*Next tip is to keep your biscuit dough fairly thick. You want a tall and thick biscuit more than you do a thin and hard biscuit. Keeping the dough thick will ensure a chewy and soft biscuit. I keep my dough about 1 to 1 1/2 inches thick (cooking times may vary depending how thick you make them).

Cheesecake Whipped Cream:
1 8oz cream cheese
3/4 cup heavy cream
1/4 cup sour cream
1/2 cup powdered sugar
1 tsp vanilla
Pinch of salt

In a mixing bowl, mix the cream cheese, heavy cream, sour cream, powdered sugar, salt, and vanilla until light and fluffy. Refrigerate until ready to use.

Assemble the shortcake:
Slice a biscuit in half, place the bottom half in a bowl. Pipe the cheesecake whipped cream onto the bottom half of the biscuit. Generously top with strawberries. Place the top half of the biscuit on top of the strawberries. Pipe a dollop of cheesecake whipped cream on the top of the biscuit, and garnish with a whole strawberry.

Serve immediately. Enjoy!
IMG_1631

The Hills Have Pies

IMG_1518 2
Have you ever seen the movie(s) The Hills Have Eyes, by Wes Craven? If not, I highly recommend you don’t…unless you love to be on the edge of your seat and scared out of your mind. The 2006 movie was a remake of the 1977 classic of the same name. Wes Craven really knows how to tell a scary story…one that stays with you…pretty much forever. Scared and scarred for life.

The story is basically about a family who is on a cross country, and is purposely detoured, and drive unknowingly into an abandoned U.S. nuclear testing site. There, they are terrorized and almost all of them killed by mutant “hill people”.

field
It’s a movie that always comes to mind when we are at the cabin….because, of course… our cabin sits on a 57 acre hillside. And what makes it even creepier…is that there is this man who has suddenly appeared in the last few months while we are on a hike, or a four wheeler ride. Although the land is posted, there are still some of the local neighbors who use the trails for their four wheelers, or for going on walks.

But this man… he’s just plain scary. He’s rather elusive, which makes him even more creepy….and when we come face to face in the woods, he just disappears into the trees. One minute he’s there… the next minute…poof. He’s gone.
woods

We did find out from the local neighbors that he’s harmless. But that doesn’t make him any less scary, especially when he’s there… and…you know he’s there because you saw him…but then all of a sudden he’s not there anymore. And then you have to walk by the spot in which he disappeared because that’s the way back to the cabin….

And it always makes me think of the end of the movie, when the remaining family members think that they’ve killed off all of the mutants…and unbeknownst to them, there is a mutant hill person silently watching them through the trees…is he watching me through the trees as I pass by? It’s quite unnerving.

path

I really need to stop watching scary movies.
And I need to start making more pies.

IMG_1357

So anyway… up in the woods along the trails are wild strawberries. They’re everywhere…And if I’m lucky enough, I can grab a few before the mutant hill man, or a chipmunk finds them first. What better way to calm my jittery nerves, than a rustic strawberry pie, and a scoop of fresh ice cream on top…

IMG_1527

The hills have pies.
And that’s not scary at all.
It’s delicious.

It’s delicious especially with my quick (cheater’s) fresh vanilla ice cream, which is basically frozen whipped cream, and a cute little pastry heart garnish (Because every pie should have a heart). This is enough bring a smile to even the crankiest of mutant hill men!

IMG_1517

….And…. I’m bringing my rustic strawberry pie to Angie’s Fiesta Friday today… and have the honor once again to co-host! Today, I am thrilled to be co-hosting with Elaine from Foodbod! This is going to be one lovely party, because not only is this lady one highly talented chef, her sweet personality is like a magnet.  It’s truly love at first sight as soon as you meet Elaine, you just can’t help it…she is so darn adorable!

A special thank you to Angie from The Novice Gardener for hosting Fiesta Friday. I know I say this all the time…but how time flies when we’re having fun…. Can you believe that we are at week number 22 already?? Our beautiful Angie certainly knows how to put on a fabulously fun party, and it’s growing by leaps and bounds every single week! But how can it not? Angie is true blue…with a kind heart, and a hilarious outlook on pretty much everything! And not surprising, her funny and entertaining manner keeps people coming back each week! And don’t get me started on her absolutely gorgeous photography and mouth-watering recipes. Seriously. You’ll become instantly smitten. I promise.

I hope that you’ll stop by and see all of the delicious recipes that everyone has brought to the table this week…you’ll be amazed. We have some truly talented people there!

….AND….If you are a blogger and haven’t had the chance to link up, now is the time! If you are new to this party, or even new to blogging…we welcome you to join us! It is a wonderful way to meet other blogger friends, and gain exposure and views! Please feel free to contact me, Elaine or Angie, if you have any questions! We are here to help, and look forward to meeting you!!

Please be sure to link your posts to Angie’s blog, as well as my blog so that we know that you have arrived! It’s as simple as clicking on the “Click to Join” button right here…

fiesta-friday-badge-button-click-to-join1

I truly hope to see you there!

Life is good, it’s a “I wonder if mutant hill man likes strawberry pies, because maybe I’ll make him one someday” kind of good…

IMG_1513

Rustic Strawberry Pie with Fresh Vanilla Ice Cream

Just a quick note…if you’re planning on making the ice cream for this recipe, although it’s simple, then you’ll need to plan ahead. You’ll need to freeze your ice cream maker bowl for at least 8 hours, to overnight!

1 quart fresh strawberries (Because let’s face it. Wild strawberries aren’t readily available to everyone.)
1/3 cup Sugar
2 tsp cornstarch
2 tsp fresh lemon juice
dash salt
Aunt Linda’s Pie Crust (Recipe Below)
Fresh Vanilla Ice Cream (Recipe Below)

Aunt Linda’s Pie Crust:
If you haven’t tried this pie crust….you honestly need to. It will be your “go-to” pie crust forever.
2 cups flour
1 cup shortening
½ tsp salt
½ cup milk
1 tbsp vinegar

In a small bowl, mix the milk and vinegar together. Set aside. In a large mixing bowl, blend the flour, shortening, and salt together until mixture is in pea size crumbles. Pour the milk and vinegar mixture into the flour mixture and stir. The dough will be sticky.
Roll out on a generously floured surface, a little on the thicker side. Maybe about a ¼” thick-14” square. Spoon the strawberry mixture into the middle of the crust, leaving about a 2-1/2” edge. Cut around the square so that the edges are perfectly straight. Save the scraps. Fold the edges up over the strawberries, overlapping the corners, so that it folds into a perfect square. Bake at 350° for about 1 hour, or until golden brown. Remove from oven and let cool completely.

Roll the scraps again to about ¼”, and using a heart shaped cookie cutter…cut a heart out of the pastry dough, and place it in the middle of the pie (Because all pies should have a heart).
With a smaller heart shaped cookie cutter, cut out as many pastry hearts as you can. Sprinkle all of the hearts with course sugar, and bake for about 10-15 minutes, or until golden brown. Watch them, so that they don’t burn! These hearts will be used to garnish the pie and ice cream later.

Quick Vanilla Ice Cream:
Just a quick note:  This is basically frozen whipped cream.  You want the heavy cream to be cold when you start this. Make sure that you keep it refrigerated until you’re ready to make the ice cream!  I only add 1/4 cup of sugar, because I just don’t care for it when it’s so sweet, especially when it’s going to top a very sweet pie. If you like it a little sweeter, then by all means, add more sugar.  It won’t change the texture of the ice cream at all.
2 cups heavy cream (Just out of refrigerator, you want it to be cold!)
1/4 cup sugar
1 tbsp vanilla

Combine the heavy cream, granulated sugar, and vanilla. Since the heavy cream is right out of the fridge, then you can go ahead and pour it into your ice cream maker’s bowl. Churn according to the manufacturer’s directions. It takes a good half hour or so.

As soon as it’s frozen to your desired consistency, serve it with a square of fresh strawberry pie, and garnish with a pastry heart.

Enjoy!

IMG_1508

Raspberry Rose Sorbet: My Guest Post for Frugal Foodie Mama!

IMG_0774

I had the honor of writing a guest post for my friend Carrie at Frugal Foodie Mama today! I was so thrilled when she asked; it took me a matter of a millisecond to say “Yes!”   And it was another millisecond before I knew exactly what I wanted to make!!

I think it’s safe to say that we are officially in the heat of the summer….and what better way to cool down, than with raspberry rose sorbet?

IMG_0772

Seriously…this sorbet made with fresh raspberries and a hint of rose is so, so delicious….and it’s just one of those things that makes you feel happy to serve to your very surprised guests when they see the floral ice bowls that you made! Just sit back and listen to the “Ooh’s and Aah’s” while they proclaim you to be the master of desserts for the day!

But only you know the truth…and that’s just how easy this pretty dessert was to make!

It’s posted today, so if you’d like to see more photos and get my recipe, please visit Carrie at Frugal Foodie Mama! While you’re there… browse through Carrie’s beautiful blog…I know that you will love her, and her many wonderful ideas and recipes…

….such as Carrie’s:

Roasted Balsamic Strawberry & Ricotta Ice Cream

ice cream

… or her

Frozen Strawberry Key Lime Margaritas 

margarita


Seriously…Crazy delicious!

A special thank you to Carrie for giving me this wonderful opportunity. It has been a pleasure. Truly a pleasure.

Life is good… it’s a “raspberry rose and flowers in ice” kind of good…

100th Post Celebration with Chocolate Swirl Ice Cream Sodas!!

IMG_0907Well…here we are.

100 posts.

I know that so many people have hit this milestone a long time ago…and have gone above and beyond already….but I still feel the need to celebrate my 100th post…with you…because it’s you who have helped me get to this point in my blog…

When I started this blog, I wondered what it would be like when I reached 100 posts. I wondered how long it would take to hit 100, I wondered if I’d even make it this far, and most importantly, I wondered how many people I would meet along the way…

And, boy oh boy… did I meet people! So many wonderful people…so many new friends!

IMG_0920

I’ve learned one very important thing along the way… that this blog really isn’t about me. It’s about you. I reached out, and you took my hand and walked down this path with me. With your kind encouragement, and sometimes friendly critique, you’ve helped me to learn and grow. So now, when I prepare a recipe, or write a post, it’s always with you in mind..

So this celebration is for you…
To you, wonderful readers…I am forever thankful.
It is because of you, I’m here.

And it’s because of you, that I plan on 100 more posts, and 100 more posts after that, and even 100 more posts after that… I still have so much to learn…and so much more growing to do… and I look forward to doing just that…. with you.

IMG_0922

So, you’re probably thinking…”Why on earth would you celebrate with ice cream sodas, when you could have made cake, or cupcakes, or something like that??”

Well…first of all…..you know full well that I can’t bake to save my life…. and second…there are actually a couple of things going on today…not only is today my 100th post, but it’s also National Ice Cream Soda Day, and it’s Fiesta Friday!

So what better way to celebrate, than with Ice Cream Sodas, on National Ice Cream Soda Day?! And what better party than Angie’s Fiesta Friday to celebrate this milestone?

There is no better way!

IMG_0895

The ice cream soda, (float, snowball, or spider) was invented in 1874 by Robert McCay Green, who owned a small soda fountain in Philadelphia. There are a couple of different stories behind his creation. The first is that his big selling cream sodas were selling quickly on a warm summer’s day, and he ran out of cream. In order to meet the demand of his customers, he used ice cream in place of the cream, and it became a big hit!

The second story that I found was that Mr. Green’s soda fountain couldn’t compete with the larger soda fountains down the road, so he came up with this new concoction to pull some of the competition’s customers to his shop. He succeeded, but for a short timeframe, because his competitors started serving ice cream sodas soon after!

IMG_0913

Fast forward about 30+ years, to when there was a ban placed on ice cream sodas because prohibitionists were working really hard to sober the country up, so they started with Sundays and Holy Days. It was believed that soda contained medicinal ingredients, containing what we now consider controlled or illegal substances such as cocaine, cannibus, and opium.. which they placed in the same category as booze. Because booze couldn’t be consumed on a Sunday.. well, then neither could ice cream sodas.  So what did they do?  They served the ice cream sodas without the soda, and that’s when the ice cream sundae was born!

People had no idea that they were actually getting high, they just thought that soda was a great medicinal tonic that was good for them, because it made them feel good!

Reality was, they were hooked on narcotics.

Druggies.
Junkies.
Victorian Smackheads.

IMG_0940

My ice cream sodas don’t contain any narcotics of any kind. Just fresh ingredients that I can’t promise make a healthy ice cream soda, but they do make a wholesome one.

They’re a special treat once in a while… a refreshing drink that you eat with a spoon! The next time you decide to treat yourself to an ice cream soda, think of me while you’re enjoying it…knowing that I thought of you when I wrote this post.

A special thank you to Angie, our beautiful host of Fiesta Friday….and to Julianna from Foodie  on Board, and Elaine from Foodbod for co-hosting this great event!  I hope that you stop by, and if you are a blogger…then please…link up with us!  We welcome you to our party!!  It’s always a great time…and I’m always blown away by the wonderful things that everyone brings to the table!  Click here to go to the party!

Thank you for 100 posts of pure bliss… I look forward to the next 100…

Life is good, it’s a “Celebrating 100 posts with my wonderful readers” kind of good…

IMG_0941

Chocolate Swirl Ice Cream Sodas
Serves Four

Just a quick note: If you are planning on making homemade ice cream, then plan for it! Make the ice cream early in the morning so that you have enough time to cool the custard and churn the ice cream!

Vanilla Ice Cream (Recipe below)
Hot Fudge Sauce (Recipe below)
1 liter Club Soda
Whipped Cream
Sprinkles (Not optional. Necessary. This is a fun drink, for goodness sake!)
Maraschino Cherries (Again. Not optional. Necessary. Let your hair down, man!)

Brown Eyed Baker’s Vanilla Ice Cream:

Another quick note: The best homemade vanilla ice cream recipe, hands down, is the one that I found on Brown Eyed Baker’s blog. It’s foolproof, and it’s delicious! This is Michelle’s recipe, copied from her blog…and…this recipe makes the perfect amount for four ice cream sodas.

1 cup whole milk
¾ cup granulated sugar
2 cups heavy cream, divided
Pinch of salt
1 vanilla bean, split in half lengthwise
6 egg yolks
¾ teaspoon vanilla extract

1. Warm the milk, sugar, 1 cup of the heavy cream and the salt in a medium saucepan over low heat, stirring until the sugar is dissolved. Scrape the seeds from the vanilla bean into the milk mixture and add the bean to the mixture as well. Cover, remove from the heat and let steep at room temperature for 30 minutes.

2. Pour the remaining 1 cup heavy cream into a large bowl and place a fine-mesh sieve on top. Whisk the egg yolks in a medium bowl. Slowly pour the warmed milk mixture into the egg yolks, whisking constantly. Scrape the mixture back into the saucepan.

3. Place the saucepan over medium heat and stir constantly with a rubber spatula, being sure to scrape the bottom of the pan as you stir, until the mixture thickens and coats the back of the spatula, a few minutes. The mixture should register 170 to 175 degrees F on an instant-read digital thermometer.

4. Pour the custard through the fine-mesh sieve and stir it into the cream. Place the vanilla bean into the custard, stir in the vanilla extract, and place the bowl over an ice bath. Stir occasionally, until the mixture is cool. Cover and transfer the custard to the refrigerator until completely chilled, at least 8 hours or overnight.

5. When ready to churn the ice cream, remove the vanilla bean from the custard and freeze the mixture in your ice cream maker according to the manufacturer’s instructions. Transfer to a freezer-safe container and store in the freezer.

Hot Fudge Sauce:

This recipe is one that I have written on an index card in my recipe box.  I don’t know where it came from, or how long I’ve had it.  I just know that it’s well used, one of those tattered and stained recipe cards!  It’s so easy, and so delicious!

1 cup chocolate chips
1 can sweetened condensed milk
1 stick butter

Melt the butter in a small saucepan. Add the chocolate chips, and stir until melted. Add the sweetened condensed milk. Whisk until combined, and cook on low for a couple of minutes. Remove from heat, and store in a glass jar in the refrigerator for up to four weeks.

Assemble the Ice Cream Sodas:
Add about 1/4 cup of the hot fudge sauce into the bottom of four tall glasses.  Using a fork, start whisking the hot fudge in the glass, while pouring the club soda into the glass, until it’s about 2/3’s of the way filled.  Add two scoops of vanilla ice cream on top of the soda (yes, it will sink).  Top it off with another dollop of hot fudge sauce, and whipped cream (yes, the whipped cream will float on top!).

Garnish with more hot fudge sauce, sprinkles, and a cherry on top!

Enjoy!

IMG_0941

Layered Peach Rice Pudding

IMG_0599

A couple of months ago, I had Jessica run to my beloved Wegmans for me to pick up a few groceries. One of the items on my list was a bag of rice.

Ok.
It was my fault.
I didn’t specify.
Jessica came home with a 10 pound bag of rice.

Yes.
10 pounds.
Of rice.

Well, in her defense… I did say “bag” of rice.

What does one do with 10 pounds of rice?
Well…one cooks it.
And cooks it…
Aaaannd…cooks it.

I laughed, of course, and started cooking rice….and have been cooking it ever since. I’m almost down to the end of it; and I surprised myself at how quickly I actually did use it up!

Much to my son Michael’s dismay, I made rice quite often as a side for dinner. He’s not a fan. In fact, he hates it. (I know…there’s a surprise….)

IMG_0617

I also made quite a bit of rice pudding. Jessica loves it, and so do I. It’s definitely a wonderful dessert; or a little snack for the evening…. But I find myself taking a little container of it to work for lunch…or grabbing a few spoonfuls for dinner.

I think that a lot of people underestimate rice pudding. There isn’t much you can do to it to make it pretty. So it’s a dessert that many people might not serve to their guests simply for aesthetic reasons.

It’s boring.
I mean, let’s face it…if you’re not a fan, then rice pudding can be very boring.
I totally get that.
But I also get that those people are totally missing out on a very delicious dessert.

IMG_0583

So, I’m going to be that person. I’m going to be the one that serves rice pudding to her guests… and with confidence….because I know that they’re going to love it. I’m going to pretty it up a little, and serve it with fresh peach jam, and fresh peaches on top…all layered on top of a graham cracker crust.

Delicious.
A perfect summertime dessert that even the “non-rice pudding fans” will even love.

Except for Mike. He still hates it.

IMG_0605

I’m bringing my Peach Rice Pudding to Angie’s Fiesta Friday to share with all of you. I hope you love it as much as Jessica and I do!

We have reached a milestone at Fiesta Friday! It is our 20th week! And this week, we have two larger than life bloggers co-hosting the party! The lovely Suzanne from APugintheKitchen,  brought an ice cream cake to the party.  I mean seriously… she made an ice cream cake!!  And the lovely Fae from Fae’s Twist and Tango made Nazouk  which is an Armenian Pastry ! I know, right? Beautiful!!  I am so looking forward to this….I know that they’ll make this party memorable!  As for Angie… Everyone loves Angie!  She’s polished. She’s sophisticated.  She’s hilarious…and she’s the kindest host you’ll ever want to meet.  A special thank you to Angie, Suzanne, and Fae for hosting this milestone event!

If you have never visited Fiesta Friday, I hope that you do stop by to see what everyone has to offer…there’s always something delicious cooking from so many people from all around the world! If you are a blogger..or new to blogging, please feel free to link up with us! This is a great way to meet other bloggers, and gain more exposure! We are always happy to welcome new people into the mix!  Just click here  to get there!!

Life is good, it’s a “You can never have too much rice in the pantry” kind of good…

IMG_0587

Layered Peach Rice Pudding
Eight 5oz Servings with a Whole Lotta Rice Pudding Left Over

This is my mom’s recipe for rice pudding. It’s one of those recipes that comes from a telephone call, that really had no measurements …. “Mom, how do I make rice pudding?” … “Oh, throw some rice in the pan, throw some milk on top, throw a can of sweetened condensed milk in….” It took me a while to learn how to make a decent rice pudding… but I do have to say that it’s never as good as my mom’s. She makes it the best.

3 cups cooked long grain white rice
1 quart whole milk
1 – 14 oz can sweetened condensed milk
¼ tsp cinnamon
¼ tsp salt
1 egg
1 tsp vanilla

In a medium saucepan, mix the white rice, the milk, sweetened condensed milk, cinnamon, and salt. When it comes to a boil, reduce the heat to low, and simmer gently, stirring frequently so that it doesn’t brown on the bottom. A browned bottom means brown flecks all throughout your pudding. It’s still edible, just not pretty. Cook until it has thickened.

There really is no time frame for me to tell you exactly how long to cook this. It takes a good hour or so to thicken, maybe to a runny yogurt consistency. Remember that the rice will continue to absorb the liquid, so you don’t want it too thick, or it will dry out. I have found a quick remedy to dried rice pudding… just stir some heavy cream in until it becomes the thickness you desire!

While the rice mixture is simmering, crack the egg into a bowl, and whisk it with a fork. Once the rice mixture has thickened, remove it from the heat, and you’ll want to temper the egg before you add it to the saucepan. Add about a cup of the hot rice mixture to the bowl with the whisked egg, and stir it quickly so that the egg doesn’t cook from the hot mixture….and then add the egg mixture to the rest of the rice mixture in the saucepan. Stir it until it is well blended. Add the vanilla, and stir until blended.

Pour into a large bowl, cover with plastic wrap, and refrigerate. Serve when cooled.

Peach Jam:
2 cups fresh peaches, peeled and diced
1/3 cup granulated sugar
2/3 cup water
1-1/2 tsp lemon juice

Cook the peaches, sugar, water, and lemon juice in a small sauce pan over low heat until the peaches have broken down, and thickened. This doesn’t take long…about ½ hour. Remove from heat, and refrigerate until ready to use.

Fresh Peach Garnish:
1 peach, skin on, diced
1-2 tsp granulated sugar

Mix the peaches and sugar in a small bowl. Refrigerate until ready to use.

Graham Cracker Crust:
1 cup graham cracker crumbs
3 tbsp melted butter
1 tbsp sugar

Mix the graham cracker crumbs, melted butter, and sugar in a bowl until well blended. Set aside.

Assemble the Dessert:

Add 2 tablespoons of graham cracker crumbs to the bottom of each glass.
Layer 2 tablespoons of peach jam on top of the graham cracker crust.
Fill with rice pudding to the top of the glass.
Garnish with fresh peaches.

Refrigerate until ready to serve. Enjoy!!

IMG_0592